

Yesterday, I did a video review of the HyperMac external battery and some of you have been asking me what software did I use to produce it? So I thought I would give you a quick run down on my workflow for that particular video. So here goes:
The Animated Intro

The Animated Intro was done using Adobe After Effects CS4. While I’d like to take credit for all that creativity, I took the easy route and bought a template. The template was delivered as an After Effects CS4 project that I was able to modify (as I do actually know how to use After Effects) and craft to my liking. The template was already in HD format.
The Audio Track for the Intro

I used the built-in Scores capability in Adobe SoundBooth CS4 to generate the royalty-free audio for my opening. SoundBooth let me import the above movie clip so that I could make the audio the exact length that I needed. I saved this audio in the new Adobe .ASND format, which is non-destructive and allows me to go back and edit to my heart’s content. Also Adobe Premiere Pro CS4 can import this format natively.
The Slides

The slides were created using Apple’s Keynote ’09, which is a part of iWork ’09. I created a Keynote file that was 1280×720 resolution to match the 720p output of my final file.
Recording the Slide Presentation – Screen Recorder
After the Slides were done, I then needed to record the presentation from my screen while at the same time recording my webcam (iSight) and voice (using a Snowball mic). For this I used iShowU HD Pro. iShowU HD Pro is great because not only can it record what’s going on on your computer, but it can also record you various audio sources and live video source.
The Lighting and Backdrop
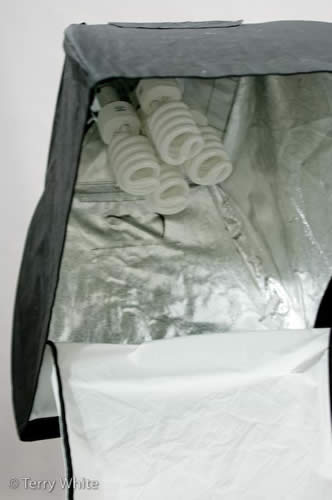
For the Lighting I used a Westcott Spiderlite TD5 with a Small Softbox. These daylight florescent lights don’t get hot, so I could have them on all day if I needed to without breaking a sweat.

The Backdrop is a Westcott Illuminator Background and Illuminator Background Stand.
Editing the Final Video
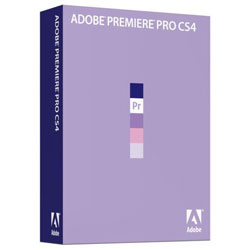
Now that I had the animated intro, intro music and screen recording video, I needed to put it all together. For this I used Adobe Premiere Pro CS4. With Adobe Premiere Pro I was able to edit the different video formats together and produce the final clip. Using the supplied Media Encoder CS4 I was able to export directly to a YouTube Widescreen HD (.mp4) format.
Premiere Pro CS4 for Mac | Premiere Pro CS4 for Windows
Premiere Pro CS4 Upgrade for Mac | Premiere Pro CS4 Upgrade for Windows
Adobe Creative Suite 4 Production Premium for Mac | Adobe Creative Suite 4 Production Premium for Windows
Adobe CS4 Production Premium for Mac Upgrade | Adobe CS4 Production Premium for Windows Upgrade
Hey Terry:
On my job we use Adobe Captivate to do instructional screen videos for our clients. Works well for me, of course I don’t have to put a video of myself in the corner. Wanted to know if you ever use Captivate for any of your instructional purposes, and if you’re going to have another free web class on your site. Have a great day!
Wow! That is ultra-cool. My copy of the Adobe Master Collection is supposed to arrive today and I can’t wait to try out some of this stuff to see how it works. Thanks for sharing your workflow.
Thanks for this explanation, Terry! I’m going to start with podcasting myself (probably using Boinx TV) but this how-to certainly will help. Always a pleasure reading your stuff!
Kind regards,
Rudy
Geez Terry,
I saw your headline alone “The making of my last video” and gasped “Oh no, No more Terry”. Glad that I read the whole blog post. You always provide informative, useful information!!
Thanks,
Stan
thanks for posting this! i was actually intrigued by your video yesterday after i saw it!
i like the way it was made!
Excellent info.
Thanks, Terry, for telling how and what hardware and software you used to produce your video.It was like taking a mini professional video production class. But t also takes away excuses for not doing excellent work.
Keep up the outstanding work.
You must do really processor intensive stuff. When I work (programming) on my non-unibody MBP, I never get below 3 hours of battery life. And that is usually with a a background linux instance running in vmware (providing a SNMP test server), high brightness, wifi on, bluetooth on etc.