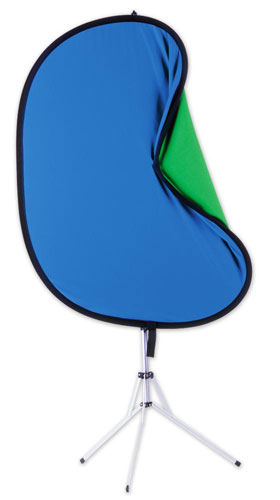
You might remember my video review of the F.J. Westcott uLight Green Screen Lighting Kit. Well this time I'm here to review another Westcott Green Screen solution. It's their Green/Blue Screen Popup Illuminator. The difference between this background and the uLite kit is that it's more portable. Like the other Illuminator backgrounds that I love so much, this one folds down (into a circle) and fits into a handy carrying case. Combine it with their popup Illuminator background stand you've got a Green Screen or Blue Screen background that sets up in about 2 minutes. This one also doesn't take as much room to setup and use.
It's Holiday Greeting Card Time
Many of you are putting your Christmas or other Holiday cards together as we speak. It's great when you can setup the perfect setting and take the picture. However, sometimes you just don't have the perfect setting, so you need to improvise. That's where shooting on Green Screen really comes in handy.
Here's a quick test shot that I took just to see what I would get with minimal effort. I basically setup the background in my basement right under one of the flourescent lights in the ceiling. I aimed a Westcott Spiderlite TD5 with a small softbox right at my subject. I could have used a bigger softbox and the brighter daylight bulbs, but again this was just a test and the light was already there from another project that I had just done.
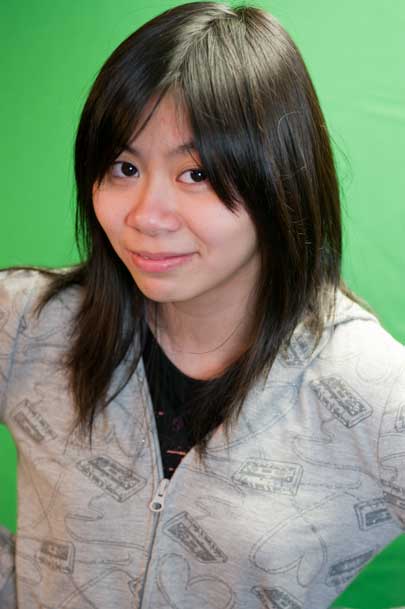
I was worried at first that the ceiling light was too bright, but in fact it did a great job killing the shadows on the background. I fired this shot using my Nikon D700, 28-70mm lens at f/4.5, in Aperture Priority mode at 400 ISO. Yes, in RAW of course.
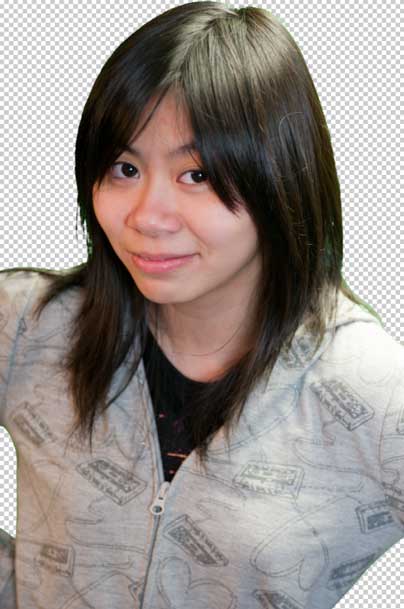
Next I brought the shot into Adobe Photoshop CS4 and ran an Action that I learned how to setup from Dave Cross to AUTOMATICALLY extract her from the background

Next I used a simple background from iStockphoto.com that I was easily able to put on a layer behind the extracted photo, just to see how it would look.
The Bottom Line
For a simple test just to see what I would get, again with minimal effort here, I was very pleased. I am also further convinced that If I know going in that I'm going to want to extract the subject from the background in Photoshop or put something behind a video in Premiere Pro or After Effects, green screen is the only way to go. Being able to get 99% of the way there (minor tweaking after) in Photoshop with the click of an Action is huge!
I want it!
You can get this 6'x7' Westcott popup Green on one side/Blue on the other side Illuminator background here (that INCLUDES THE STAND) from B&H Photo and Video. They also make a slightly smaller 5'x6' version here (that INCLUDES THE STAND). There is even a smaller 3'x4' version that would be would be good for headshots or product shots here. The stand is also available separately here.
If you're a NAPP Member and want to see Dave's fantastic technique on how to AUTOMATE extracting images from a Green Screen, you can watch this Exclusive Video here. (yes, you have to be a NAPP member. No I have no control over that. Yes, you should just join! Do so here.) You can also see the video, which comes on a DVD in the box of the uLite kit here.

The link to the 6’x7′ background on B&H does NOT include a stand.
Thanks Chris, the link has been updated to the 6’x7′ version that DOES include the stand.
where can i find that action that dave cross showed you?
http://www.photoshopuser.com/members/?page=view&id=green-screen-extraction