Recently a fellow photographer asked me about flying with her camera gear and what was allowed and what wasn’t? Since I fly for a living and I usually have at least one camera with me I’m pretty familiar with the rules and thought I’d share some tips here. First I have to give you a disclaimer in that TSA can decide to search any of your baggage at anytime and ask you to take out every single item one-by-one for inspection. I’ve had it happen! Now with that out of the way luckily this is not the norm. Let’s go over some quick tips on carry-on vs. checked luggage. I absolutely HATE checking my luggage and only do so if I have no choice. This means that I want to carry both a camera bag AND a computer bag on board and therefore I will check the 3rd piece of luggage containing my clothes. Under no circumstances am I ever ever ever going to check my camera or computer gear. It’s like waving good-bye to it as I feel like I’d never see it again. If I have to check my camera gear, then I’m not going! Most airlines allow you one piece of carry-on luggage such as a roller-board suitcase and a personal item such as a backpack, briefcase or purse. For me that means a backpack.
A Quick FAQ
Q. Do I have to take my cameras out of the bag when going through TSA security?
A. Typically NO, but TSA at any time can ask you to take ANYTHING and EVERYTHING out of your bag. With that said I can’t remember the last time they asked to take my cameras out. It’s been years. This of course goes out the window outside the US. Foreign airport security is a lot less forgiving. Give yourself time as you will likely need to take out each piece of gear and put it in a bin.
Q. Should I just check my camera gear under the plane to save the time and hassle.
A. NO! You may never see it again if you do and the airline will NOT replace it.
Q. What about tripods/monopods?
A. I have been known to travel with a tripod from time to time and I put it in my larger roller-board suitcase with my clothes. This however, is a grey area. Some TSA checkpoints will let it go and others will require that you check it as a tripod could be used as a club/weapon. So be prepared with extra time if you’re traveling with a tripod and have it in a bag that you don’t mind checking (not with the rest of your camera gear).
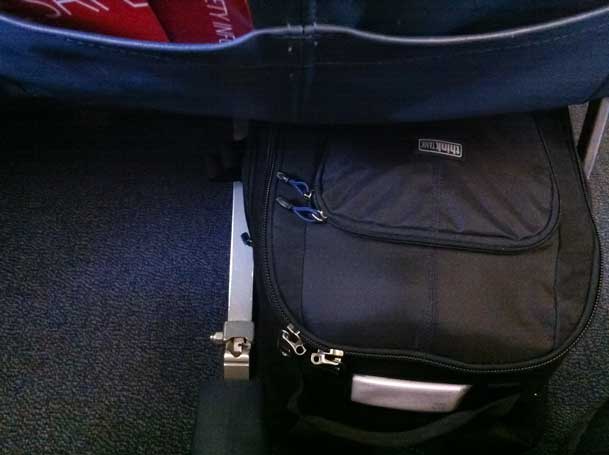
The backpack pictured above is my BIG ThinkTank “Street Walker Hard Drive” Backpack. This is the one I carry when I’m going on a trip specifically to shoot and I’m going to carry a LOT of camera gear. This one backpack also holds my MacBook Pro 15″ Retina notebook and iPad Air. It weighs a freaking ton once I have I have it loaded, but it still fits under the seat in front of me on a plane and therefore allows me to carry a rollerboard on with my clothes (and tripod) in it.
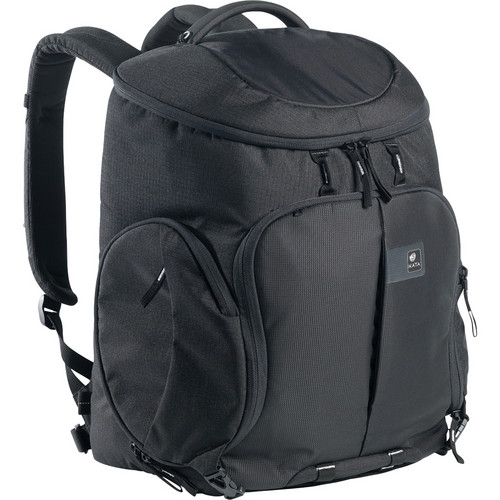
On trips where I’m carrying less photographic gear but still more than two lenses then I carry my smaller “Kata” backpack:
This one will still hold one camera body and 2-3 lenses plus my MacBook Pro. Also since it’s smaller you’ll be less likely to load a ton of gear in it and therefore it will be lighter to carry and manage.
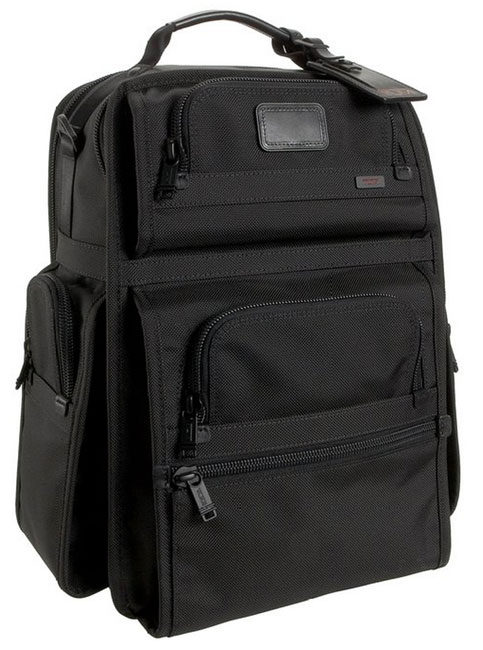
Although both backpacks above are great for those photo specific trips I go on, neither of them are my “regular” backpacks. Since most of my trips are not photo specific I’m usually carrying only one camera body (my Nikon D600) and one lens (my Nikon 28-300mm) or my even smaller Sony Alpha NEX-3N. My daily/weekly travel backpack is actually my Tumi Alpha T-Pass Laptop Backpack.
I really like this backpack A LOT! The T-Pass stands for “TSA Friendly” in that the back containing your laptop can unzip so that you can lay the bag flat (open) without having to remove your laptop saving you time. Tumi bags are expensive, but they come with a 5 year warranty and are very very very well constructed. I use this bag daily and it shows no signs of wear after one year so far. There is plenty of room in it for my laptop, iPad, camera stuff and just a ton of other little items that I carry. It weighs a ton once I load it up, but it handles the load very well.
The Bottom Line
For the most part you should be fine traveling by plane with your camera gear and carrying it on as long as your carry-on bag meets the size restrictions for the overhead bin or under the seat. TSA sees cameras everyday and while they still require you to take your laptop out and put it in a separate bin (unless you are TSA Pre-Check or you have a bag like my Tumi above), they tend to not ask you to take your camera gear out. The only other thing they can be uptight about is carrying a lot of batteries. So keep your extra batteries to a minimum and spread them across multiple carry-on bags as best you can.
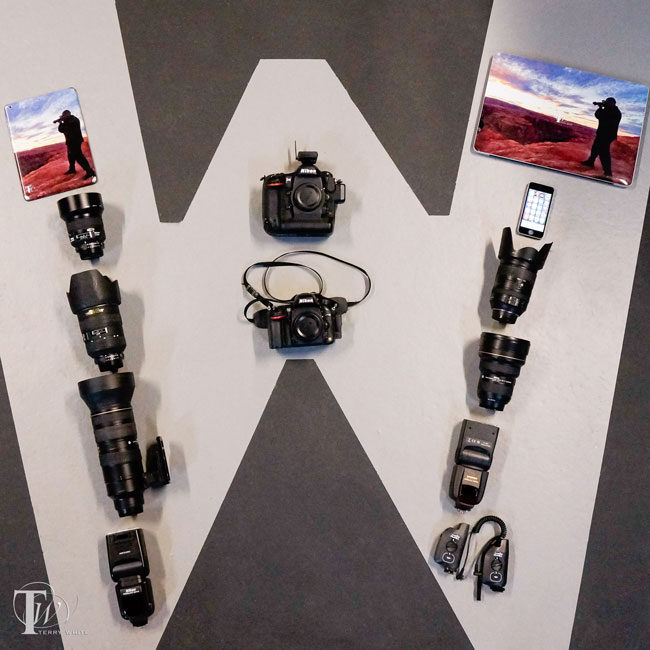
I remember when I first started out in photography and wanted to get serious about it, I had lots of questions about what to buy? No one wants to make a large investment in the “wrong gear”. I often get questions from New Photographers or Photographers looking to set up their 1st studio, asking what equipment should they get? That’s a hard question to answer without knowing what you plan on shooting the most, your space, and your budget. My primary focus is Portrait – (Beauty, Fashion & Glamour). Rather than trying to address every single situation individually, I thought it would be easier to share with you the equipment I use, and then you can take it from there. I had a 4,800 sq foot studio space and yes I LOVED IT! If you see something you think you’d like to have in your studio then you can just go ahead and get it.
Your DSLR/Mirrorless most likely came with a camera strap and in big bold print, it advertises the brand and model of your camera. It’s like saying to the world, “Hey, I’ve got an expensive camera right here. Come steal it!” I prefer something a little less flashy and more versatile.
Black Rapid R-Strap – I like this one for photo walks and when I’m using longer lenses, or heavier bodies.
Up Strap – I like this one for travel and photo walks as it will NOT slip off your shoulder.
I used to use Elinchrom strobes for the first 10+ years of my photography journey. However, in February 2021 I made the switch to Westcott’s new lighting system.
3 Westcott FJ400 Strobes – these are awesome because I can use them in the studio AND on-location because of the built-in battery packs.
Arkon Clamp Stand for DSLR Camera, Tablet, or Phone this arm is simply amazing because it’s strong enough to hold my DSLRs/Mirrorless cameras so that I can get those shots straight down on top of my subject.
Kata R-103 – My smaller backpack when I don’t need to travel with as much gear.
I have a variety of smaller bags, but the 3 above are the ones I use the most.
Studio Music System
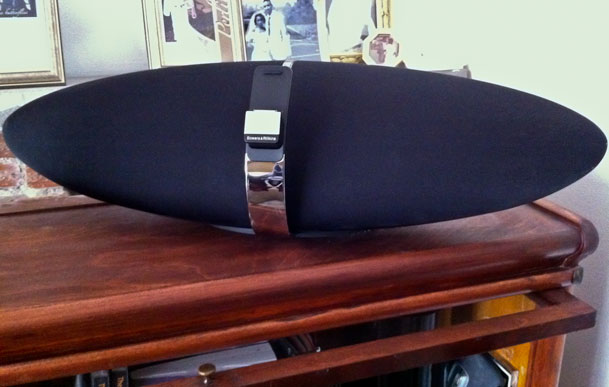
Music is a very important part of my shoots, therefore, the sound has to be good (sometimes loud) and able to be heard throughout the building. Therefore I stream the same music via my Bose Soundtouch 20.
DJI Mavic Air – for aerial photography/4K Video and behind the scenes shots
WD 1TB My Passport Wireless SSD for in-field backups and mobile editing workflows.
Apple TV 2 Set-top boxes – My photography is on display throughout the studio both in print and electronically via HDTVs and Apple TVs driving them.
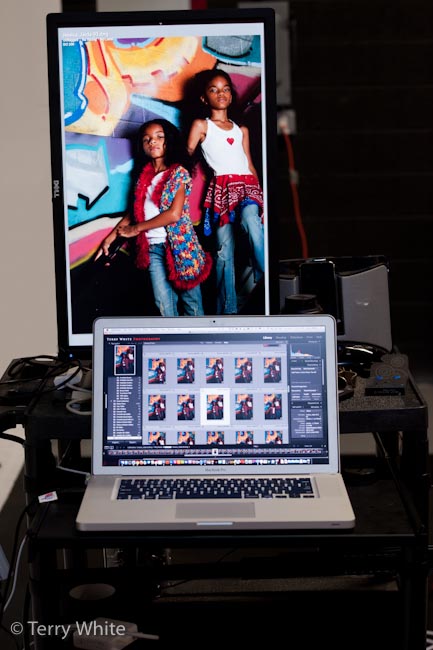
Apple The New iPad Pro – I use it for portfolio display, image review, model releases and variety of other tasks. See how it fits into my workflow here.
Mac Mini Mac OS X Server with a Drobo 5D attached. There’s also a Drobo FS on the network for additional backups of the main Drobo – Network backups for every shoot I do before I leave the building
The list above represents equipment that I’ve acquired over the past 4 years. By no means do you “need” all of it, especially if you’re just starting out. Take from it what you will and keep in mind that I didn’t start with it all on day one! That’s the thing about photography, “there’s always something to buy!” No one ever told you to get into photography because it would be a “cheap” hobby! 😉