Join me Tonight in LA and NYC on Wednesday for the Adobe Create Now Tour

AdobeCreateNowBanner

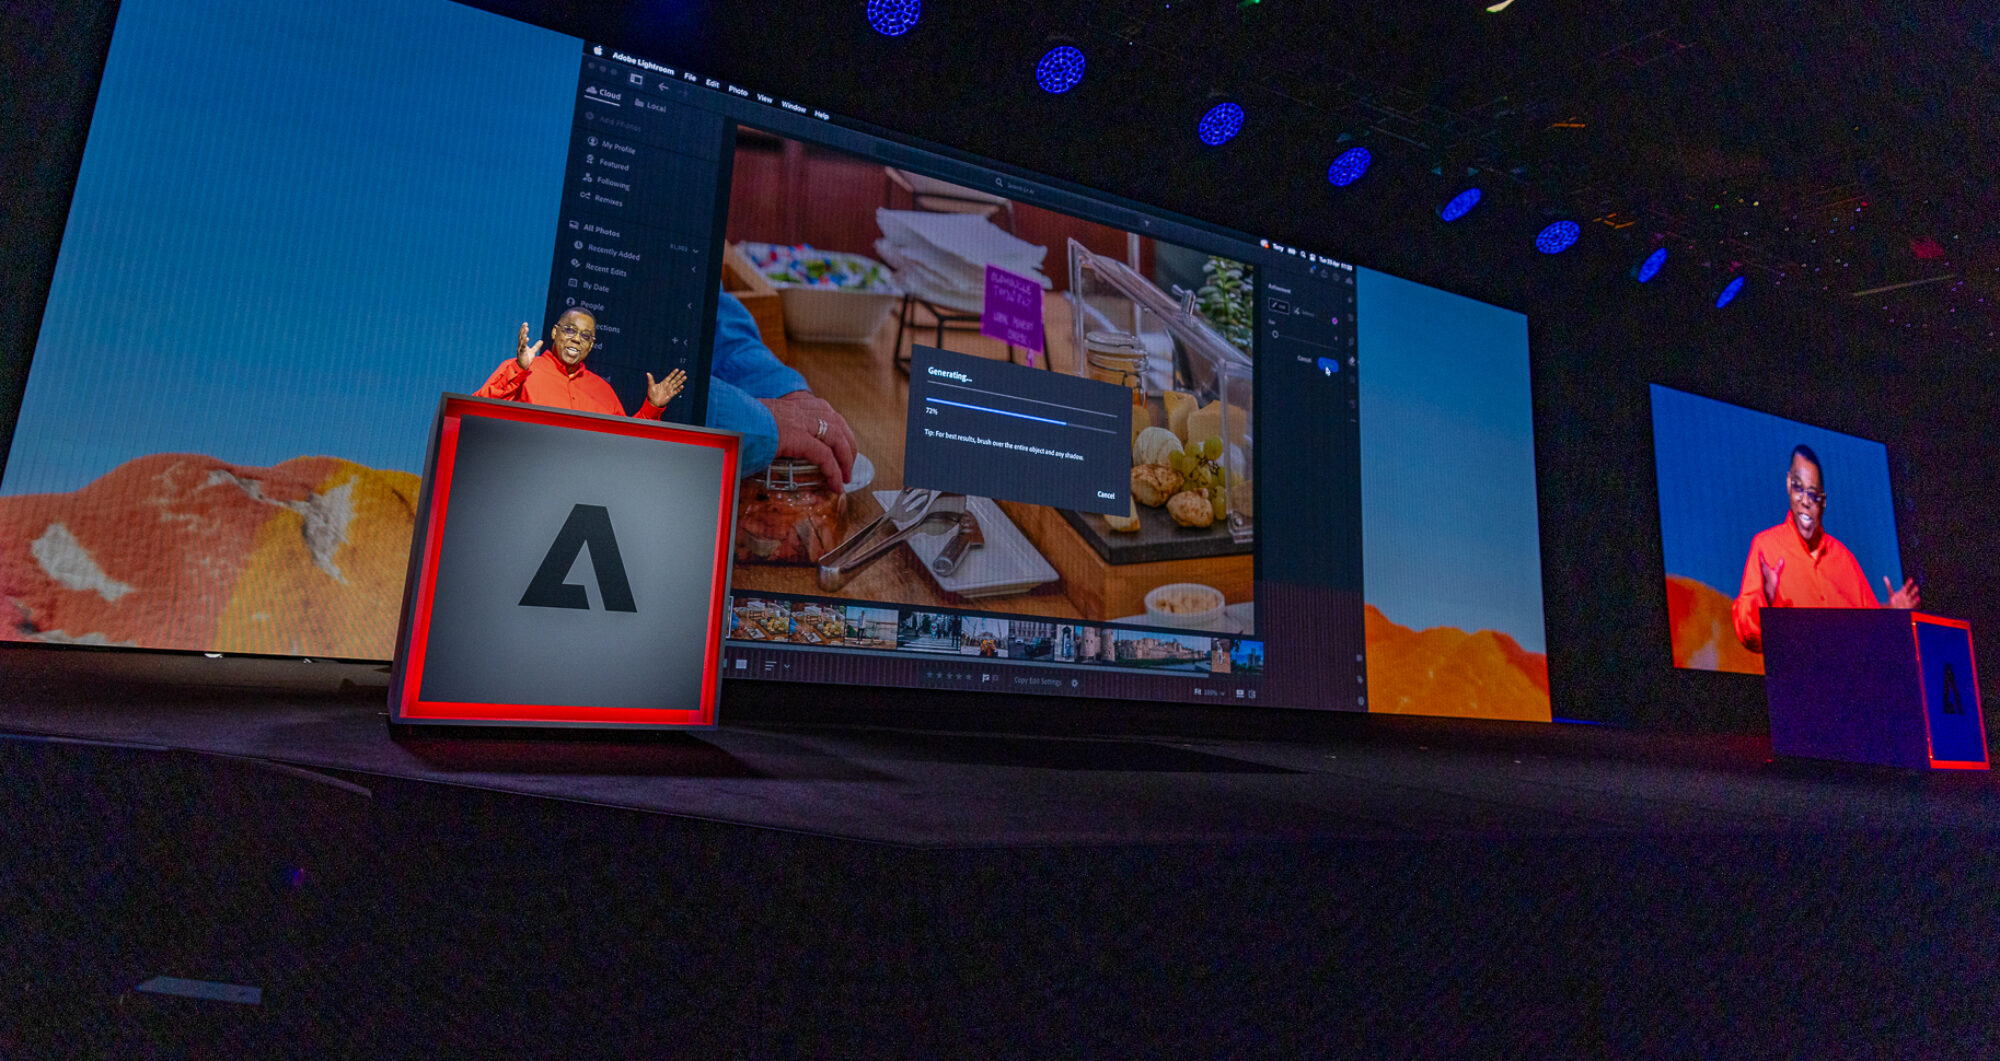
Hey guys! You can catch me LIVE at the Adobe Create Now World Tour Event in Los Angeles tonight (Monday 2/25) and New York on  Wednesday (2/27) . I’ll be covering the latest and greatest Adobe innovations and updates for our design products.

Register here for tonight in LA

Register here for NYC on Wednesday

Register here for New Jersey on Thursday


Where is the Create Now World Tour Coming to a City Near You?

If you want to check out the events happening in your town click the banner below:

createevent

Logitech Ultrathin Keyboard mini Review

logitech_ultrathin_mini_stand

If I think about my favorite iPad accessories, there’s no question that the Logitech Ultrathin Keyboard Cover is my favorite. The iPad is great and the on screen keyboard is fine for typing short messages or replies. However, when it comes to heavy text input or writing blog posts like this one, nothing beats a physical keyboard. The Logitech Ultrathin Keyboard Cover is the best one on market IMHO. It attaches magnetically and works just like an Apple Smart Cover. Read my original review here.


A physical keyboard for the iPad mini?
logitech_ultrathin_mini

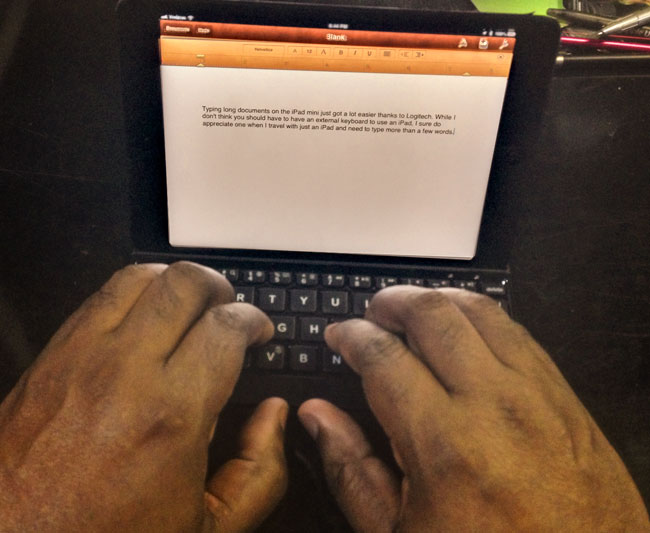
When I saw that Logitech introduced an Ultrathin Keyboard mini for the iPad mini, the first thing I thought was “no way! It’s going to be too small.” The thing I like best about the original Ultrathin Keyboard Cover for the full size iPads is that it doesn’t feel cramped. It feels like a full-sized keyboard. I figured that the iPad mini was just too small and that if someone made a keyboard, it probably wouldn’t be a good experience. Nevertheless I was tempted and had to try the new Logitech Ultrathin Keyboard mini. The first thing I did when I took it out of the box was put my fingers on the home row.
logitech_ultrathin_mini_my_hands

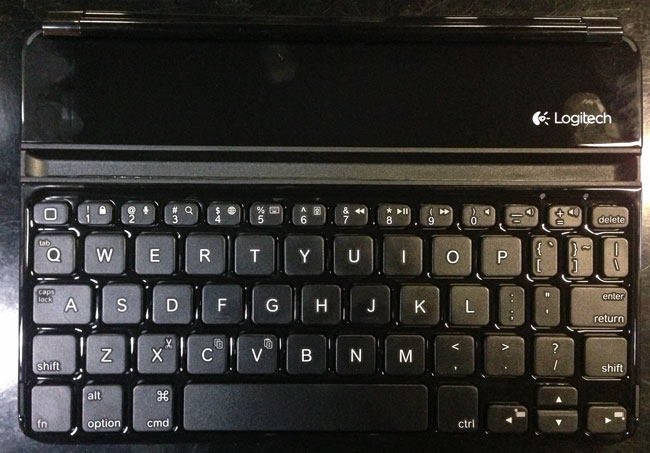
I was amazed! It felt fine. Sure it was a little smaller, but not bad at all. I was also pleasantly surprised to see Shift keys on both sides. Other keyboards I’ve tried for the 10″ iPads sometimes remove one of the Shift keys to make the layout fit better. I NEED BOTH SHIFT KEYS! However, Logitech did make a couple of compromises. The Caps Lock key shares the same key as the “A” key and you use the Function key to activate it. The Tab key also shares the same key as the letter “Q”. These were much smarter compromises than eliminating a Shift Key.


Great smart cover like design
logitech_ultrathin_mini_cover

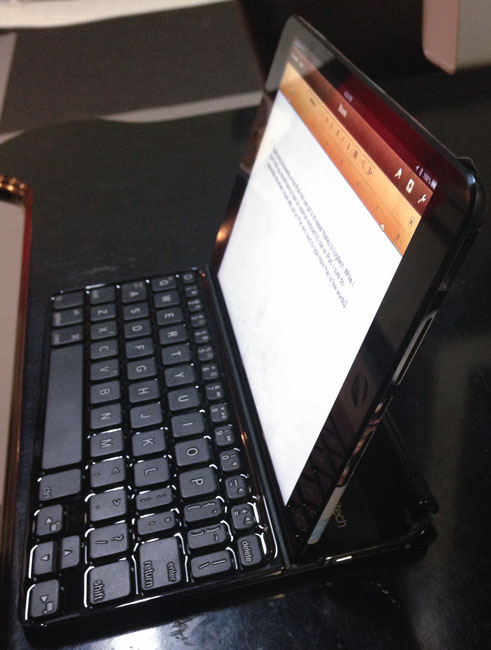
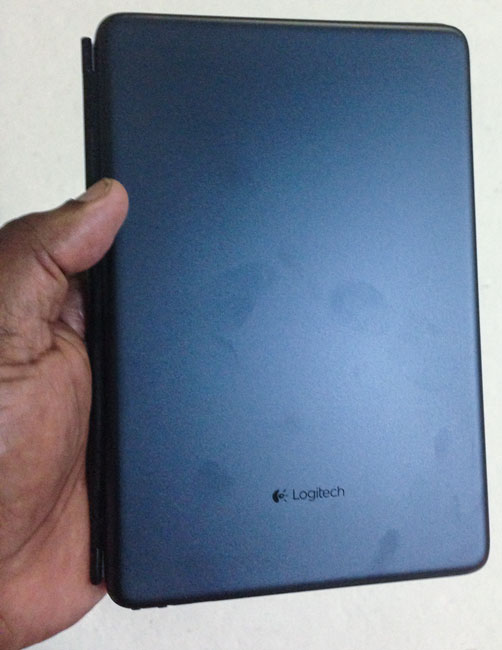
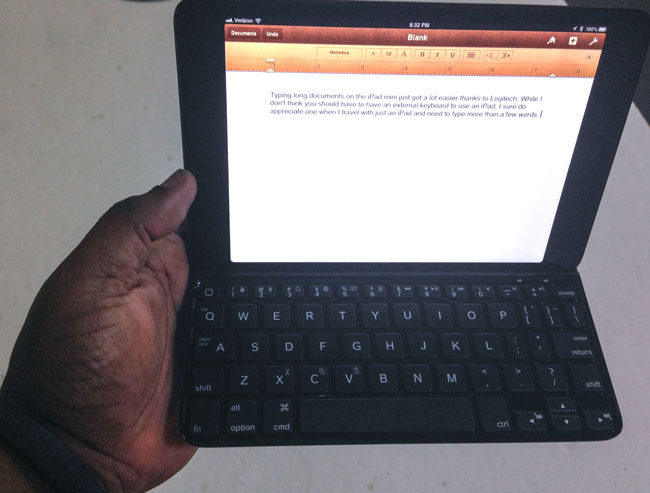
Like the regular Ultrathin Keyboard Cover, the Ultrathin Keyboard mini works as a smart cover and a stand for your iPad mini. As you can see in the photo, it shows off finger prints quite well too. It also has a “home” key that works like the home button on your iPad. Not to mention other iPad specific keys like volume controls, find, slideshow and text selection buttons. The Ultrathin Keyboard mini connects via Bluetooth and has a built-in rechargeable battery that lasts about 3 months between charges assuming you’d use it 2 hours per day!


The Bottom Line
logitech_ultrathin_mini_stand_in_my_hand

Many will jump to tell me that “If you use an iPad there is no need for a physical keyboard or a stylus” and to those people I would say that you’re right. “Need” is a strong word, but I would also say that while the iPad and iPad mini work perfectly with your fingers, that doesn’t mean that there aren’t times where a physical keyboard wouldn’t make things easier. Not to mention that only the Sith deal in absolutes 😉 The Logitech Ultrathin Keyboard mini and Logitech Ultrathin Keyboard Cover are great for those that want to travel with just an iPad/iPad mini and still get a lot of work done.

You can get the Logitech Ultrathin mini for iPad mini here in black or directly from Logitech in black or white.

You can get the Logitech Ultrathin Keyboard Cover for iPad 2 and higher here in black or white
Finally! A 1TB 7200rpm 2.5″ Drive

1tb_7200rpm_travelstar_bare

Last August I wrote a post and created a video showing the speed difference between USB 3 and Firewire 800 and while that was fine, what I realized was that the real bottleneck was the drive itself. I typically buy 1TB portable drives for on the road backup and emergency use. Until now all 1TB 2.5″ drives were only rated at 5400 rpm. In other words, slow! This means that the interfaces like Firewire 800, USB 3 and Thunderbolt really didn’t matter much if they all outpaced the speed of the drive itself. I bought a Buffalo Tech 1TB Thunderbolt/USB 3 portable drive. I couldn’t wait to see how “fast” this new drive would be? I was disappointed as it was no faster than my Firewire 800 or USB 3 drives. The problem wasn’t Thunderbolt or something that Buffalo Tech did wrong, the problem was that 1TB drives didn’t spin any faster than 5400 RPMs.

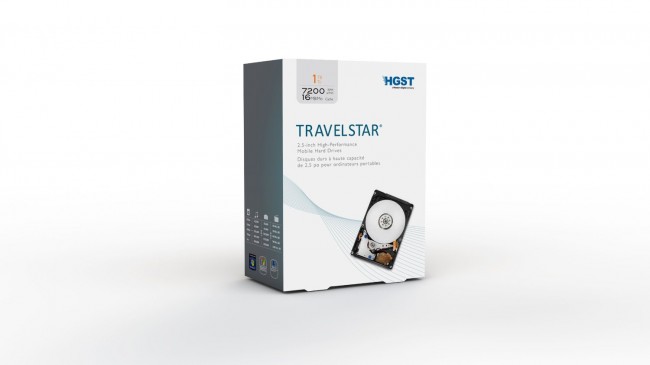
HGST shipped a 1TB 7200RPM Travelstar 2.5″ Drive!

1tb_7200rpm_travelstar

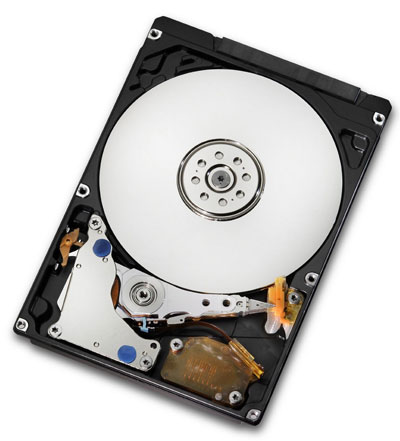
I noticed that I was seeing NEW Drives from OWC and G-Tech that stated that the drives were 1TB 7200 RPMs. This meant that there had to be a NEW 7200 RPM 1TB internal drive that I wasn’t aware of. I did some research and found that HGST (a Western Digital company) had in fact shipped a 1TB 7200RPM 2.5″ drive.


Upgrading my existing drives

Rather than run out and buy a couple new drives, I decided that there was nothing wrong with my enclosures. I figured I could just buy the new bare drive and swap out the slower drive in the enclosures that I already owned. Great idea, but it really depends on the enclosure. Some enclosures are really easy to open and others aren’t. Almost in ALL cases you’re going to void your warranty on the original drive/enclosure.

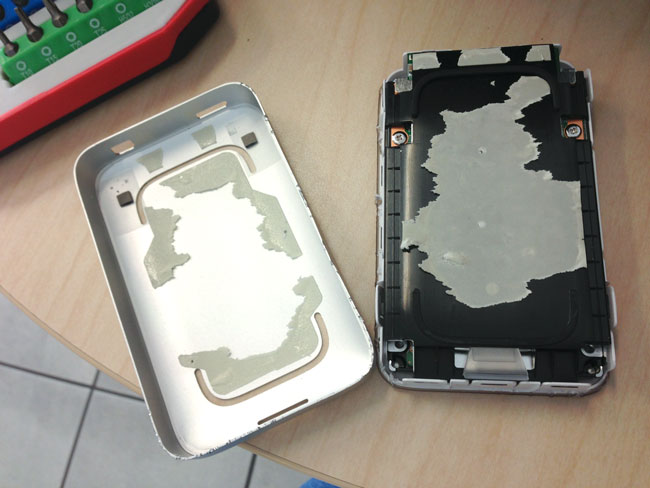
buffalo_tech_opened

It was clear that the Buffalo Ministation Thunderbolt/USB 3 enclosure was NEVER intended to be opened by the consumer. This is probably one of the hardest cases I’ve ever had to open. You pretty much have to “pry” it open to get to the drive and it won’t look pretty when you’re done. Not only is the case secured by internal tabs, but the internal drive tray is “glued” in place. That makes it even harder to open because the glue is fighting against you to. I was determined to swap this drive out and I wasn’t concerned about the cosmetic appearance of the case once I was done. If you want it to still look pretty, don’t try to open this case. You will leave pry marks no matter what.

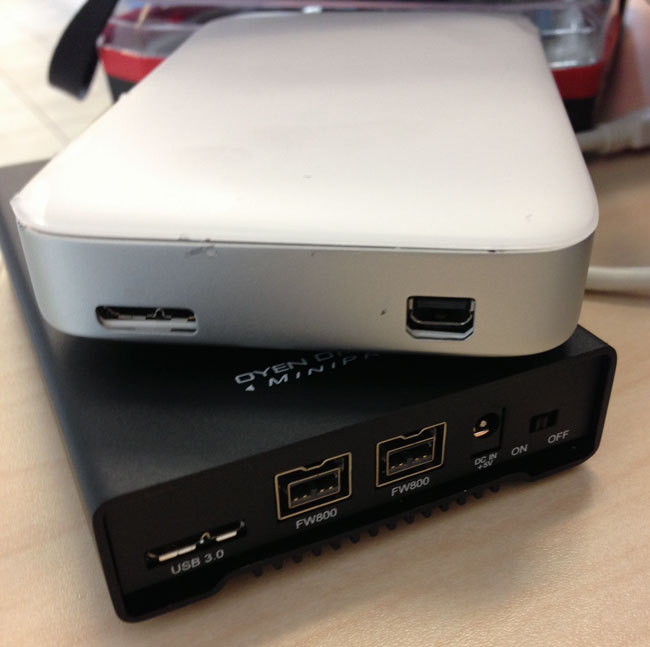
after_1tb_7200rpm_drive_install

On the other hand my Oyen Digital Firewire 800/USB 3 case opened up very easily by simply removing the screws on the bottom and sides of the drive. I swapped out the drive and it went back together just as easily.


The Speed Tests

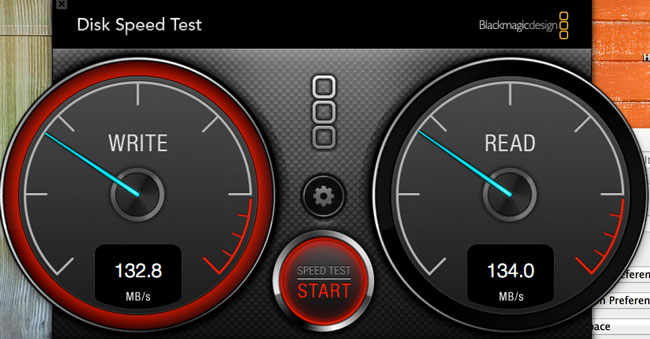
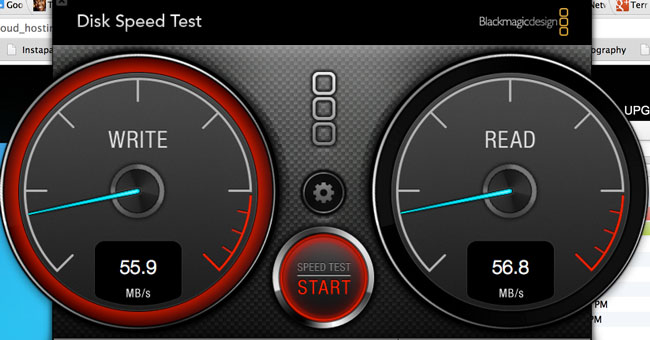
1tb_7200rpm_drive_speedtest
1TB 7200 RPM Drive Speed Test via USB 3

As I suspected, the new 7200 RPM drive was MUCH FASTER than the 5400 RPM ones. There was still virtually no difference in speed between the Thunderbolt and USB 3 interfaces. This could be due to several factors, but in all cases both drive enclosures tested faster than they did with the slower drives.

1tb_5400rpm_drive_speedtest
1TB 5400 RPM Speed Test via USB 3


The Bottom Line

Until SSD drives go up in capacity and come way down in price, these traditional hard drives are still going to be useful for backups and transporting large amounts of data. Now that this drive is out I expect all the drive manufacturers to start making it available in their enclosures. If you’re not a do-it-yourself kinda person, then I would either wait for the Buffalo Minstation to get an upgrade or I’d go with this G-Technology 1TB G-DRIVE mini Portable USB 3, Firewire 800 Drive. If all you need is USB 3, then you’re better off just ordering the bare HGST 1TB 7200 RPM drive and low cost portable enclosure like this one.

How To Get Started with Adobe Creative Cloud – 10 Things Beginners Want to Know How To Do

Adobe_Creative_Cloud

In this episode of the Adobe Creative Suite Podcast Terry White shows you how to Get Started with the Adobe Creative Cloud – 10 Things Beginners Want To Know How To Do. Sign up, download your apps, access your cloud storage, sync, share and review files and more…

This video also completes my “How To Get Started with Adobe Creative Cloud For Designers and Photographers” See the rest of the videos here:

How to Get Started with Adobe Photoshop CS6

How To Get Started with Adobe Illustrator CS6

How To Get Started with Adobe InDesign CS6

How To Get Started with Adobe Lightroom 4

How To Get Started with Adobe Muse

Are you missing out on my Bonus Content?

See more of my Adobe Creative Suite Videos on my Adobe Creative Suite Podcast and get the App below. It features EXCLUSIVE CONTENT that no one else gets to see. This episode has a BONUS CLIP that is available only in the App! My iOS App is a Universal App for iPhone, iPad and iPod touch. I also have an Android version on the Amazon App Store:
Learn Adobe Creative Suite with Terry White - Wizzard Media


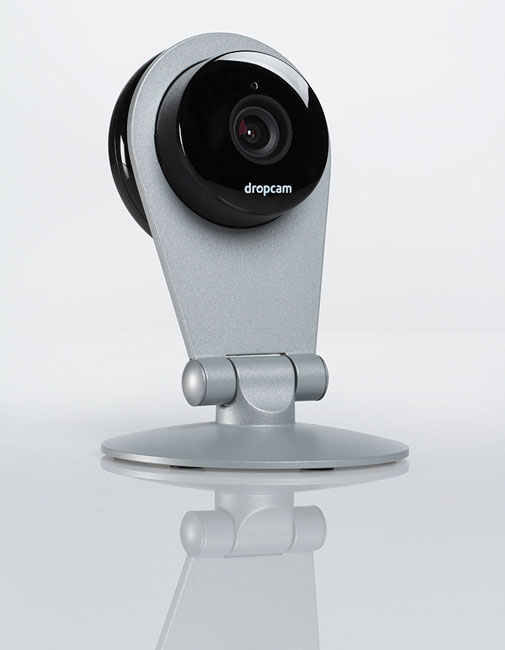
Dropcam HD Review

DropcamHD_front_turned_HI-RES

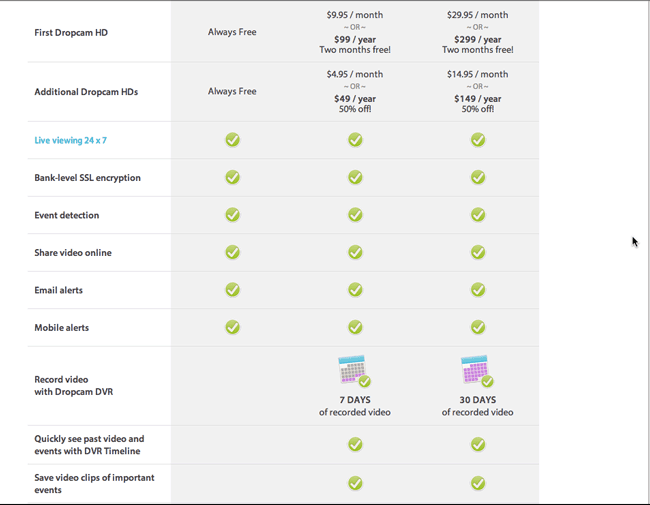
I’ve been using Panasonic IP webcams for years to keep an eye on things at home and at my studio. However, Panasonic has gotten out of this business and therefore it was time to look at newer cams to recommend to people that ask. I was intrigued by the Dropcam HD and finally got a chance to try one out. Dropcam HD is a 720p HD WiFi enabled video monitoring camera. It also broadcasts sound. Unlike the Panasonic cameras, Dropcam is both a hardware solution and service. During the setup process you configure a Dropcam.com account along with setting up the hardware. You have a choice of a “free” live viewing only account or a paid Plus or Pro account that not only allows you to view your Dropcam live, but also see either 7 or 30 days of recorded video respectively. The idea is that if you’re using it as a security camera that you’re not going to be watching it 24 hours a day. Therefore Dropcam will automatically record and keep the last 7 or 30 days of video so that you can review it if need. However, even with the Free account you can setup motion detection that can alert you that something is moving in front of your camera so that you can tune in immediately and watch.


The initial setup

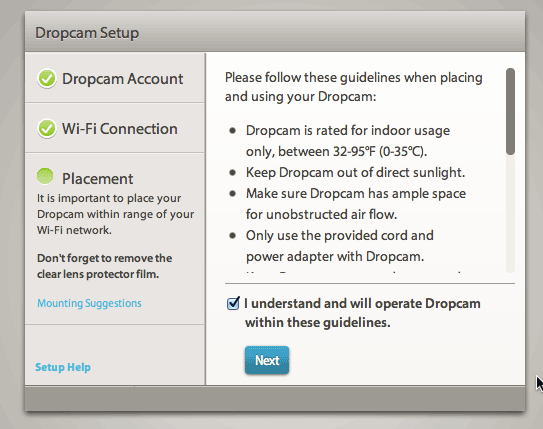
drocam_setup

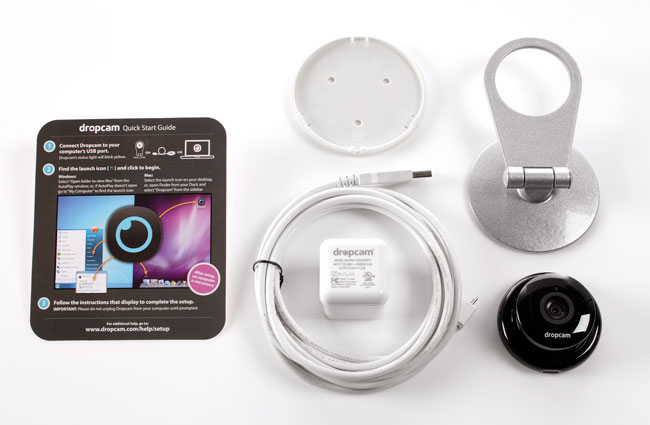
The initial setup couldn’t have been easier. Dropcam HD comes with a stand/mount, 10 foot long USB cable and USB power adapter. You plug the Dropcam HD into your Mac or PC initially and it mounts on your desktop as a volume containing the setup utility. No need to even download anything. During the setup you join the Dropcam HD to your existing WiFi network including password protected ones. You also setup your account on Dropcam.com during this process. Once you’ve got it setup, unplug it from your computer and place it where you want to monitor (indoor use only) and plug it into a AC wall plug. Once the camera powers up and connects to your network the setup completes. The mount can be either used on a desk, bookcase, etc. or you can wall/ceiling mount it. It even comes with the screws and anchors. Also the camera can easily be removed from the mount. It just pops in and out. Also the indicator light can be disabled for more discretion.


Image quality

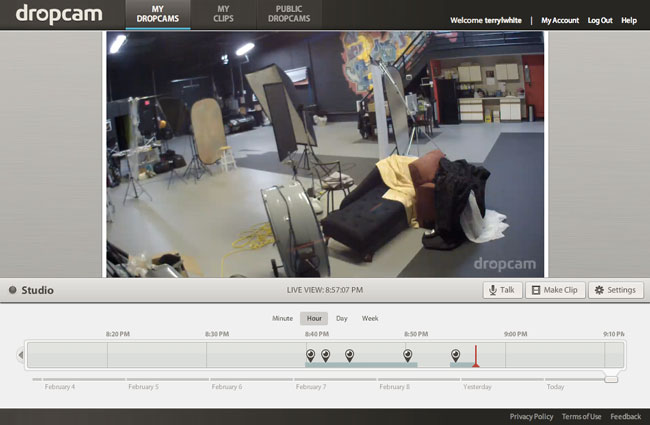
dropcam_HD_studioview

I was really impressed with the image quality. Definitely much better than the standard def/low def Panasonic cameras I’ve been using. You can watch the image in a Flash enabled web browser on your Mac or PC or you can download their mobile App and watch the stream live on your iOS or Android devices. See my review of the iPhone/iPad App here.


Works in the dark too

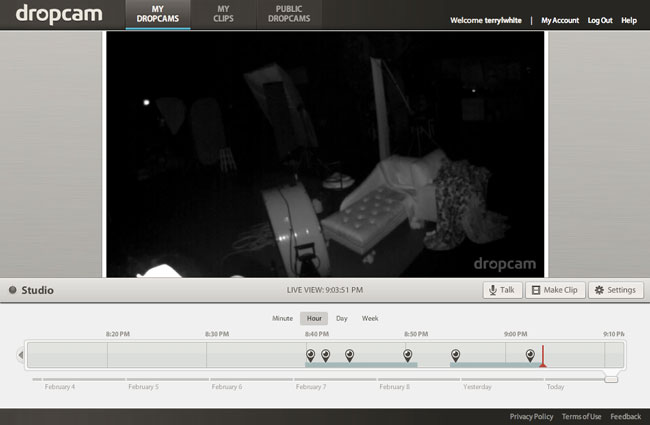
dropcam_hd_dark

Unfortunately the room you’re monitoring may not always have the lights on especially if you’re not home. I was happy to see that Dropcam HD uses infrared technology to show you what’s going on even in the dark. It automatically switches to night vision when the lights go off and off again when the lights come back on.

dropcam_HD_rates

The Bottom Line

Dropcam HD is a very well thought out process and the company doesn’t rely on any other company or software to make their solution work. This is a good thing as many other solutions lack things like mobile apps or online recording. The image quality is exceptional and exceeded my expectations. You can setup multiple Dropcam HD units. You can do two way audio and it has digital zoom. While this hardware/service solution works as advertised there are a couple of things that would make it better. First off there’s no way to rotate/swivel the Dropcam. It’s a fixed camera and therefore can only cover the range that the built-in lens covers. With that said, the lens covers up to 107° field of view, so this may not be an issue for most. The next thing is that while it comes with a USB power adapter, it’s unnecessarily wide and you may have an issue plugging it in to an multiple plug outlet next to another plug. There’s no reason why it couldn’t be skinnier. The only other thing you might consider is that Dropcam uses about 60GB of bandwidth a month. Depending upon your ISP/plan this may be an issue. Comcast for example thinks anything over 300gb a month is excessive! As you can see I can’t find a whole lot wrong with Dropcam HD. I’m impressed and will look to replace my older Panasonic units with Dropcam HDs.

You can get Dropcam HD here.

You can also check out Dropcam on Facebook here.

DropcamHD_parts

Your On Camera Flash Sucks Less With Lightscoop Deluxe

wpid11623-TLW4178_sm.jpg
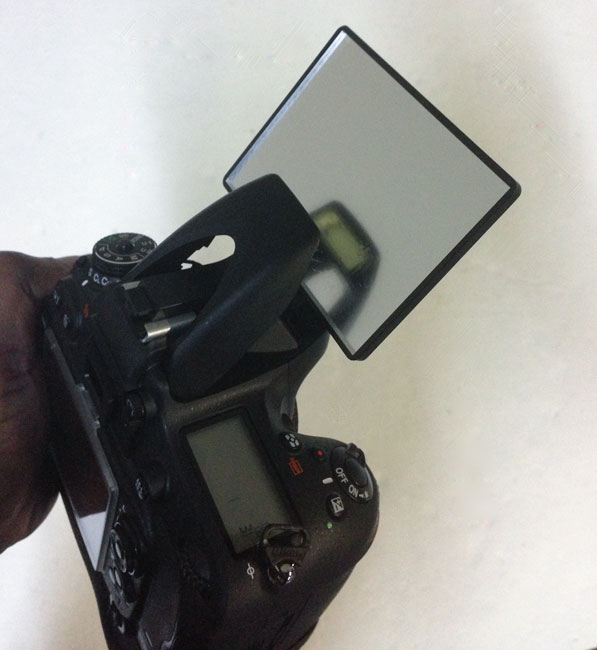
Shot taken with the pop up flash on my Nikon D600 complete with a harsh shadow off the lens hood.

Usually the only time I pop up the flash on my DSLR is to use it as a Commander to control and fire my off camera Nikon Speedlight. If you ever see me using it to light a subject you can almost bet that it was an emergency, there was no other choice and I’m hating life in that moment. There are two ways to combat the horrific effects of on camera flash. Either bounce it or diffuse it. When it comes to my speedlights I’m a “diffuse it” kinda guy. However, for the tiny popup flash built-in to most cameras, the options to diffuse them are less. This is probably why you never (or hardly ever) see pros using the pop-up flashes on their cameras. Heck, my Nikon D4 doesn’t even have one. They probably figured if you’re a D4 customer, you know better.

Professor Kobre’s Lightscoop Products Aim to Make your On Camera Flash Suck Less

LightScoopMini
Nikon D600 Body with the Lightscoop Deluxe Attached

I reviewed their original Lightscoop way back in 2007. While it’s a great product, I rarely carried it because although it was small, it was still an odd shape that took up space in my bag and there just weren’t gonna be too many times that I’d be using it. Now they offer a Lightscoop Deluxe.

Continue reading “Your On Camera Flash Sucks Less With Lightscoop Deluxe”

Review: The Lens by NK Guy

thelenscover

I’ve seen and read many books on digital photography. I’ve learned a lot about lighting, posing, setups, etc., but the one thing that I hadn’t seen before was a book that was all about lenses. “The Lens: A Practical Guide for the Creative Photographer” goes into great detail to answer the question “which lens should I buy?” Although I’m pretty set on the lenses I want/use on a day to day basis, that doesn’t mean that I always know which lens is the best to use for every situation. I go through trial and error sometimes. This book rocks when it comes to giving examples on not only which lenses to use in certain situations that may be obvious to some of the pros out there, but it gives examples of uses for lenses that you may not have thought about. I’m also guilty of using the same lenses for the same stuff that worked last time. This book gives me a refreshing look at what’s possible with the glass that I’ve invested in.

the_lens_telephoto

Whether you’re a pro photographer or you’re about to buy your first good lens, I recommend you take a look at “The Lens” by NK Guy. It’s available in print as well as Kindle format, which means that even though I enjoy the printed version I’ll be adding the Kindle version to my iPad to always have with me.

You can get it here.

the_Lens_choosing_focal_length

Join me Tomorrow in San Francisco for the Adobe Create Now Event!

CreateNow-SanFran

Hey guys! You can catch me LIVE at the Adobe Create Now World Tour Event in San Francisco tomorrow evening (Thursday, 2/7/13) at 4:00 PM PST til 8:30 PM PST. I’ll be covering the latest and greatest Adobe innovations and updates for our design products.

Register here and I’ll see you tomorrow!

Can’t make it to San Fran? Then join me Friday for my LIVE online event: Ask a Pro – Creative Cloud for Photographers

I’ll be showing photographers how they can take advantage of advances in Photoshop and Lightroom as well as new workflows brought to us by the Adobe Creative Cloud.

Learn about the new features in Adobe Photoshop for Adobe Creative Cloud members. Terry will demo Creative Cloud workflows showing how you can take projects created in Photoshop or other CS apps and publish websites using Adobe Muse or iPad apps using DPS SE.

Join me Friday at 12 noon PST for this hour long online session. Register here.

Where is the Create Now World Tour Coming to a City Near You?

If you want to check out the events happening in your town click the banner below:

createevent