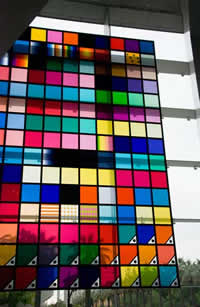
My Apple Store has been remodeled

Apple Store Somerset Remodel

Click the above picture for a larger view…

One of the most successful retail stories in modern times is that of the Apple Retail Stores. They have more than exceeded everyone’s expectations including Apple’s. I can remember quotes from analysts and pundits giving them two years before Apple would be forced to start closing them down. Well the first store opened in 2001 and now Apple has over 180 stores world-wide with millions and millions of visitors each year. So much for the gloom and doom forecast.

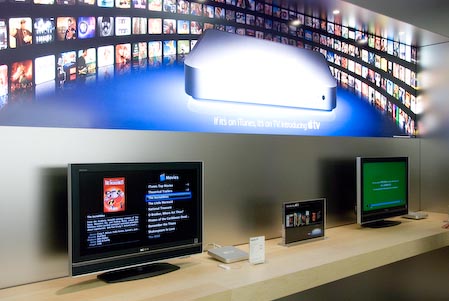
My closest and favorite Apple store is the Somerset Collection location in Troy Michigan. This store went through a major renovation and had its grand reopening today! At first glance you’ll notice how much larger the store is. You’ll also notice the new shinny stainless steel look and fixtures. This isn’t by accident. Steve Jobs saw the work of this great artist and contract him to design these panels for construction and upgrading of all new Apple Stores. What used to be the back storage, tech room has been relocated to an adjacent space behind one of the other shops. This easily adds another 20-30′ to the depth of the store. The store also appears to be wider when in fact it’s not. This is an example of clever engineering and space saving design that allows the panels and shelving to be more recessed in the existing space. Everything is much more accessible with more Macs to touch and play with. The store got other upgrades that aren’t so obvious For example, the networking in the store has been upgraded to 802.11n with a faster internet pipe as well.  All of the cabling has been run through the new stone (not concrete) flooring. There are now two new "Studio" areas for one-on-one training and presentations with 4 large plasma displays. All of these displays can be tuned to the same presentation if need be to allow a larger audience to see the presentation. The Genius Bar has also doubled in size.

What you won’t notice is a row of cash registers. In fact each sales rep walks around with a hand held credit card check out device. Your receipt is emailed to you. There is one register hidden at the Genius Bar for those who insist upon paying with cash.

The lovely Linda Stein gave me the grand tour.

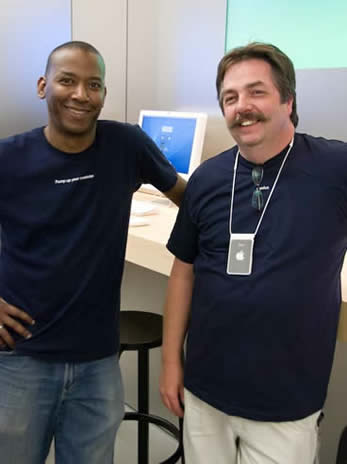
Amir and Dave were also on hand to show me the finer points of the remodel.

As usual the Apple Store was a buzz with people buying Macs, accessories, iPods and everything Apple. It’s great to have a refreshed look on a very successful store in the Apple chain!

Adobe CS3 Update Bonanza

I just got in from San Jose (3rd stop on the CS3: Creative License Tour) on the redeye and I realized just how many updates came out this week. So I thought I’d do a quick recap in case you missed any of it:

Camera RAW 4.1

Adobe released a rather significant update to Camera RAW this week. Beyond the normal support for the hot new cameras, this new version adds very cool and very useful Sharpening & Noise Reduction controls. No longer is it necessary to go to Photoshop just to do good sharpening of your images. There’s also a new Clarity slider that you’ll have to see to believe.

Camera RAW 4.1 adds support for 13 new digital cameras and backs, including the Canon EOS-1D Mark III, Fujifilm FinePix S5 Pro, Nikon D40x, Olympus E-410, Olympus SP-550 UZ, Sigma SD14, Phase One H 20, Phase One H 25, Phase One P 20, Phase One P 21, Phase One P 25, Phase One P 30 and Phase One P 45.

Camera RAW 4.1 only works in Photoshop CS3 and Photoshop CS3 extended. If you are on an older version of Photoshop, but have one of these newer cameras, you can use the FREE DNG converter to convert your images into .DNG format and then use them in your older version of Photoshop. These controls will also be added to a free update of Lightroom which is do out soon. The Lightroom update will gain these features and more cool things.

Adobe Photoshop Camera Raw 4.1 for Photoshop CS3 is now available for download (Mac | Win) from Adobe.com. You can also just run the Adobe Updater and these updates will be installed for you.

Bridge 2.1

Bridge 2.1 which is a part of the CS3 apps and suites got an update that fixes some bugs that cropped up after CS3 shipped. However, it also got some pretty neat enhancements too:

Multilevel Keywords

Organized your keywords into groups and subgroups as deep a hierarchy as you want by using the multilevel support in the keywords panel. Bridge now includes keyboard shortcuts for applying single keywords or parent keywords. Advanced options allow for storing hierarchy into the file metadata. Easily import and export keywords using tab-delimited file formats.

Improved Cache Management

Control the size of the Bridge cache of thumbnail and metadata information to better improve responsiveness. The cache can also be compacted to improve performance.

General Improvements

Preference control over video and audio file previews
Improved scrolling and renaming performance
Usability improvements to custom workspaces
Improved overall stability

You can update your copy of Bridge by running the Updates command from the Help menu in your CS3 apps.

Adobe Media Gallery Engine

Now you can produce Flash and HTML galleries right in Bridge CS3! The Adobe Media Gallery Engine is a FREE add on to Bridge CS3. It adds quick, powerful Web gallery creation to Adobe Photoshop® CS3, Adobe Photoshop CS3 Extended and the Adobe Creative Suite®. AMG makes it possible to create HTML or Flash-based galleries from any of the file formats supported by Bridge; adjust the galleries using built-in preview; and export the results or upload them via FTP.

Sounds a lot like Lightroom’s Web Module doesn’t it?

New CS3 Screen Savers

Last, but certainly not least, I got a lot of requests for the cool colorful CS3 styled wallpaper (Desktop Pictures) that people have seen on my Mac during my CS3 Podcast Episodes. I made those Wallpapers available to the general public, but this week I’m also making the NEW Adobe CS3 Screen Saver available for both Mac and Windows. You can download them here and get your CS3 groove on.

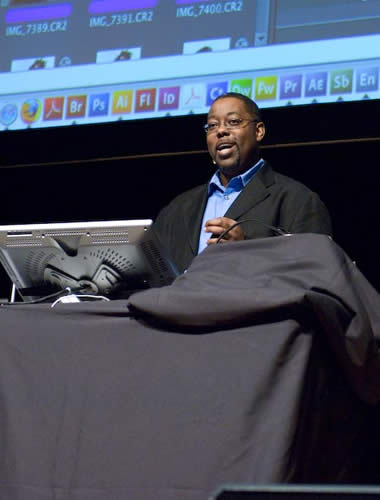
CS3 Tour – San Jose – Day 2

This is Day two of the CS3: Creative License Tour in San Jose California. There was such a tremendous demand for this event that we had to add a second. Once again we’re doing this event at the Adobe headquarters. Its great to have over 150 people here. I’m doing this blog post live during my keynote to show the simplicity of using Adobe Contribute CS3 to do blogging. The audience is energized and we’re diving deep Creative Suite 3 throughout the day.

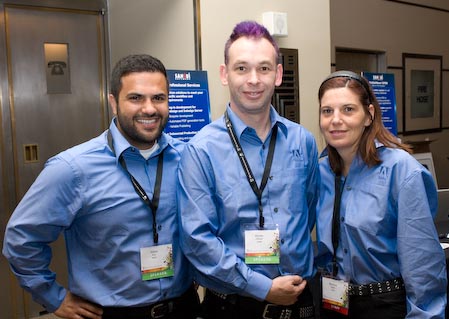
Lisa Forrester is doing the Design Premium Suite, Kyle Thompson is doing the Web Premium Suite and Kevan O’Brien is once again doing the Production Premium Suite with his purple hair and all. I hope to see you at one of the upcoming cities.

CS3 Event San Jose – Live

I’m at the 3rd stop on the Adobe CS3: Creative License Tour here in San Jose California. Actually we’re doing this event at the Adobe headquarters. Its great to have over 150 people here and the response was so great that we had to add a second day. The audience is great and we’re having a blast learning about Creative Suite 3. We also got a special treat by having Adobe’s Senior VP of the Creative Solutions Business, Johnny L join me on stage during the keynote. Lisa Forrester is doing the Design Premium Suite, Kyle Thompson is doing the Web Premium Suite and Kevan O’Brien is once again doing the Production Premium Suite with his purple hair and all. I think the new box designs went to his head, literally. I hope to see you at one of the upcoming cities.
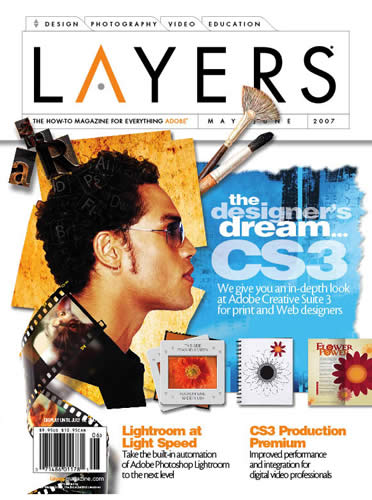

Check out the current issue of Layers magazine

If you are thinking about or have recently upgraded to Adobe’s Creative Suite 3, then you should really check out the current (May/June 2007) issue of Layers Magazine "The How-To Magazine For Everything Adobe." In addition to my regular tutorial on InDesign, I wrote the "What’s new in InDesign feature." Check it out. You’ll also find detailed information about what’s new in each of the CS3 apps including those in the new CS3 Production Premium. You should be able to find this issue on your local newstands.

Apple TV updates and iTunes DRM Free

Apple not only released an update to iTunes (version 7.2) to support their new DRM Free aka iTunes Plus tracks, but they also announced updates to Apple TV. The first one was no surprise as Apple stated a while back that EMI’s catalog would be available in a Digital Rights Management (DRM) free version. These new tracks cost more at $1.29, but they are also sampled at a higher 256K quality AAC format. What’s nice is that iTunes will offer you the option (if you enable iTunes Plus in your account) to upgrade the songs/videos you already own from EMI’s catalog to the DRM/higher quality versions for the difference in price (30¢). I did this for my 71 songs and one music video for a mere $14.25. The iTunes store is being hammered by users downloading all these tracks and my downloads timed out several times before completing. So the question is "will you pay more for DRM free tracks on iTunes?"

The next update came as a surprise!

Apple Announced a new higher capacity Apple TV model sporting a 160GB drive for $399. This was one of the biggest complaints most reviewers had with the original model, which is still available at 40GBs for $299. This update is not earth shattering by any means, however what came as a complete surprise was Apple also announced a partnership with YouTube. Soon (mid-June) you’ll be able to browse the YouTube catalog directly on your Apple TV and stream videos from the popular site. When users were complaining about not having this capability, I wasn’t really one of them because YouTube videos don’t look that great on my computer, how crappy would they look on my high def set? Apparently this was Apple’s concern too. YouTube will be re-encoding all their content in an Apple TV H264/MP4 format which should yield a higher quality look to them. When these videos are ready, you’ll most likely have to do a software update on your Apple TV to add the new YouTube menu option. It’s all good and I welcome this new ability.

Underwater Photography

I bought the Olympus Stylus 720SW last November while on a Caribbean cruise. I blew just about every chance I had since then to grab some shots underwater. My last great opportunity was in Australia at the Great Barrier Reef and just as I was leaving my hotel room headed to the reef for the day, I picked up the 720SW only realize that the battery was dead and I didn’t bring the charger! Arrrrrrggggggh!

So I decided to give it a spin this past weekend in the pool. Sure it’s not as exotic as Australia, but it is water! This camera is waterproof up to 10′ without the need for a special housing. I love the fact that it has built in scene modes just about for every situation (25 in all) including Underwater Snapshot, Under Water Wide 1, Under Water Wide 2 and Under Water Macro.

For a point and shoot camera it does an adequate job. In the scene modes for underwater, I did notice a little more noise than I like, but for an underwater camera that costs less than some housings out there, it ain’ t bad. However, my single biggest complaint remains with this camera and that is Olympus chose to use the xD card format as opposed to the much more popular SD card format. All my other cameras use either SD or Compact Flash. I really don’t need another format such as xD or Memory Stick.

Sony PS3 now upscales regular DVDs

Sony has released the much rumored 1.8 firmware which among many things now upscales standard definition DVDs to HD resolutions. One of the main reasons I got a PS3 was to enjoy Blu-ray HD movies in my theater. I now use it as my primary DVD player and with this new upscaling capability I’m even happier about that move. Also the occasional HD game is cool too.

The other things you find in this update include:

  • Printing images to a supported printer
  • Copying saved data (PS & PS2) to a memory card
  • Viewing files on a DLNA enabled device/media server
  • Remote play
  • and a host of other minor tweaks

90 more gigs! I’ll take it.

While I was quite content with my 160GB drive in my MacBook Pro at first, it’s amazing how fast space goes away when you not only want the Mac version of Adobe’s Creative Suite 3, but also the Windows version too. Not to mention that I now have all of the betas of the CS3 Production Premium video apps too. The next thing I knew I was down to less than 10GB’s of available space left and that’s a little to cramp for my comfort. I was all set to go with the 200GB 7200 rpm Samsung drive (although Samsung is not one of my favorite brands by any means). However, before I could pull the trigger on that one, MCE Technologies announced a package deal on the Western Digital 250GB 5400 rpm drive.

What a choice? 200GBs at 7200 rpms or 250GBs at 5400 rpms. Although I’m a fan of speed, I couldn’t give up the chance to have the extra space at the current speed that I’m used to now. So I pre-ordered the package from MCE and my birthday wish came a little early (yeah, I’m tech guy. These are the kinds of things we really want as gifts). MCE said that the drives would ship on June 1st. However, I got mine this past Friday. Although I’m sure you can get a better deal on the drive alone, I liked the fact that MCE was selling the drive with a USB 2/eSATA case, the cables, instructions and tools to perform the upgrade. All for $279. Speaking of the case, it comes with both the USB 2 data cable and the eSATA data cable as well as a 2nd USB cable that powers the drive. So no AC adapter required.

Installation went well. Here’s how I did it:

First I took my existing backup drive, a 120GB 2.5" SATA and installed it in the USB 2 case that came with the new drive. I then replaced my existing 160GB drive with the new 250GB drive. Keep in mind that my 160GB drive has all my stuff on it. So I put my 160GB drive in another external case. This way I could boot from the backup drive in the USB2 case and perform a CopyCatX duplication of the whole drive (sector-by-sector copy) including my Boot Camp partition. I thought I was home free, except there was one problem. CopyCatX does an EXCELLENT job of making an EXACT copy of one drive to another (SuperDuper and Carbon Copy Cloner can’t do this). However, since I had Boot Camp installed it did NOT automatically expand my Mac partition to see the rest of the space. So what I ended up with was two partitions that were the exact same size as before and the 90GB’s of free space was just sitting there as unformatted free space. This is when I found out that you just can’t expand your partition without wrecking your Boot Camp partition. I tried to do it with iPartition and while it worked for the Mac partition, it rendered my Boot Camp partition unbootable.

So I reformatted the new drive using Disk Utility and simply used SuperDuper (which actually comes on the new drive) to clone my Mac partition from the old drive to the new drive (about 2 hours of cloning). Then I went through the multi-hour drudgery of reinstalling Boot Camp, Windows XP and my Windows apps. While this wasn’t the most fun part of my day, it did give me the opportunity to also bump up the size of my Boot Camp partition. I went from 40GBs to 55GBs in the process.

All is well and I’m back up and running with a total of 90GBs of extra storage. I have a couple of network configuration things to do on the Windows side the next time I’m in an Adobe office, but that’s a minor thing. I recommend this drive to anyone who needs LOTS more space in their notebook. If you have Boot Camp, get ready to reinstall it. Hopefully Apple will make tasks like this easier when Boot Camp comes out in its final form in Mac OS X 10.5. I also hope that they make it possible to have (support) more than two partitions (Mac & PC) with Boot Camp installed. I would like to have a 3rd partition that is for data files that could be shared between the two environments and multiple users on the Mac OS X side.

Lightroom still on sale at Amazon.com

Hey! It looks like someone forgot to tell Amazon.com that Adobe Photoshop Lightroom now goes for $299. There was an introductory price of $199 from February (when the product shipped) until the end of April. But it appears that Amazon still has some of those $199 boxes left. So while they have supplies left of the introductory sku’s you can get Lightroom for only $199.49. However, you’d better hurry as it says "while supplies last!".