Guest Review: If All Hardware Installs Were This Effortless…


By Jason Levine


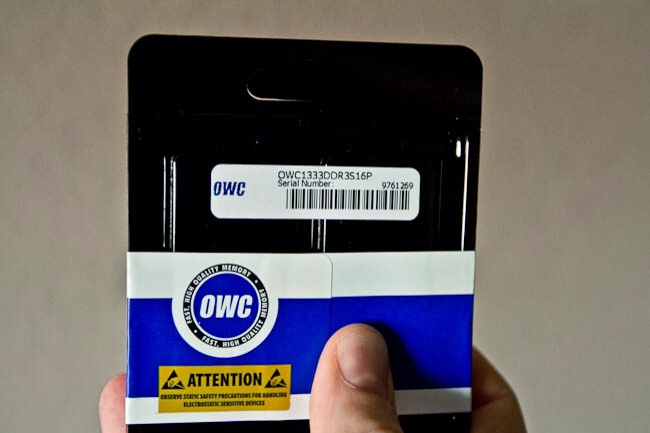
16.0GB (8GBx2) PC3-10600 DDR3 1333MHz SO-DIMM 204 Pin CL9 SO-DIM


You know, having built more PC machines than I care to remember, I think my 'fear' in doing RAM upgrades stems from those fateful salad days, when a RAM upgrade meant a number of things:


1) Is this really the proper RAM for this particular (OEM, non-OEM, generic/custom) motherboard;

2) Will I have to go into the BIOS and make changes?

3) Will the machine recognize this memory at all;

4) Will I have perpetual BSOD and wind up re-installing the old RAM again, wasting money and time. 


I'm sure many of you have been there, and despite the fact that we're now in 2012, I still get those same vibes every time I prepare for the inevitable 'upgrade'.


Well, I'm happy to say that the current offering from OWC gives your 2011 series MacBookPro an unbelievable boost in speed and power, one that you're likely to notice almost instantly…especially if you've got an internal SSD drive and, even moreso, if you work across multiple 64-bit Creative Suite applications (like Lightroom, Photoshop, Premiere Pro, After Effects and Adobe Media Encoder).


The two, 8GB sticks arrived in small, simple packaging in less than 24 hours. I placed the order around 4pm Central Time on Thursday, and literally had it in my hand before 1pm on Friday. Gotta love that.  Crack open the seal, and there, atop some pink foam, were the keys to my new editing bliss… <insert pics however you see fit>


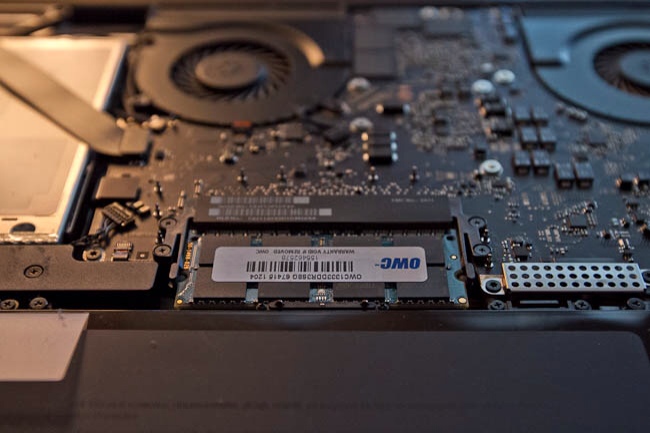
Curiously, or perhaps not-so-curiously absent were any kind of installation instructions. Again, I've done this for every MBP I've ever purchased, so I wasn't too concerned. A simple Google search yielded exactly what I needed, and just as I remembered…9 simple screws (for my 'early 2011 17" MBP) was all it took to reveal the RAM slots; pop it in, pop it out, you're done. Even as I began to remove the back cover, I thought to myself, "Do I have to ease it out? Any special tricks?" But again, it literally pops off, easily, and you just apply  a little pressure (so that the edges are flush) when you're replacing the screws. 


The key to doing this quickly is lining up those screws! I always place them, visually on the table, in their exact layout. Apple uses different size screws, so it's key that you return them where they belong. Not doing this, however, will lead to enormous frustration. I don't even want to go there!


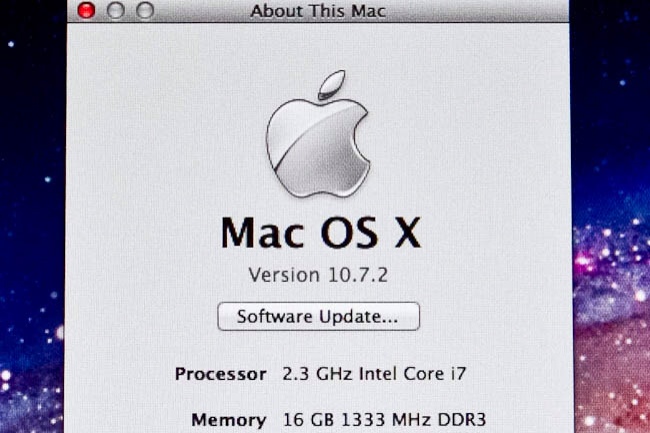
Within seconds of closing the back cover, I powered on the machine and literally, in about 5.5 seconds, I was greeted with the LogIn screen; a happy place to be! I logged in, quickly went to "About This Mac" and lo and behold, there it was….  I ran the machine for about 9 hours following the install, and everything seemed great. Fast, responsive, and ultimately, stable.  Today I'll be diving into some deep editing/rendering, so that'll be the more definitive comparison test (having spent the better part of the year working with 8GB).


Now, I wanted to share this little tidbit. I had ordered this RAM when it was first made available (or rather, 'announced') sometime last March.  In fact, it was my dear friend and fellow road-warrior Terry White that sent me the OWC link in the first place.  At the time, the 16GB RAM upgrade was selling for $1600 . Steep indeed…but for mobile video editing, it would be a game-changer and a no-brainer on my part. I quickly made my purchase and awaited the goods.  


Well, tragedy struck Japan, and the industry was immediately impacted by this unprecedented natural disaster. As such, I was immediately made aware by OWC that the part was 'on backorder' and would be shipping in approximately '6 days'.  A second email, about two weeks later indicated "20 days"; I received two more emails and one final communication at the end of April indicating, "Backordered Indefinitely".  Understandable, clearly…and I just assumed it wasn't meant to be. 


Now, my only complaint in this whole process was that OWC never contacted me again to let me know it was back in stock! And moreover, it was nearly 1/6 the cost! (with shipping, the total was approximately $266 USD). I found out, via several Twitter friends, that they were already using the 16GB upgrade and I had no idea it was even readily available.  Since it was OWC who ultimately cancelled my order, I would have thought they would have contacted me to let me know it was once again available. They didn't. So really, this is just a little 'wrist slap' to say, "Hey…I wanted to give you my money…and you could have had it sooner!" 


All in all, this was the best (and most smile-inducing) RAM upgrade I've ever done (this being my sixth or seventh MBP). Time will indeed tell, but from where I'm sitting, it's all looking up…and with 16GB of fast RAM…in my laptop. 


How I upgraded my MacBook Pro

500gb

It’s not unusal for me to go a couple of years without upgrading my main notebook, the MacBook Pro. As a matter of fact before getting the latest 15″ unibody, I had skipped the last two revs. The updates just weren’t significant enough for me to go through the hassle of upgrading. This time I timed it right and I love my “Late 2008 15″ MacBook Pro.” Granted there’s the Glossy Display debate, but I’ve gotten used to it and have no problem with it. Seeing how I will probably be using this computer for at least another 18 months (unless some major breakthroughs happen), I wanted to max it out. When I got it, it came with 4GB of RAM and a 320GB 7200 RPM drive. Although I knew that I would eventually want more hard drive space, I wanted to wait until the 500GB hard drives came in a 7200 RPM model instead of 5400 RPMs. Well that day is today!

Seagate 500GB 7200 RPM 2.5″ Drive and MORE RAM!

4gb

I checked with my good friends over at OWC and the NEW Seagate 500GB 7200 RPM 2.5″ Momentus drives were readily available. I thought the price was reasonable enough, so I ordered one. Since I was already going to be under the hood, I also wanted to take this opportunity to upgrade the RAM. Although Apple originally sold this MacBook Pro with a max of 4GB of RAM, it can actually address 6GB of RAM (the 17″ and the early 2009 models can do 8GB of RAM). I originally had two 2GB DIMMs installed, so this would mean replacing one of them with a 4GB DIMM to get to 6GB of RAM, which again is the max that this MacBook Pro will address. So I orded the 4GB DIMM also.

My installation procedure

I have 2-3 utilities that I rely on when it comes to upgrading to a new hard drive. If I’m upgrading to a faster drive of the same capacity or larger capacity, but not partioned I use CopyCatX. CopyCatX “duplicates” the drive to the new drive sector by sector. This is much faster than traditional cloning and creates an EXACT duplicate of the drive. The app has the technology to expand the duplicate to take into account the space available on a larger drive. However, if the original drive is partitioned AND the new drive is larger, you’ll end up with the difference in space as an unusable partition. So in my case since I have a BootCamp (Windows XP) partition AND I was going to a larger drive, using CopyCatX was out of the question.

I installed the new drive and the RAM

mbpopen

I took the cover off the bottom of my MacBook Pro and there it was! The battery and the hard drive are right there in plain sight. Asside from the original MacBook, this has got to be the most drive accessible notebook that Apple has ever created. All my previous drive upgrades were a pain in the neck. I was able to easily figure out how to take the drive out. It was actually only one very small phillips screw holding the bracket in place. I then had to remove the 4 pins from the drive itself that Apple uses to hold the drive in securely. These require a very small torx screw driver. Luckily, I had the necessary tools.

What I didn’t see was the RAM! Apple usually does it the other way around. Usually the RAM is in plain sight and the hard drive is buried. However, this time the RAM was no where to be found. Rather than guess at the location, I remembered seeing installation videos on the OWC site. So I went to another computer and watched the short clip to discover the the RAM was under the main cover which was held in place by 8 screws. The only thing I wasn’t sure about was did it matter if the new 4GB DIMM was in the lower slot or the upper slot. I didn’t think it would matter, so I put the 4GB DIMM in place of the 2GB DIMM that was in the upper slot. I then put it all back together.

6gbram

SuperDuper! was next

I took the original 320GB drive and put it in an external OWC Mercury On-The-Go Firewire 800 case and connected it. I also had my bootable backup drive. I decided that it would be cleaner to boot from the backup drive and clone the original drive to the new one. Since the 15″ MacBook Pro only has one Firewire 800 port, I had to daisy chain the two externa drives. Just to be on the safe side I plugged the OWC drive into the AC outlet to make sure there was enough power to run both external drives. I then ran Disk Utility from the backup drive to format the new internal drive. Next it was time to clone over the Mac partition onto the new drive. I fired up SuperDuper! and cloned over my Mac partition on my original 320GB drive (the drive I just took out) onto the new drive. This clone took about 3.5 hours for close to 240GB of data. I then booted from the New drive and everything was working so far.

Time to run the BootCamp Assistant and Winclone

winclone

Now that I was booted from the new drive it was time to partition it again for BootCamp. I fired up the BootCamp Assistant and partitioned the drive slightly larger than the old partition I had (64GBs for the new one). Now in order to get my old Windows XP partiton over to the new partition I had to make an image of it first using Winclone. Winclone is a Mac app that lets you backup and restore a Windows partition. Since I had plenty of room on my new internal drive, I fired up Winclone and imaged my old partition (from the now external 320GB drive). The compressed image was only 24.51 GBs. I’ll move it another drive when I’m done as a backup. Once the image was completed, I click right over to the restore tab and restored it to the NEW BootCamp partition that I had created earlier.

The Bottom Line

You can never have too much RAM and too much storage. If you’re going to use your existing computer for a while, then having more room and the capacity to run more/larger apps is always welcomed. Also since we’re going to see more and more 64 bit apps coming in the future, going beyond 4GB of RAM is going to be worth it. I use Adobe Photoshop Lightroom 2 every day and it’s already 64 bit enabled. All I had to do was do a Get Info on it and turn off the “Open in 32bit mode” checkbox. I feel that this upgrade was worth the time and money.

64bitlr1

64bitlr2

The upgrades cost:

500GB 2.5″ 7200 RPM Seagate Momentus Drive: $157.99

4GB DIMM $329.99.

If you need an external drive case to put your old drive in, this is the Firewire 800 one I used. I already had it, so I didn’t have to buy it for this job.  It’s $79.99. If you don’t care about Firewire 800, they make both Firewire 400 ($49.99) and USB 2.0 ($27.95) cases that cost less. They also sell the drive and cases as bundles. So you might save a few bucks buying them together.

Also if you don’t have the tools, you can get this installation tool kit for $17.95

I’ve dealt with OWC for years and never had a problem. Great company!