Homeworks Internet Controllable Radio Thermostat

Programmable thermostats are certainly not a new thing. I’ve had one in my home for several years. They allow you to lower your energy costs by turning the temperature up/down automatically at times throughout the day/night where you’re either not home or wouldn’t notice as much because you’re asleep. You can set these times and days of the week to match your daily routine/schedule. While that’s all well and good, it doesn’t help much in a situation where you don’t have a daily routine. For example, in my studio I’m not there on any kind of regular schedule. Some days I could be there every day for several days in a row and other times I could be gone for weeks at a time. In the past I would simply put the thermostat on the lowest setting before I leave and turn it back up when I arrive. There have also been times where I’ve forgotten to turn it down and the heat was going for no reason for a day or two with no one there. I started looking for a better solution.

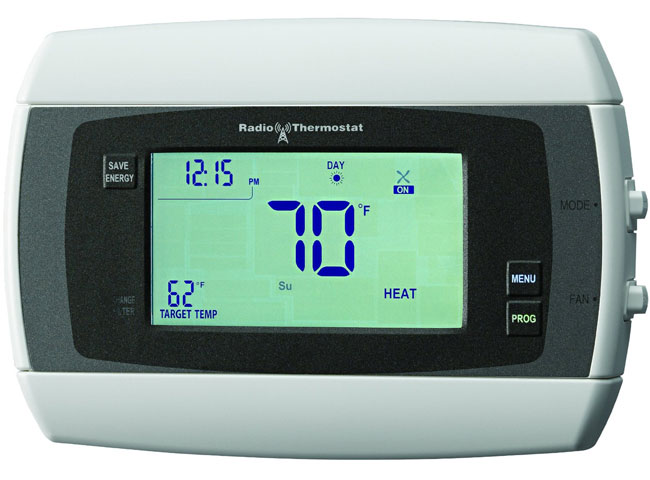
The Homeworks Radio Thermostat was the answer

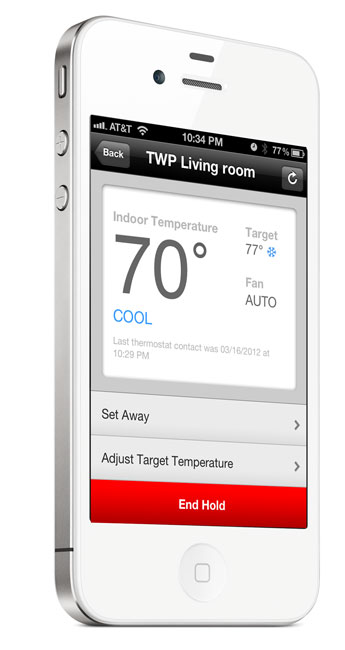
This thermostat is programmable like all the others, but it also allows you to control it via an App on your smartphone or tablet over the internet or locally via WiFi! With the App I can see the current temperature of the studio AND adjust the thermostat remotely at any time. If I forget to adjust it when I leave, no problem as I can now adjust it from anywhere in the world. If I want to turn the air conditioning on to cool it down before I arrive, I just pull out my iPhone and adjust the thermostat on my way in. So far this device and App have worked really well.

Installation – While I have installed thermostats myself in the past, I decided to let my electrician do it since I had him out working on other things anyway. It didn’t take him long to wire it up. Once It was installed all I had to do was set it up via the iOS App (works on Android too) and connect it to my WiFi network and pair to my account. From that point I could control it from my iPhone or iPad inside the building or via the internet from anywhere. The only thing that I can’t seem to figure out how to do is to switch it from Heat to Cool or to Auto from the App. I can do this from the panel itself, but not remotely. Otherwise, I have the control I need from the App.

You can get the Homeworks Radio Thermostat here for about $107.

You can get the App for free here from the iTunes

Video Review: Wacom Intuos 5

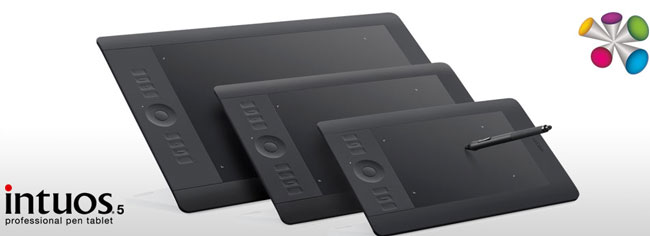
I’ve been a user and fan of the Wacom line of graphics tablets for years. The New Intuos 5 exceeds my expectations.

See why the NEW Wacom Intuos 5 Rocks!


You can get the NEW Wacom Intuos 5 starting at $212.99 (list $229) here

Get the OPTIONAL wireless kit here for $39.

Octava 3 Port HD Switch to the Rescue

When I named my top favorite gadgets of 2011, I also declared my Sony Google TV as the most disappointing gadget that I bought in 2011. One of the things that annoys me the most when I'm just watching TV on it is the overly complicated Input Selection implementation. Instead of simply pressing a input button and cycling through the available inputs, you get a menu on screen and then you have to cycle to the one you want and worse press the Select button to make your choice. While this isn't the end of the world using the supplied remote, it becomes a pain in the butt when trying to train universal remotes like my Harmony One or Harmony Link. The benefit of Harmony remotes is that you can press one button for the "Activity" you want and the remote will turn on/off all the appropriate gear and switch inputs. I was actually considering getting rid of this TV and replacing it with one that has regular Input selections. That's when I remembered my Octava HDMI 4×1 with Toslink switch that I use in my home theater. I wondered if Octava had an HDMI switch that would solve my problem in the room with the Sony Google TV and they did! It's their 3 Port HD Switch. Like all of their HDMI switches, it supports the latest HDMI standards, CDP, 1080p resolution and high speed for things like 3D TVs and Blu-ray players. It also come with an IR remote.

It works perfectly

I ordered the 3 Port HD Switch and got it with a Free HDMI cable. I set it up so that the output goes to the HDMI 1 port on the TV. I connected my TiVo Premiere XL to HDMI IN 1, Apple TV 2 to HDMI IN 2 and Sony Blu-ray player to HDMI IN 3. I had to reconfigure my Harmony One and Hamony Link to know about the Octava Switch. Now I can press one button to switch Activities and the Octava Switch switches to the right source as it should!

Normally I would only use the Octava HDMI switches when I have a shortage of HDMI ports, but this time it solved another problem.

You can learn about the Octava HDMI Switches here.

Review: RCA USB Wall Plate Charger


Last year I reviewed the U-Socket by Fastmac. A year later RCA is here with something similar. If you're like me you have more and more gadgets and mobile devices that charge via USB. With each new device you either get a new USB charger and/or USB cable. While you can usually use any of these chargers to charge any of your devices, it's nice having a "built-in" USB charger whenever possible. This way you can pack your favorite USB charger in your luggage/computer bag and just leave it there for travel. 


What's the USB Wall Plate Charger

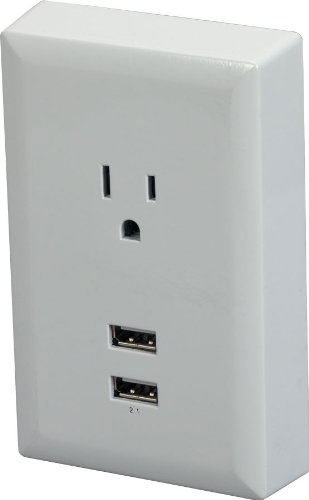
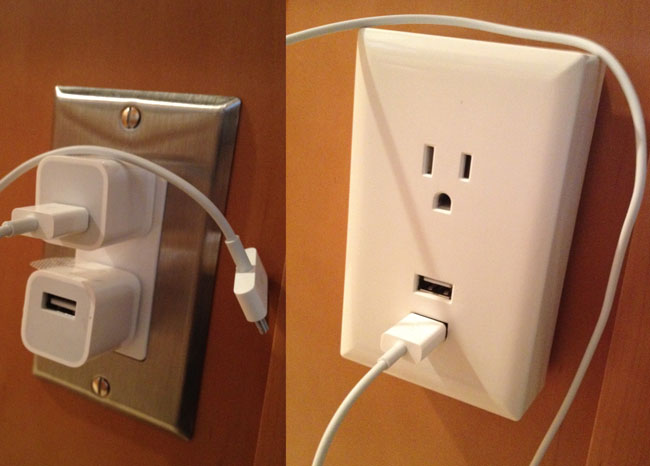
The concept is simple. You plug this wall plate charger into any existing outlet and you get an AC plug plus two USB charging ports. The bottom one is higher powered 1.2 AMP for charging tablets such as the iPad. 


What are the Pros?

  • Easy to install – just plug it in
  • Gives you two USB ports (one high powered one) 
  • Still lets you plug in a standard AC plug even with a power brick without blocking the ports


What are the Cons?

  • You lose an AC plug (you go from 2 to 1)
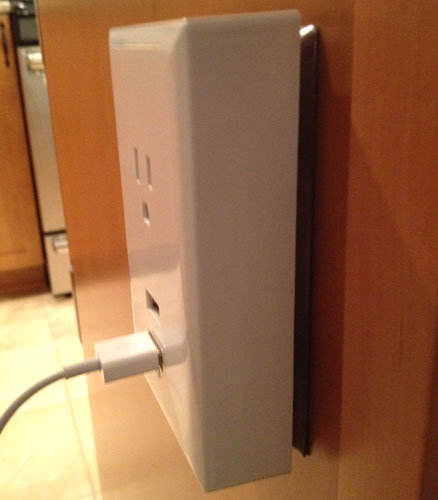
  • It sticks out about an inch
  • You only get one higher powered USB port to charge things like tablets, instead of two


How is this better  or different than the U-Socket?

The U-Socket (pictured above) is more of a permanent install. You or your electrician (please use an electrician if you don't know what you're doing) replaces your existing wall plug with a U-Socket and you get the two AC plugs plus two high speed USB charging ports. Therefore the RCA Wall Plate Charger is only better in that you can just plug it in and remove it whenever you want. You can also take it with you on a trip and use it in places like hotels or vacation homes. 


The Bottom Line

I still prefer the U-Socket over the RCA Wall Charger. However, for something quick and easy it's hard to beat the RCA Wall Charger for its simple "plug-it-in" approach. I wish that it either didn't stick out so far or if it's going to stick out an inch then it might as well have the USB ports on the side. Also not sure why you have to give up an AC plug. Seems like at a minimum they could have done a pass-through to the existing one (I don't have an electrical engineering degree, so I'm not sure what's possible). I would recommend the RCA Wall Charger for anyone that needs an easy or temporary USB charging solution. It's available in either white or almond here for about $15.

Lastly if you're going to have something that sticks out about an inch, then you might consider this alternative one.

Lightroom 4 Beta – Enhancements

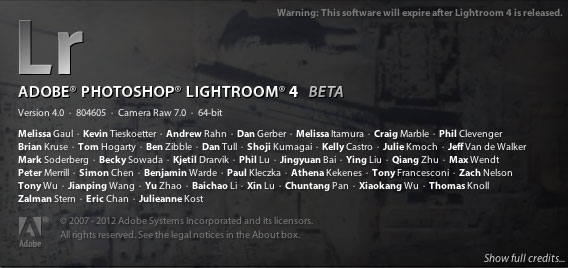
My colleague Julieanne Kost has been doing a daily series on her blog where she's been outlining the small, but important enhancements in Lightroom 4 that could easily be overlooked. These are the kind of enhancements that would probably never make the brochure, but will impact our use of Lightroom 4 everyday. I thought she did such a fantastic job that I copied them and posted them below. 🙂 However, you shouldn't let that stop you from checking out her blog directly. She has a TON of Lightroom and Photoshop information there. See Julieanne's blog here.


Enhancements to the Library Module

• In the Folder panel, you can now move and/or delete multiple folders at one time.

• In the Collection panel, Option -drag (Mac) | Alt -drag (Win) a collection to duplicate it. More specifically, if the collection is loose (it’s not in a Collection Set), Option -drag (Mac) | Alt -drag (Win) until a thicker line appear between two items (indicating that the collection will be duplicated), and release. To duplicate a collection within a Collection Set or to duplicate the collection into a different Collection Set, Option -drag (Mac) | Alt -drag (Win) the collection on top of the Collection Set icon (watch for the highlight) and release.

• Stacking is now available in Collections.

• At the top of the Filmstrip bar, the selected image’s folder or collection is displayed. (This is really handy when in other modules.)

• The Flag attribute is now global.

Terry's Soapbox WARNING! – If anyone has ever attended one of my Lightroom sessions at Photoshop World or other workshops you'll know that I've made it a point to say that "I didn't like the way Flags worked in LR 2 and LR 3." If we go back to LR 1 when you flagged an image with a Pick Flag, that flag would be present no matter where that image went (say you dragged it into a collection for example). In LR 2 (I think it was 2)  the Pick flag behavior got changed so that the Picks would only be present in the location that you assigned them. For example if you Flagged an image in a folder and then dragged that same image to a collection the Pick Flag would NOT be there in the collection. I thought this was a bug at first and complained about it to the LR team repeatedly. Eventually someone explained to me that this "new" behavior was intentional and that Picks should be local. I got the logic of this as it gave the user the ability to have Picks in one place that were different than another place. Although I got it, I never really liked it! I always felt that a Pick is a Pick and that at a minimum it should be a preference "Picks are Local or Global". For this reason I started using Color Labels more because they were Global! It would appear that this decision has been reversed in Lightroom 4 and now Picks are back to being Global again ala LR 1.  Woot! …stepping down from my soapbox now.

• You can filter and/or search images based on their Metadata status. Images will be assigned one of several different statuses including Changed on Disk, Conflict Detected, Has Been Changed, Unknown and/or Up to Date).

• You can also search/filter on Map Locations and GPS Data (GPS Location or No GPS Location).

• That folder structure that you carefully crafted in the Develop module to hold your presets is now maintained both in the Import dialog box as well as the Quick Develop panel.


Enhancements to the Develop Module

• Snapshots now auto name with a time/date stamp.

• The White Balance Selector Tool’s sample area is dependent on zoom level. (Zoom in to sample a smaller area.)

• Noise reduction adjustments are always displayed (regardless of the zoom viewed).

• The Navigator panels in both the Library and Develop Module have two new options for zooming 1:8 and 1:16.

• This one isn’t new, but when using the Adjustment Brush, clicking on the disclosure triangle to the right of “Effect” displays an amount slider to increase/decrease all of the adjustments applied to that adjustment at one time.


Enhancements in the Output Modules

• Settings in the output modules (Book, Slideshow, Print, and Web) are “sticky”. When you leave a module and come back to it – even if you change the folder of images – the settings will remain as they were the last time you visited the module. This is an excellent addition if you’re working with one set of photographs and then move to another set of photographs and want the same output settings.

• In order to save output settings with a set of photographs, click the Create Saved Book, Slideshow, Print etc. button in the bar at the top of the creation’s preview area.

• Flash Galleries in the Web Module are now color managed.


Enhancements to the Export Options

• When exporting files, in the Metadata section, you can choose to Remove Location Information. Note: this option is only available when choosing either “All” or “All Except Camera and Camera Raw Information” as it doesn’t make sense with the other options.

• It is now possible to export images directly to Adobe Revel to be used on your mobile phone or tablet device. Use the “Export To” pull-down menu at the top of the Export dialog.

• Export to DVD is now available on 64-bit Windows machines.

• In the External Editing Preferences, you can now choose to “Stack with Original”. Or not. : )


Enhancements to Publish Services


• In the Lightroom 4 Beta, only the Facebook and Flickr plug-ins are installed in the Publish Services panel by default. However a button has been added directly underneath them to easily “Find More Services Online”. Although it might seem like added work to have to install a plug in, there is an advantage – if a plug-in is not baked into the application, it can be updated by the developer at any time.

• Publish Services (collections) can now include video.

• After making small changes to images (such as adding a keyword  etc.) in Publish Services (collections), you may not want to republish the images, If you do not want to republish, simply select the images and Control -click (Mac) / Right Mouse -click (Win) and select  “Mark as Up-To-Date”.


Additional Preferences


• On Mac, in the General preferences, you can now choose your preferred Language.

• Under Presets, several features have options to Restore Presets and Templates to their defaults. This may be very useful in teaching environments.

• In the External Editing preferences, you can now choose to “Stack with original”.

• Under the File Handling Preferences, be sure to keep the “Embed Fast Load Data” checked on for DNG. This can enable DNG files to load up to 8x faster in the Develop module and will only cost you approximately 200K per image!


You can download your copy of the Lightroom 4 Public Beta here for FREE

Continue reading “Lightroom 4 Beta – Enhancements”
Overpriced?

Rarely will you hear me complain about the price of anything. I feel that companies and individuals have the right to charge whatever they want and we as consumers have the right to buy it or not. Ultimately if no one buys a product then the company will either fail or adjust accordingly. I saw this product recently and I thought "COOL!" That was until I reached the price point. My eyes opened wide for a bit, but then I remembered my rule. Don't complain. You don't know what it cost to develop the product?You don't know what it cost to manufacturer the product? You don't know what ti cost to distribute the product, etc. 


How much would you pay for the world's only Flash Drive for iOS Devices?

A nifty product for sure. On one end it has a standard USB plug like any other flash/thumb drive and on the the other end it has a 30pin dock connector. Plug it into your computer, copy files to it and then plug it into your iPad, iPhone or iPod touch and copy files from it using their App. Sounds great! I could actually see using one of these from time to time especially when getting files from others. However, for me I can't quite justify the price (starting at $99.95 for 8GB). I can get an 8GB flash drive for $8 all day long. I can even get a 32GB flash drive for $27. Wait, that's not a fair comparison. These low priced thumb drives can't plug into your iDevices. Right! OK, I can sign up for a free Dropbox.com account and transfer up to 2GB's of files back and forth all day long for Free between my computer and iDevices. Wait, that's not really fair either. You need an internet connection to make that work and if you're wanting files from someone else then you got to do some setup work on their end to get the files into your Dropbox. True! Well can't you just download an App that lets you transfer files between computer and iDevices wirelessly? Yep, there are tons of them and here's a cool one called Air Sharing. Alas, it's not as simple as a physical flash drive either and these apps either require an internet connection, WiFi connection or Bluetooth connection. Yes, it would appear that this is a unique product offering a unique advantage and perhaps it can command a uniquely high price too. This product will be especially attractive to those who are now carrying their iPad most of the time instead of a laptop. The market will ultimately decide!

You can get an iFlashDrive starting at $99.95 for 8GB here.

Yes, I pre-ordered a Nikon D4!

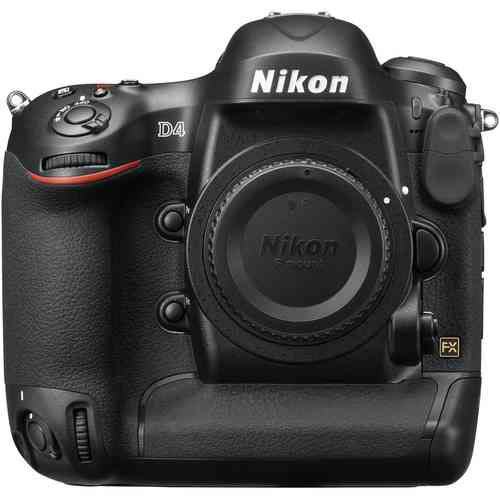
Usually when something big in tech or photography happens my friends start asking me "did you order one?" This time the big news is the newly announced Nikon D4 DSLR camera. Let me start by saying that I've always had Nikon D3 envy, but just couldn't justify the price. I don't need the high speed because I don't shoot sports. My D700 has served me quite well and I really have no complaints with it. My desire to replace it only stems from the desire of having a full-frame camera that also does video. I have a Nikon D7000 for travel and currently a D5100 in studio for doing video. However, I find that I don't shoot much video with it because what I realized is that the times I want to shoot video is usually while I'm shooting stills. This would mean putting down my D700 and walking over to my D5100 and shooting video. In reality the moment would then be lost that I wanted to capture on video. What I want is one camera that does both. I've been waiting for the D700 replacement (the rumored D800). However, there's one problem with the D800 and that is according to ALL the rumors it will be a 38MP camera! While I'm assuming that Nikon will allow you to "turn down" the megapixel setting to a lesser resolution, it would mean that for me 99.9% of the time I would be shooting at that lower resolution as I have no desire/need to process or house 38MP RAW files. Since the D4 is here (shipping in February) I started looking at it as the answer to my quest. 


I don't need a $6,000 body!

Let me be the first to say/admit that I DON'T NEED A $6,000 CAMERA BODY! Nope, not on any level. It won't in any way positively affect my photography enough to offset the cost. The rumored D800 will likely be half the price and more in line with the D700 pricing that I'm used to. With that said, I'm going through with it and have ordered a D4 anyway. Another thing besides all the D4 goodness and video capabilities that intrigues me is the New Nikon WT5 Wireless Transmitter. Not only do I have a desire for a full-frame Nikon 1080p video capable DSLR, but I definitely have a strong desire for getting fast wireless tethered shooting! This video really got my attention and it's probably what pushed me over the edge:

httpv://www.youtube.com/watch?v=d0DnEoqm-wc


I'm doing it anyway! – FAQ

Q. Couldn't you just wait and see what the D800 really has to offer and make your decision then?

A. Asking me that question shows you don't really know me. I rarely wait to see what's coming if there is something in front of me that does everything I want.


Q. Will the D4 make you better photographer?

A. Nope


Q. Is video really that important to you? 

A. Hmmm… yep.


Q. Are you going to sell your D700

A. Normally that would be the plan, but I've decided at least for now to keep the D700 as my backup body in studio. I may change my mind down the road. However, since I won't have any need for the D5100 anymore my buddy has already called dibs on it.


Q. Don't you get all your gear for free anyway?

A. LOL, you don't really think that do you? Um no! I wish!


Q. You're not even a full-time photographer. Isn't this overkill.

A. Yep and your point?


Q. I thought photography was just your hobby and you do it for fun.

A. It is and I like to have a LOT of fun.


Q. Couldn't you find a better use for that money?

A. Yep. Life is short, might as well get what you want when you can.


Q. I don't really see how you can justify a D4 given that you don't make your living as a photographer.

A. I know, right?


Q. If you couldn't justify a D3 then how can you justify a D4?

A. Good question. The D3 never offered enough features over the D700 that I would use to justify the difference in price. The D4 does against the not yet announced D800.


Q. There's no reasoning with you on this purchase is there?

A. Not really.


Q. Where did you pre-order it from?

A. Right here at B&H Photo.

Solmeta Outs a New N3 GPS for Nikon DSLRs


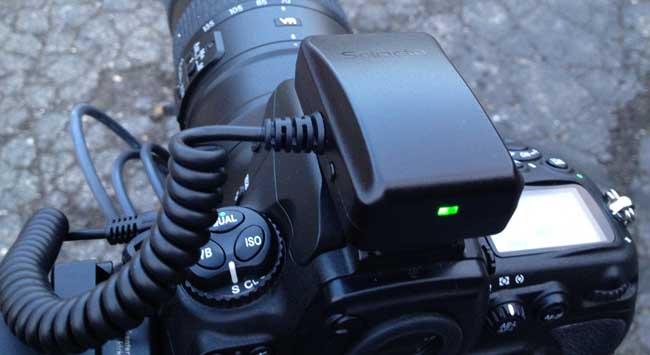
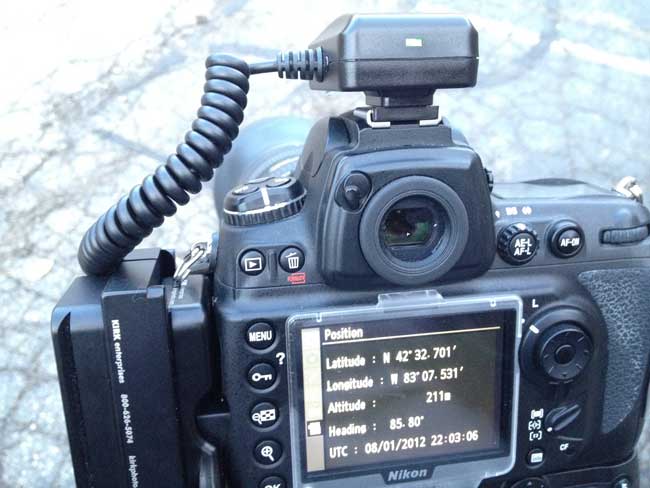
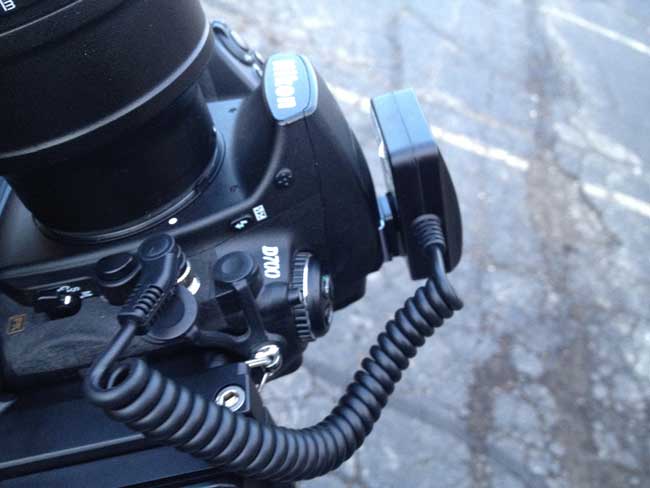
It's been a while since I did my Nikon GPS Smack Down. Back then I chose the Solmeta N2 as the winner for overall best GPS for Nikon DSLRs. Since that time Solemta has come out with another new model, the N3 and I got a chance to try one out. Like previous model the Solmeta N3 plugs right into your compatible Nikon DSLR and geotags (adds longitude/latitude and heading) your photos as you take them (both JPG and RAW support). However, unlike the previous model you now have to choose between the one for professional DSLRs like the D700, D3, D4, etc. and the prosumer models like the D5100, D7000, etc. The reason you have to choose is because the interface cable is now hardwired in. This has it's advantages and disadvantages. The advantage is that the connection is perfectly secure. The N2 allows you to plug in a cable to match your camera, but the connection could easily get damaged if you bumped/hit it the wrong way. The new connection is very well designed. The disadvantage (at least for me) is that if you have multiple camera bodies of different types you'll now need one of each type to go with your camera as opposed to just ordering the additional cable. This will only affect a small percentage of people, but it is a slight step down in convenience for me. Another small but notable cable improvement is that the cable is now coiled instead of being too long or too short. It will be just right for however you attach your GPS (in the hotshoe or on the strap). 


Faster and more accurate

This model uses a 3-axis electronic compass like their top of the line model the Geotagger Pro. The N2 uses a 2 axis compass. The first thing that impressed me was how fast it was ready to go. By the time I tuned the camera on and was ready to snap the 1st picture it had already locked on to a satellite and was providing the location info to my Nikon D700. The other big difference is that this model gets its power directly from the camera. The other models have internal batteries that you charge and then only after they run down will it get power from the camera. While having a built-in battery does provide for potentially longer shooting, the N3 is designed to use less power, sleep and take advantage of the Nikon GPS power saving features. I haven't had it long enough to compare battery life, but I did notice that it went to sleep a few seconds after I turned the camera off and was ready almost instantly when I turned the camera back on.

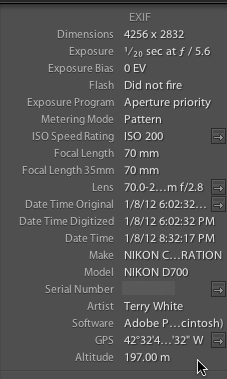
The GPS data shows in Lightroom 3 and allows you to click the arrow/button to take you to that spot on Google Maps.


New Indoor Fixed Mode

GPS units work best when used outside, but if you are going in and out of buildings a GPS that only works outside isn't much use to you. The N3 has an Indoor Fixed Mode that will use you last known location to continue tagging photos as you take them inside.


Built-in Remote Trigger Support

One of the usual concerns pro photographers have is that the model for the pro cameras use the 10 pin terminal port. That port is also often used for cable releases (remotes). While Solmeta does sell a Y splitter cable so that you can use your existing cable release, the also have a port on the side for use with a basic remote too.


The Bottom Line

I have mixed feelings about this model. I'm happy with the speed and accuracy, but I'm less happy about needing a specific model for your camera. Luckily the N2 and Geotagger Pro are still available as options. Solmeta has positioned the N3 right between the Pro and N2 and it's priced at $189. You can't go wrong with any of these models as they are all solid performers. 

Learn more or order here.

Review: SplashID Key Safe


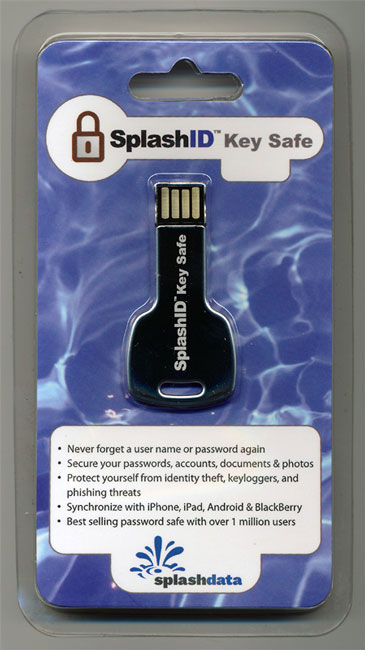
Lately I've become a bit of a password security freak. I've been proactively changing passwords and PINs to be more secure and to make sure that I'm not using the same password in multiple places. My goto App for managing all my passwords is 1Password. I love this Application on both Mac OS and iOS. Recently I became aware of SplashID Key Safe. SplashID Key Safe is a hardware based 4GB thumb drive that offers an "unbreakable" AES and 256-bit Blowfish encryption, which provides proven protection for safe password management. The Key Safe is both Mac and Windows compatible.


Set it up


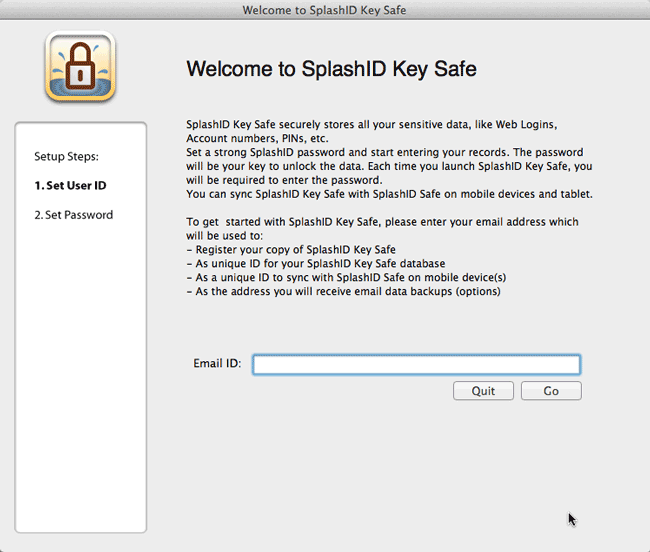
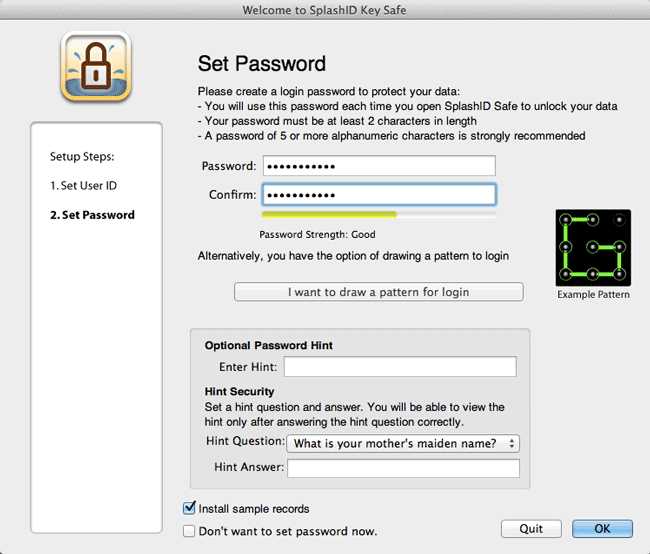
Once you plug it into your computer you run the appropriate setup app for your platform. You then create a secure password so that you can access your data going forward. It even offers an optional cool Pattern based password where you use your mouse to draw a pattern that you've created to connect the dots and unlock the key. This definitely beats having to remember a long complicated password and keying it in each time. Once you've set up your credentials you can then begin the process of entering all your sensitive data. Enter it all. Anything from website logins to credit card numbers and bank accounts to software serial numbers to frequent flyer info. Since it is a thumb drive you can also securely attach files to any record from your computer.


Regular Use

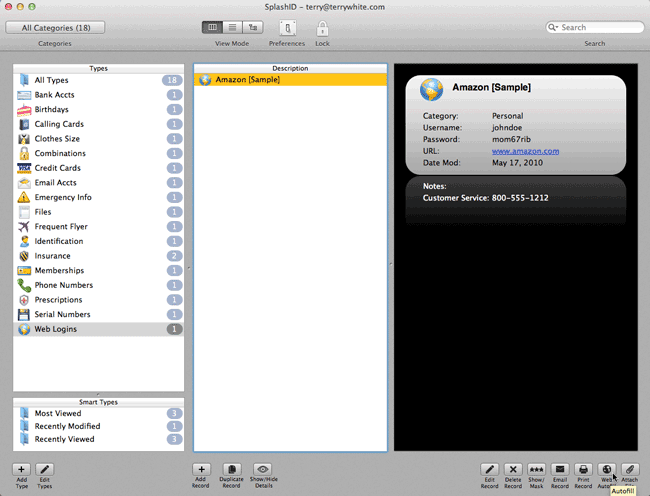
Once you've got it all setup you can plug it into to any Mac or Windows PC and bring up your passwords and files. If you want to log onto a secure website using a saved password you can bring up that Web login and go right to the URL. From there you can copy and paste in the user name and password when prompted. You can also use the built-in Autofill feature so that it fills in this info for you. As a 1Password user the 1st thing I looked for was a way to import my 1Password data in and low and behold there's a 1Password Import right in the File Menu.


Sync with your Mobile Device

Spashdata also makes mobile versions of their App for iOS, Android, Blackberry, Windows Mobile and WebOS. That pretty much covers every major mobile device being sold today. I downloaded the iOS Version. See my review here.


The Bottom Line

If you're looking for a hardware solution to manage your passwords and take them with you where ever you go this is it. If you're already a 1Password user then there probably isn't a big reason to switch other than having the ability to carry your passwords and files on a 4GB thumb drive. Either way, you need to think more about securing your personal information in these times of hackers and identity thieves. You can get the SplashID Key Safe for $29.95 here from their site.

Best of 2011: My Top 10 Gadget Picks

Happy New Year Everyone! 2011 was a great year for me and I look forward to 2012. While I did have a great year, I didn't really get a ton of memorable gadgets. As I sit here thinking about my Top 10 Picks and I look back at the last two years of picks, many are still the same or simply updated versions of ones before. However, I did get a couple of cool things this year that are new and do stand out. Here are My Favorite Gadgets of 2011:


The iPhone 4s

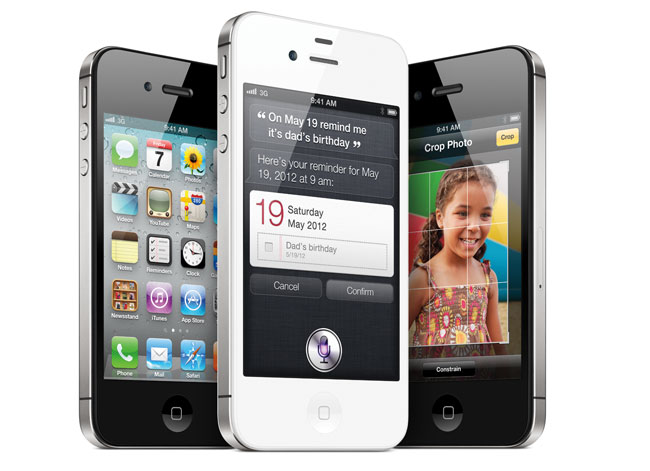
This is probably my most used gadget and while the iPhone 4 didn't make my list last year, the iPhone 4s has been a blast. I can't believe how much I use Siri day to day as well as the much improved camera. What really makes this all sing is iOS 5 and the faster A5 processor.

Get the iPhone 4s here.

Also see my "25 Fun Things To Ask Siri" post.


Rouge Flashbenders

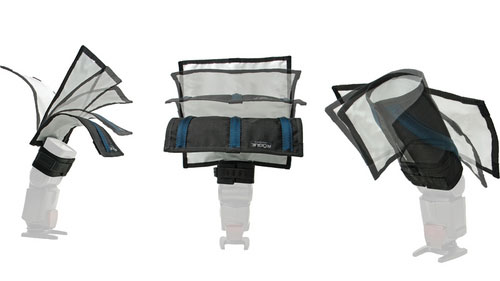
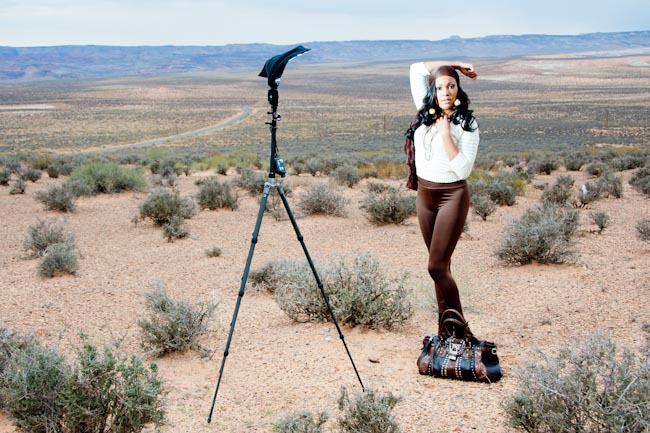
I'm surprised by how much I've been using these little gems all year. While I certainly love having a nice softbox to shoot with, when I travel I often just don't have the room to pack a ton of gear. That's why the Rouge Flashbenders are in my Top 10. They're inexpensive, easy to travel with and produce great results for speedlight photography.

See my original review here.

You can get the Rogue FlashBenders (3 in a set) here from B&H or individually Large, Small, or Bounce Card/Flag. My favorites are the Large and Bounce Card/Flag.


Scottevest

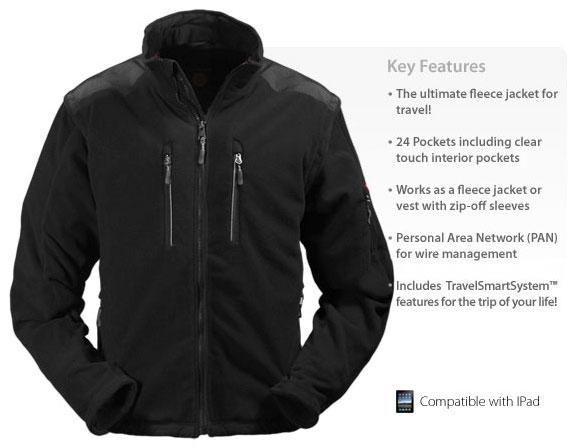
The Scottevest is my jacket of choice when I travel. It allows me to have all kinds of mobile gadgets in my pockets and easily serves as my 3rd carry-on on the plane. 🙂

See my original review here.

See the Scottevest line of apparel here.

Continue reading “Best of 2011: My Top 10 Gadget Picks”