Best USB 3.0 Hub for Travel

Satechi-USB3.0-hub

Back in 2012 I did a review of what I consider to this day to be The Best USB 3.0 Hub. I still have this hub on my desk to this date with zero problems with it. It just works! While this USB 3.0 hub is great, it’s a bit too large for my travel tastes. Yes they do make this 4 port version but it’s still larger than I wanted for travel. The big decision you have to make when going with a travel USB 3.0 Hub is whether or not you want/need a powered hub or not. Obviously a powered hub is the way to go when you have the ability to plug it in to a power supply and you don’t mind carrying yet one more power supply in your bag. However, USB 3.0 offers more juice than USB 2.0 does. Therefore you may be able to get by with a self powered hub especially for occasional use during travel. When I’m using my MacBook Pro or MacBook Air on the road, I’m usually in need of one extra port. I usually have my Wacom Intuos Pro tablet plugged in and an external USB 3.0 hard drive. At that point I may need to plug in a document camera/scanner or a Lightning cable to sync/copy something from my iPhone or iPad.  Or I could simply need to plug in a thumb/flash drive to copy a quick file. These are the kinds of things I need to do via USB 3.0 on the road from time to time. The hard drive can be plugged into Thunderbolt. That frees up the USB port if needed, but not all of my portable external drives are Thunderbolt equipped.

I went with this portable USB 3.0 Hub

satechi-USB_3.0_hub_with_harddrive

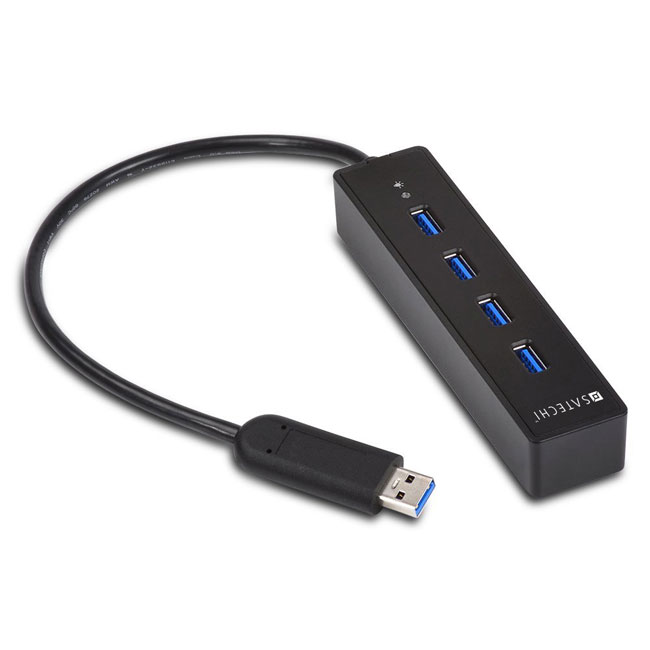
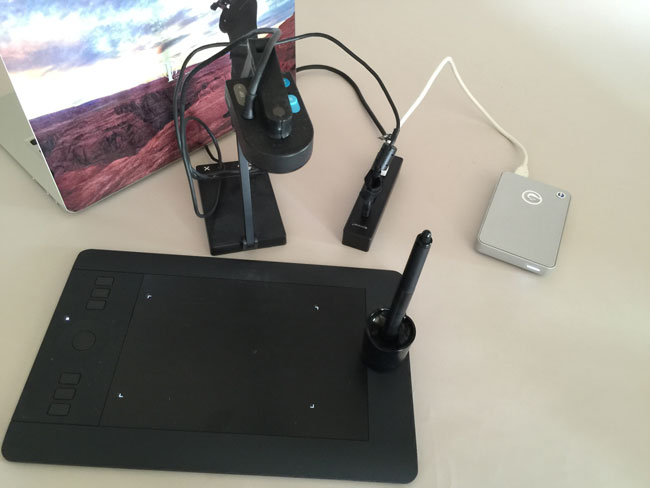
Although Anker makes this 4 port USB 3.0 Hub, I went with this Satechi 4 port USB 3.0 Hub. It seemed to have high ratings across the board on multiple sites. I havent’ been disappointed as the Satechi 4 Port USB 3.0 Hub has been GREAT!. It performs as advertised as long as you keep in mind that it’s NOT a powered hub. So let’s get the rules of using a bus powered hub out of the way. First off if you plug in too many devices that require USB power you will likely run into issues where the devices may not work or may not work at their top USB 3.0 speed. So when I want to use a bus powered USB 3.0 hard drive I plug the hub into my computer first and then I plug in the hard drive. Lastly I plug in any slower devices. If you stick to these rules (plug in the hub first, and the most power hungry devices next) then you’ll be more successful. I was able to easily plug in my USB 3.0 G-Tech hard drive, and my Wacom wireless module and lastly my Ziggy document camera with one port on the hub to spare. This is likely more than I will actually use on a regular basis, but I wanted to test my worst case scenario. Also keep in mind that I have one more available USB 3.0 powered port on my MacBook Pro/Air. With this Hub I could easily have two external bus powered hard drives  (one in the USB 3.0 hub and the other in the built-in port) and still have other ports available for less power hungry devices. Since I only travel with three external hard drives on a regular basis, this is exactly what I needed as I never need to plug in more than two at a time and If for some strange reason I need all three, I can plug at least one of them in via Thunderbolt.

The Bottom Line

If you need a powered USB 3.0 Hub for travel, then you should probably get this one. However, if you’re looking for a smaller one that can be used even if you don’t have an available AC power port nearby or you don’t want to carry one more power brick, then you could go with this Satechi 4 Port USB 3.0 Hub and get the extra ports you need.


Apple Pay First Impressions

apple-pay-iPhone-6-plus

Sadly it seems pretty common place these days to hear of big companies being hacked and having thousands, if not millions of credit card numbers stolen and resold. When Apple announced Apple Pay, I was very interested to say the least. The idea of a payment system that breaks away from all the traditional pitfalls of credit/debit card payments is something that we can all appreciate. The concept behind Apple Pay is simple. If you have an iPhone 6 or iPhone 6 Plus then you have the necessary hardware (NFC – near field communications) to allow for wireless transmission of data from your phone to a payment terminal at the cash register. However, instead of sending your credit card number, name, phone number, email address and card ID, a token is sent instead. The token itself is USELESS to hackers. Therefore if the merchant is hacked they never had your credit card number or information about you to lose. Sign me up!

Setting up Apple Pay

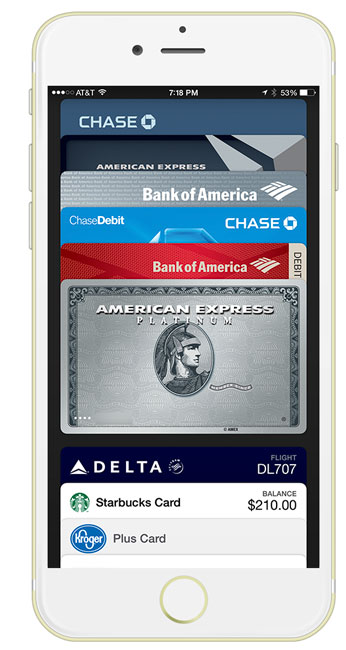
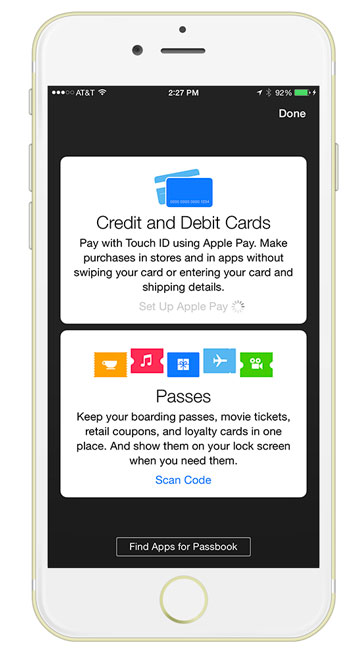
setup-apple-pay

This past Monday iOS 8.1 was released which allowed for Apple Pay to be setup on the iPhone 6 and iPhone 6 Plus. The setup process is very easy. Apple Pay is now a part of Passbook on your iPhone. First off if you have a credit/debit card on file with your Apple ID, you can immediately add it. All you’ll need is the card ID from the back for verification. You can then proceed to add additional cards by simply hitting the + sign and either using the built-in camera to OCR the card info or you can key it in manually. The camera worked for all but one of my cards. I was able to easily add four additional cards. The only one that gave me trouble was a Chase Slate credit card. While the card was easily added, I had to call them to actually activate it for Apple Pay. The number displayed during the setup process and I was able to tap and call it right from the Apple Pay area of Passbook. It took three calls as I was disconnected twice to get through the process. Actually I ended up deleting that card and re-adding it and it was then approved immediately.


Using Apple Pay with other Apps on your iPhone

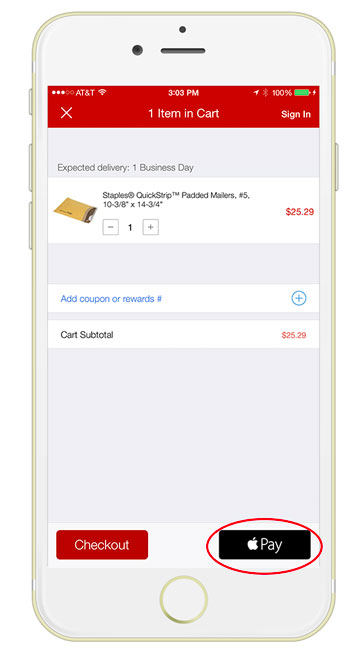
apple-pay-staples

Although I could have gotten in my car and headed out to one of the merchants that supports Apple Pay, I decided to test it first right from my office chair by placing an online order. Several apps got updated on Monday including Staples, Target, Uber, Apple Store, Hotel Tonight, Groupon, Open Table and others. Since there was an office supply item I needed I decided to order it with the Staples app and pay with Apple Pay. I fired up the Staples app and searched for the the item I wanted. I added it to my cart and tapped check out. Once I got to the checkout screen I had the option of either signing in to my Staples account, checking out as a guest or tapping the Apple Pay button. Once I tapped the Apple Pay button I was able to then choose which card I wanted to use, which address I wanted to ship my order to and which phone number and email address I wanted to use for shipping the order. I later found that in the Apple Pay settings in iOS 8.1 you can set all the defaults you want to use. I tapped pay and put my finger on the finger print scanner and that was it. My order was placed. I didn’t have to key anything in. It was awesome as online ordering on a phone can be a pain in the butt.


Using Apple Pay at a retail location.

apple-pay-boa

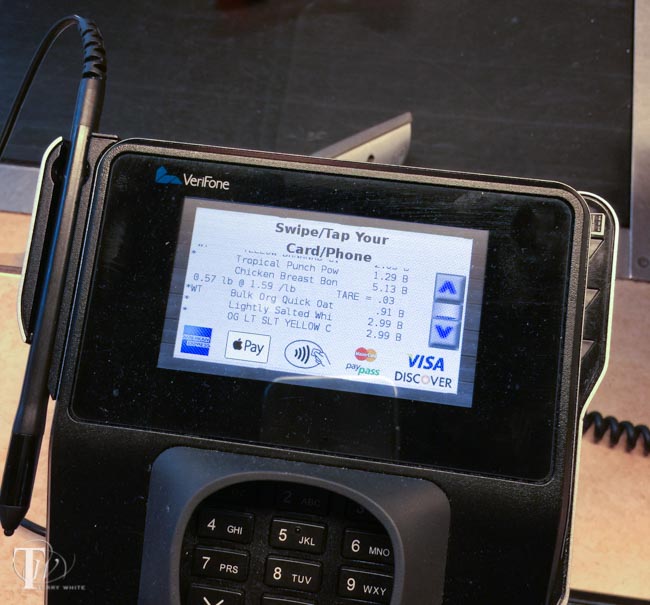
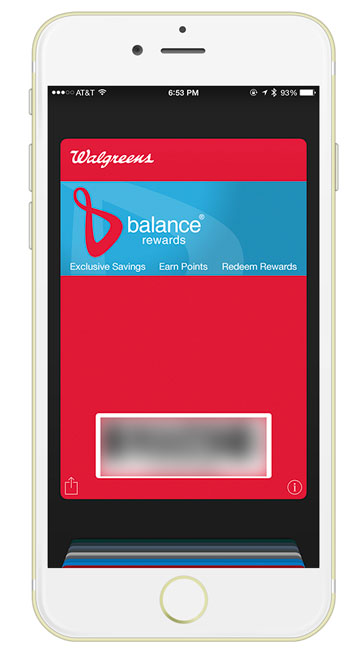
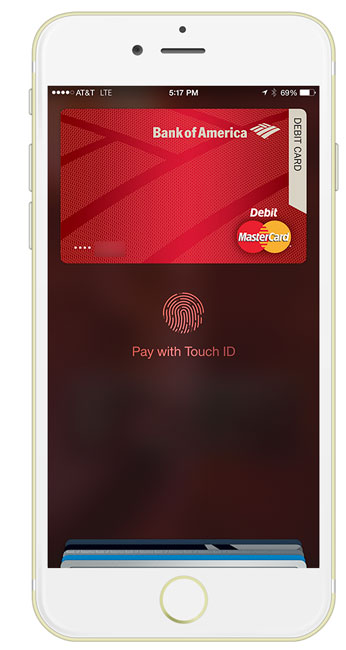
Yesterday I decided to give Apple Pay a try at my local Walgreens. It was the closest store to me that accepts Apple Pay besides McDonalds. While the  process was relatively quick, it wasn’t as “touchless” as I imagined. The first thing that I learned from the Staples experience above is that by not signing in, I didn’t get any Staples Rewards. Well the same thing applies at the register. You will still need to present your store loyalty card if you want points/discounts. Luckily my Walgreens card is also in Passbook. I handed the clerk my iPhone so that she could scan the barcode on my Walgreens card first. Then she rang up my two items. Once she was done I put my iPhone up to the sensor to start the Apple Pay process. My default debit card appeared on the screen and I used my finger to approve the transaction. AWESOME! Done right? Well not yet. Once I saw the “Approved” appear on my iPhone I put my iPhone away, but I still had to tap Credit vs. Debit AND approve the amount on the terminal. I assume that had I used a credit card vs. a debit card then I would have probably bypassed that first question. However, it was still odd that I had to tap that I approve the amount after the fact. Nonetheless, she handed me my receipt and I was out the door.

A short video of my first Apple Pay at a retail location:


The Bottom Line

Apple Pay will definitely move us one major step closer to replacing the traditional wallet. Instead of physically carrying 3, 4 or 5 cards now I may only carry one or two because the others are in Apple Pay if I want to use them. It was also a good feeling knowing that Walgreens didn’t just get my debit card number and If I wanted to be totally anonymous then I could have not given my rewards card. If you have an iPhone 6 or iPhone 6 Plus I can’t think of any reason not to use Apple Pay. It’s certainly much more secure than handing over your physical card. Apple Pay can’t be used by someone else even if they steal your phone because of the required finger “touch-ID”. You can also remotely wipe all your information including pay information from a lost or stolen iPhone via the Find My iPhone feature. Apple also has the clout to bring over most of all the major players, so they are likely to succeed where others have failed at this.

As of today you can use Apple Pay with the following Bank Cards (AMEX, Visa and Mastercard) from: American Express, Bank of America, Capital One, Chase, Citi and Wells Fargo with more banks coming this year like barclaycard, Navy Federal Credit Union, PNC, USAA and US Bank. Apple says that you can use Apple Pay at 220,000 stores and counting, including: Aeropostale, American Eagle Outfitters, Apple Stores, BabiesRus, BJs, Bloomingdales, Champs, Chevron, Disney Store, DuaneReade, ExtraMile, Foot Locker, FootAction, Macy’s, McDonalds, Meijer, Nike, Office Depot, Panera Bread, Petco, Radioshack, Six:02, Sports Authority, Subway, Texico, ToysRus, Unleashed, Walgreens, Whole Foods or anywhere else you see this icon:

wireless_NFC_pay_icon

Some are reporting Apple Pay working at stores others than the ones Apple lists, so give it a shot if you see the wireless pay icon above. See Apple’s list here.


.

20 Million Views and 20 Million Thank Yous

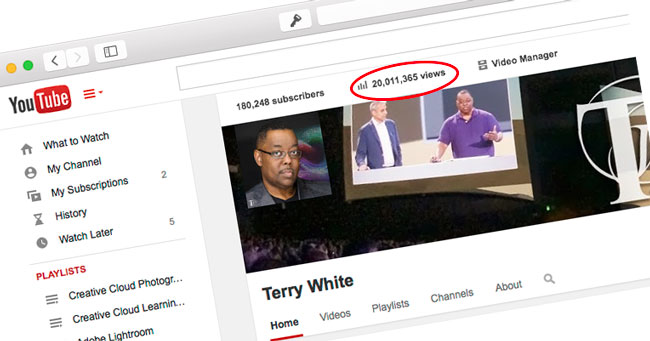
20millionviews

Wow! I just checked my YouTube views and noticed that I have passed the 20 Million View mark! I wanted to take a few moments to thank all my viewers and supporters. Whenever I’m out at an event, conference or on tour so many of you make it a point to come up to me and thank me for my videos or to tell me how my videos have taught you various things. This of course encourages me to do more and to continue doing what I do.


wpid13992-IMG_3630_sm.jpg

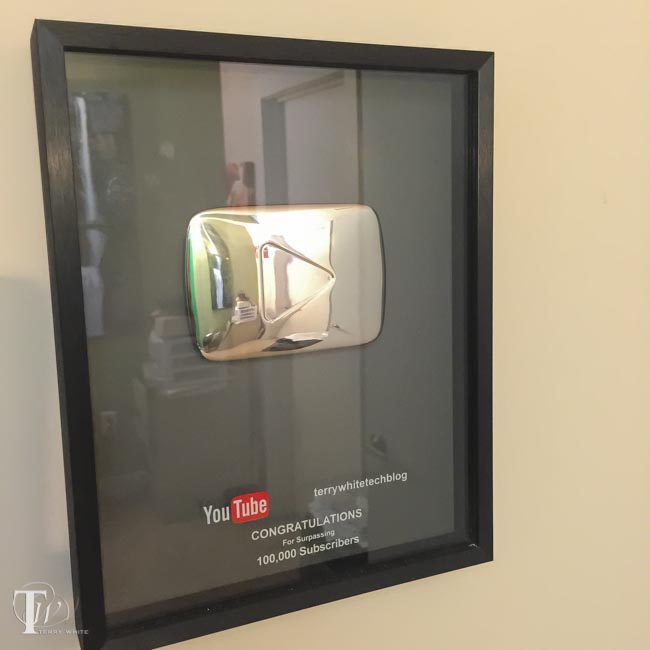
I also noticed that I now have over 180,000 subscribers to my channel. It seems like it was just yesterday when I received the plaque above recognizing me for surpassing the 100,000 subscriber mark. I expect to hit the 200,000 subscriber mark some time around the beginning of 2015.

Thank you guys so much! 

As much as I love doing my videos, believe it or not the hardest thing to come up with is new topics. More often than not I dismiss a topic that pops in my head because I think “everyone already knows that.” However, when I actually do go ahead and record it anyway it’s usually a hit. So please sound off in the comments about which upcoming topics you’d like to see videos on. Now before you jump in and start suggesting things, keep in mind that I (nor does anyone else), know everything or every product. So asking for a Dreamweaver topic or an After Effects (beyond the basics) topic probably won’t happen. It would be like me asking you to record a video on open heart surgery (unless of course you are a surgeon). I primarily focus on Photoshop, Illustrator, InDesign, Adobe Muse and Lightroom. I dabble in Premiere Pro and a little After Effects. Now that we have that out of the way, feel free to tell me what you’d like to see:

P.S. If you haven’t subscribed to my channel yet, please do so today! Let’s hit that 200,000 subscriber mark by Christmas 🙂

A new easier to remember URL

I almost forgot that I setup an easy to remember URL that will take you straight to my videos. Just head over to terrywhite.tv


How to Move Your Lightroom Photos to Another Hard Drive

Lightroom_totem

In this episode of Adobe Creative Cloud TV, I’ll show you two ways to move your Lightroom photos to another hard drive/NAS. This is one the questions I get most and I decided to dedicate a video to it and share some tips as well.


Are you missing out on my Bonus Content?

See more of my Adobe Creative Cloud Videos on my Adobe Creative Cloud TV and get the App below. It features EXCLUSIVE CONTENT that no one else gets to see.  My iOS App is a Universal App for iPhone, iPad and iPod touch. I also have an Android version on the Amazon App Store:

.


My Photography Website Makeover with Adobe Muse CC

twp-MBP-iPadAir-iPhone6Plus

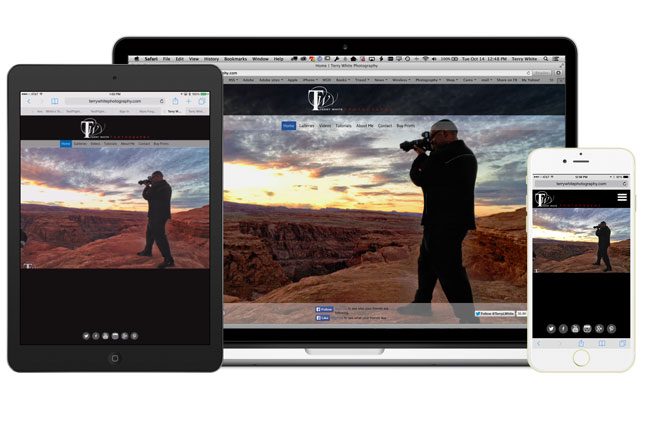
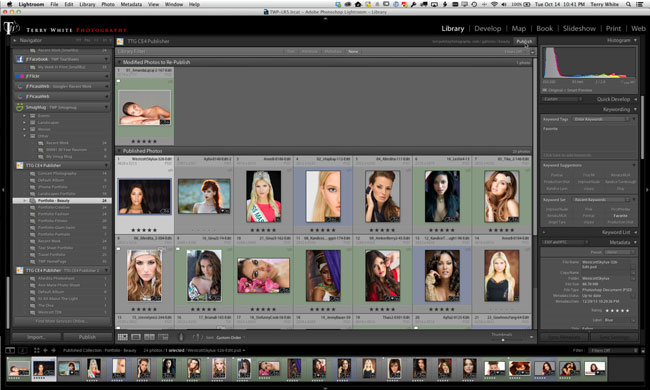
After posting my  last update about how I had built my photography website with Adobe Lightroom and plug-ins from The Turning Gate, I started getting questions like: “Could you build your site with Adobe Muse CC?” Of course the answer was always “yes I could, but…” There was a big reason that I built this particular site with Lightroom instead of Muse. I’m always updating my photography galleries with new photos and removing older photos. I manage all of my portfolios and this process with Collections in Lightroom. With the Web Publishing Bundle from The Turning Gate I’m able to update those galleries at any time with the click of the “Publish” button right in Lightroom. However, on the other hand Adobe Muse would allow me to customize the look and feel of the site more easily and basically do anything I wanted on any page at any time without having to write code or CSS.

Hmmmm, why not use them both?

The more I thought about it the more I figured I could have my cake and eat it too. I could build all the non-gallery pages (Home, About me, Contact, etc.) using Adobe Muse and use Lightroom and The Turning Gate plug-ins to continue to update the galleries. It would take a little more setup up front, but once the work was completed I would have the ease of updating the galleries anytime that I like right from Lightroom AND the ease of customization for the rest of the site using Adobe Muse.

TWP-AdobeMuse
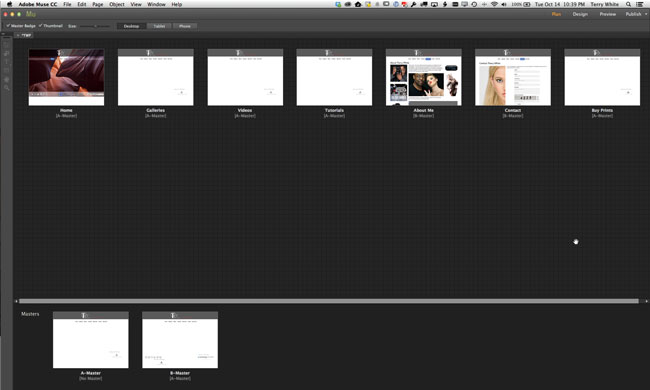
Using Adobe Muse CC I customized the look of the site and navigation

I set out to complete this task this past weekend and I put the new site up (terrywhitephotography.com) on Monday. As with any new site I’m still tweaking things here and there, but I’m LOVING IT so far! I built a standard Adobe Muse site with all three layouts (Desktop, Tablet and Phone) and I also made sure to include the pages that would need to be in the menu, but not actually built in Muse (Galleries, Videos, Tutorials and Buy Prints). Using the trick of Excluding those Pages from the menu allowed me to put custom links in to the Galleries and Videos pages produced by Lightroom/The Turning Gate. I also had to modify my Lightroom produced pages to point back to the main site when someone clicks on home, about and contact.

TWP-LR-TTG
Using Lightroom and the CE4 Web Publishing System from The Turning Gate I can publish my galleries to my website.

I’ve anticipated at least some of the questions you may have, so here we go:

FAQ

Q. What did Muse let you do that you couldn’t have done with The Turning Gate?

A. The first one was I’ve always wanted a full screen slideshow on the homepage of the desktop layout. It was so easy to do this with the Widgets in Muse and I’m not sure if there was an effective way to do this in The Turning Gate AND have the slideshow work the way I liked.

Q. Your older site was “responsive” and currently Muse isn’t. How did that work out with this website makeover?

A. Well the pages from Lightroom/The Turning Gate are still responsive and therefore when you click on my Galleries page on a mobile device you still get that experience. However, for the rest of the pages made with Muse I was able to optimize the content for Desktop, Tablet and Phone just the way I wanted. So it works out fine.

Q. If you had to do this from scratch, which Turning Gate Plug-ins would you need?

A. Since you’re going to need at least 3 of their plug-ins (Gallery, Auto-Index and Publisher) you’re still better off going with the CE4 Web Publishing Bundle as it will include everything you need for one price.

Q. Will Adobe Muse ever be “Responsive”

A. I get that question a lot and Adobe Muse improves rapidly with new features. Since “ever” is a long time, I would guess that you’ll see the features that people demand the most at some point! (how’s that for a non-committal, keep my job kinda answer?)

Q. Since you’re using Adobe Muse to create the home page and the full screen slideshow, what happens when you want to update it?

A. I did give up the ability to update the homepage slideshow with Lightroom automatically, but since I don’t update it as often I’m ok with exporting images from Lightroom manually when I want to update that one slideshow.

Q. What if I want to add music to my Muse site, HTML 5 video (like you did with the Turning Gate) or even have a template to get started with, what can I do?

A. I have really been impressed with MuseThemes.com. They make a variety of add-ons for Muse including widgets and templates that take Muse beyond the standard set of functionality. They (like most 3rd party add-ons) fill in the gaps.

Q. Will you be adding more Muse features to your site?

A. Yep, now that the hard part (which wasn’t so hard) is out of the way, I can add more features from Muse and use this site to showcase what can be done with Adobe Muse over time. I’ve already take advantage of the full screen slideshow, full width slideshow, SVG support, contact forms, social widgets, composition widget (for my phone menu), menus, TypeKit fonts, custom hyperlink colors, transparency and of course some gratuitous use of scroll effects 🙂 .


One more thing…

Your site is only as good as the web hosting that serves it up to your visitors. So far I couldn’t be happier with Bluehost.com. I was originally turned on to them by The Turning Gate and now they now host all my websites.


How To Create Custom Brushes for Photoshop or Illustrator Right on Your iPhone

PS_CC_totem


In this episode of Adobe Creative Cloud TV, I’ll show you how to use the NEW App, Adobe Brush CC to create custom brushes for Photoshop CC, Illustrator CC and Adobe Photoshop Sketch right on your iPhone or iPad. You can download Adobe Brush CC for FREE here from the .


Are you missing out on my Bonus Content?

See more of my Adobe Creative Cloud Videos on my Adobe Creative Cloud TV and get the App below. It features EXCLUSIVE CONTENT that no one else gets to see. My iOS App is a Universal App for iPhone, iPad and iPod touch. I also have an Android version on the Amazon App Store:

.


The Best, Fastest Car Charger for your Phone and Tablet

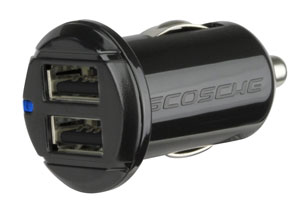
schosche_dual_12watt_car_charger

Every time I turn around there seems to be a new, better car charger than the one I’ve been using. I actually started with this Scosche Dual Charger over a year ago. It worked great, but the thing that I didn’t like about it was that only one of the ports charged at the faster 2.1A speed. Then I discovered this one by Lenmar. It gave me what I wanted, TWO ports both charging at 2.1 AMP/10 watts each. Perfect! Well it was perfect until I discovered that Schosche released a dual 12 watt charger! If you have a newer iPad 4th generation or iPad Air you might have noticed that Apple now includes a 12 watt wall charger instead of the 10 watt charger included with previous models. Now you can charge your iPad Air in car at full speed or speed charge a smartphone. Since we usually aren’t in our cars for hours at a time each day, speed matters. You might be able to get back up to a full charge faster on a shorter commute. I also figure why have just one port when you can have two? This way you can charge your phone and another device such as a tablet or a passenger’s phone.

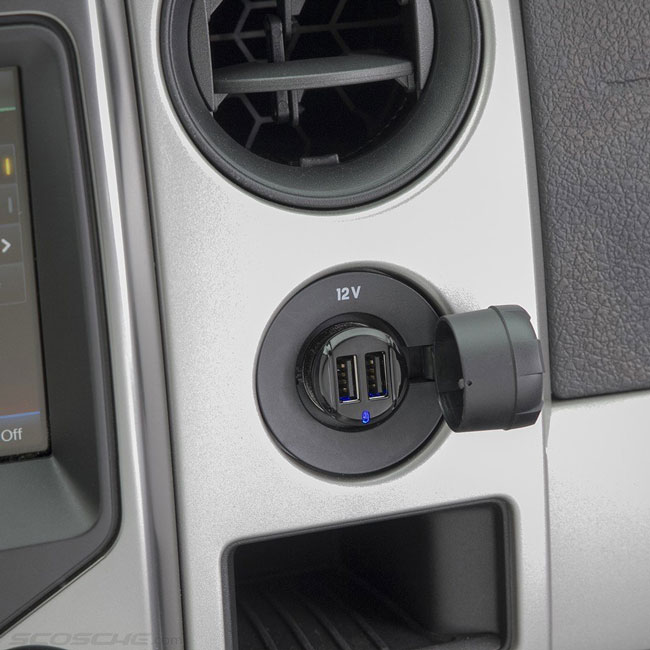
schosche_dual_12watt_car_charger_in_car

I also like the low profile fit. The original Schosche I used back in the day stuck out of the socket quite a bit. This one almost fits flush with the 12V socket. Even if your car has a built-in USB port I’m going to go out on a limb and say that it doesn’t provide 12 watts of power. In most cases it’s probably a 5v 1A USB port.  As far as I can tell this is one of the fastest car chargers on the market.

You can get the Schosche 12 Watt USB Car Charger here.


What’s New In the October 2014 Update to Photoshop CC, Illustrator CC, InDesign CC & Muse CC

Hot off the heels of the big release for 2014 of Creative Cloud, the engineers have been hard at work delivering more value to Creative Cloud members. I’m here to show you the top new features for the October 2014 update to Adobe Creative Cloud.


See What’s New In the October 2014 Update to Photoshop CC

See What’s New In the October 2014 Update to Adobe Illustrator CC

See What’s New In the October 2014 Update to Adobe InDesign CC

See What’s New In the October 2014 Update to Adobe Muse CC


Also check out the NEW Mobile Apps:

Adobe Photoshop Mix (now on iPhone as well as iPad)

iTunes.

Adobe Illustrator Line

iTunes.

Adobe Photoshop Sketch

iTunes.

Adobe Illustrator Draw (formerly Adobe Ideas)

iTunes.

Adobe Shape CC

iTunes.

Adobe Brush CC

iTunes.

Adobe Lightroom Mobile Update

for iPhone
iTunes.

for iPad
iTunes.

Adobe Premiere Clip

iTunes.

Adobe Creative Cloud
iTunes.


TiVo Mini does the job but could be better

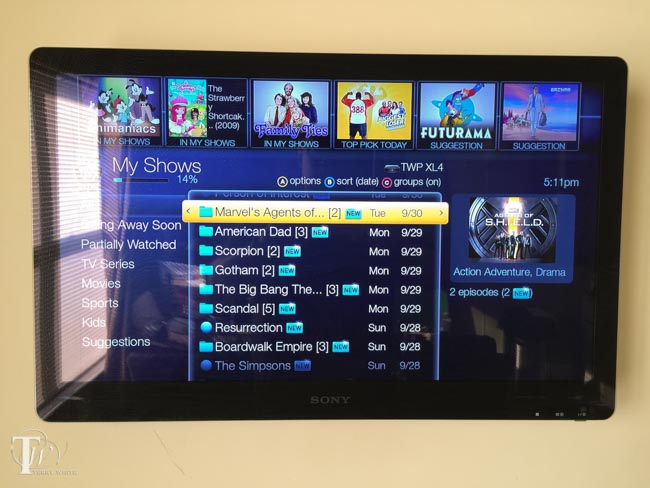
TiVo-Mini

If you’ve followed my blog for a while, you’ll know that I’m a fan of TiVo DVRs. Not long ago I relocated and it was time to rethink my multi-room viewing experience. In the past I had DVRs in each room. This of course is redundant and costs more than other options. Since I was starting over in a new location I decided that I only needed ONE TiVo DVR and I would explore options for viewing that content in other rooms. In the past I used this setup from Actiontec and while it worked OK, I wanted to see if there was something better? My search led me to the TiVo Mini. TiVo Mini is a smaller box designed to be used on another HDTV in your home. It connects to your HDTV via HDMI and not only streams live TV from your existing TiVo DVR, but it also can stream any recorded content from your TiVo DVR. The big advantage here is that unlike the Actiontec or other solutions, each HDTV can view something different. In other words if someone is watching a recording or live TV in the living room, another viewer can be viewing something totally different in the den, office or bedroom.

The Good

wpid13953-IMG_3379_sm.jpg

It works GREAT! The setup was pretty straight forward and once setup I’m able to enjoy my TiVo in another room as if I was sitting right in front of it. The quality of the stream is as good to my eyes as watching the content on the main TV. There is a small lag that would only be noticed if you had the same live broadcast showing in both rooms at the same time. It does exactly what I needed it to do. It comes with an additional TiVo remote that allows you to control the TiVo mini as well as the TV.


It could be a lot Better

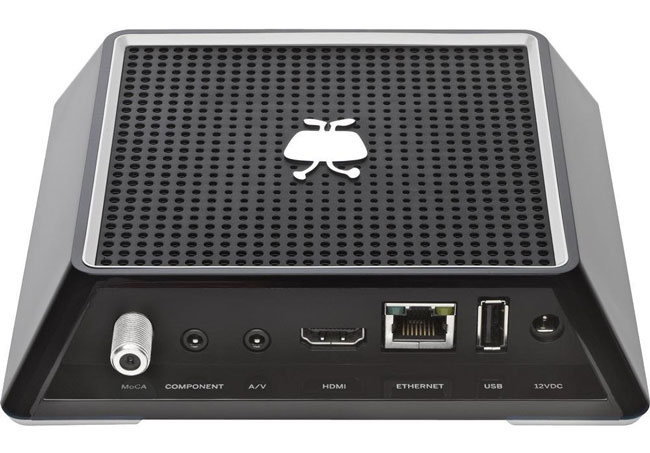
TiVo_Mini_back

In order to use a TiVo Mini you have to have all the right stuff in place or you simply can’t use it. First off it requires the later generation 4 Tuner TiVo Premiere or Roamio. Luckily I got a TiVo Premiere 4XL on close out and little did I know at the time that going with the 4 tuner model would pay off now. The 4 tuners are necessary so that the main TiVo can still record while the other tuners are being shared with the the TiVo Mini(s) in your home. The next requirement is that it can only work over Ethernet! That’s right it has to be hard wired and there is currently no built-in wireless option. In my opinion in 2014 this is dumb! Most people will not have a wired ethernet connection in bedrooms, family rooms, etc. If my Apple TV can stream HD quality content from the internet via WiFi, there should be no reason that TiVo Mini shouldn’t be able to stream content wirelessly from another room in the same home! There is another option that works via a coax connection if you happen to have the other rooms wired for cable. You can use a set of MoCA adapters to do ethernet over coax or if you have a TiVo Roamio Plus or TiVo Roamio Pro those models have MoCA support built-in.  This is probably the best way to go if you can’t run ethernet AND you have the coax cable connections in each room. Luckily I could run “flat” ethernet cables and hide them from room to room. Aside from the connection hurdles, the one and probably biggest problem that people will have with this solution is that TiVo charges a monthly charge to use TiVo Mini. Wow! I can see paying for TiVo service for the DVR, but why on earth is there a need to pay for TiVo service on the TiVo Mini? The TiVo Mini technically is just a bridge to the main TiVo DVR. You can opt to pay a one-time Lifetime Service fee and be done with it, but I can’t see why there is a need to charge for a service for this box at all?


The Bottom Line

Despite the problems, it was the best and most elegant solution to allow me to have my TiVo in 3 rooms and only having one TiVo DVR. The fact that each room can view something different is great and the product has worked perfectly for me so far. Rumor has it that TiVo is working on a newer model of the Mini with wireless capabilities. There’s no formal announcement at this point. TiVo if you’re listening, this product screams to be connected wirelessly and you should ditch the service fees for it even if it means charging a little more for the box itself. Keep in mind that it can’t do anything without a TiVo DVR, so paying a fee for the Mini seems a bit much.

You can get the TiVo Mini here.

How To Retouch a Photo in Photoshop for a Mature Audience

PS_CC_totem


In this episode of Adobe Creative Cloud TV, I’ll show you how to retouch a photo in Photoshop for a more mature audience.


Are you missing out on my Bonus Content?

See more of my Adobe Creative Cloud Videos on my Adobe Creative Cloud TV and get the App below. It features EXCLUSIVE CONTENT that no one else gets to see. This episode has a BONUS CLIP that is available only in the App! My iOS App is a Universal App for iPhone, iPad and iPod touch. I also have an Android version on the Amazon App Store:

.