Why I Switched from Elinchrom to Westcott for Flash

Model Christa posing for my astronaut them with two Westcott FJ-400s

I usually pride myself on making tech purchase decisions that will serve me for years. This is no different. I started with Elinchrom strobes for flash photography. It was February 28, 2008 that I placed an order for a two strobe setup with soft boxes and triggers. Looking at the price of what I paid back then boggles my mind, but it was an investment that lasted me for 13 years. Well worth the investment as they performed flawlessly over the years and still work fine to this day.

So why switch now?

Continue reading “Why I Switched from Elinchrom to Westcott for Flash”

It’s Friday! Time for my Photography Masterclass

It’s Free! Today I will be in studio and doing a LIVE shoot to contribute images for sale on Adobe Stock. I’ll walk you through the steps from start to finish to get your images online for sale and to potentially make money from your photography while you sleep.

I will be live Friday, February 19, 2021 at 8AM PT/ 11AM ET. You can watch here for free:

If you want to catch up on previous episodes, here’s a playlist of every episode since day one.

Continue reading “It’s Friday! Time for my Photography Masterclass”

F.J. Westcott Flex LED Light Review

FlexLED

I remember when I first saw the above photo on Westscott’s website, I immediately and without hesitation said “WOW!” I love continuous lighting and the thought of having an LED light panel that would be easy to travel with was intriguing. I recently put the 10×10″ model to the test. Here’s a short video of my setup:

The Flex LED is 5,600 daylight balanced. The Flex™ 1-Panel Daylight kit includes a mounting bracket and a 1/4 stop diffusion panel. The dimmer goes from 5% to 100%. The panel is water resistant and the kit also includes a 16′ extension cable.

Here’s a production shot from my test shoot:

wpid14447-Alyssa-0447_sm.jpg
The mounting bracket includes a “clip” style mount instead of a traditional light stand mount. That’s both a plus and a minus. However, since the panel is so light you should be able to attach it to any light stand or any other suitable stand. I also clipped it to a chair back at one point to light the background. In the picture above I simply clipped it to the light stand holding my Westcott Skylux LED and Rapid Box Octa XXL softbox which was powered off at the time.

wpid14449-Alyssa-0449-Edit_sm.jpg

The above shot was captured with my Nikon D810, 70-200mm VRII f/2.8 lens at ISO 200, 190 mm, f/3.5 1/80 sec. Although I prefer bigger, softer main lights for portrait work I was impressed with this light for its size and incredible amount of output. It was soft enough with the diffusion panel on front.

The Bottom Line

wpid14455-Elena-3-0160_sm.jpg

The Westcott Flex LED is another great tool in my lighting arsenal and it’s probably the first LED light that I feel very comfortable in traveling with and knowing that it won’t take hardly any room in my carry-on luggage. The “clip” means that I can probably get away without having to carry or find a light stand too. While the price may seem relatively high, it’s actually on par with high end name brand speed lights from the top camera manufacturers. However, the fact that it’s continuous lighting means that I can also use it for video recording too making it more flexible than a speed light.

You can get the details/order the kit here.


Having Fun with New Light Modifiers

fstoppers-flash_disc

If you’ve followed my photography over the years you know that I’m always looking at new light modifiers. I can never have too many in my arsenal. Over the past few evenings I’ve been experimenting with some new ones that have made their way into my studio. Let’s take a look at them and some of the results I’ve been getting so far.

Fstoppers Flash Disc

fstoppers-flash_disc-mounted

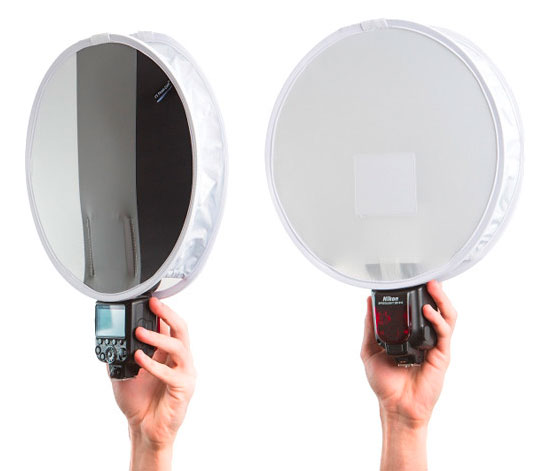
The first one was actually what I call a “checkout line impulse buy”. In other words my cart at B&H Photo had the items I wanted and I still had some money left on my gift card. I couldn’t think of anything else I wanted in the amount that was left over so I decided to add the Fstoppers Flash Disc. It looked cool, very portable (it folds down to a size smaller than the speed light), and I figured if nothing else I could use it as my white balance card.

Before last night’s shoot I decided to take a few test shots so that you can get a feel for what this will do for you. Now keep in mind that the bigger the light and the closer it is to your subject, the softer it will be. Since this modifier is relatively small I was skeptical. However, it did exactly what I expected. It gave me a better light than I would have gotten without it!

wpid14321-Christa-0002_sm.jpg

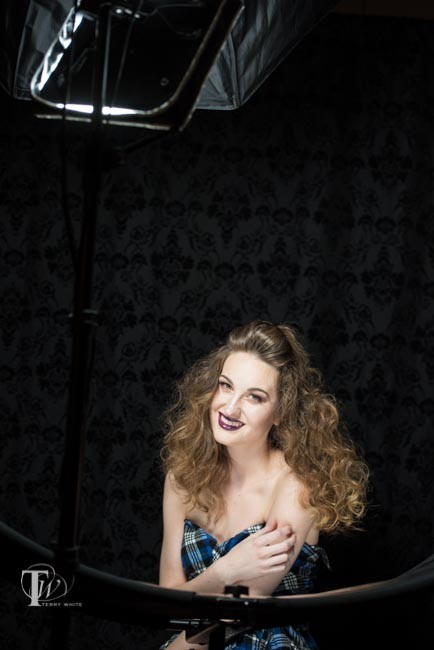
First up, here is worse case scenario. No modifier at all. Just flat horribly harsh lighting from the speed light using just the little built-in flip down diffuser. (yes I could have bounced it to make it better. Yes I could have turned the power down. Yes I could have done _____., but the point here is to show what small lights typically do straight on).

wpid14325-Christa-0011_sm.jpg

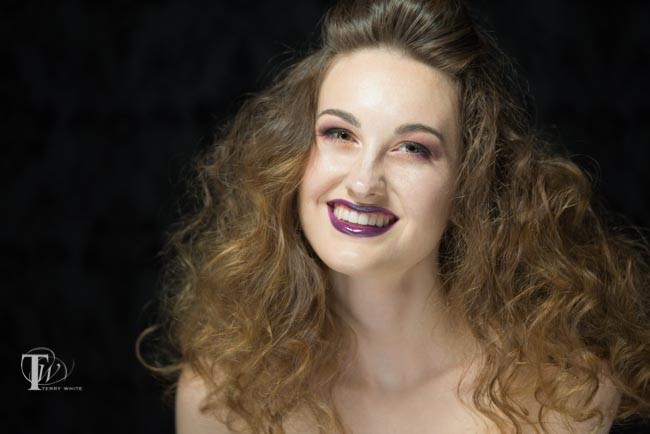
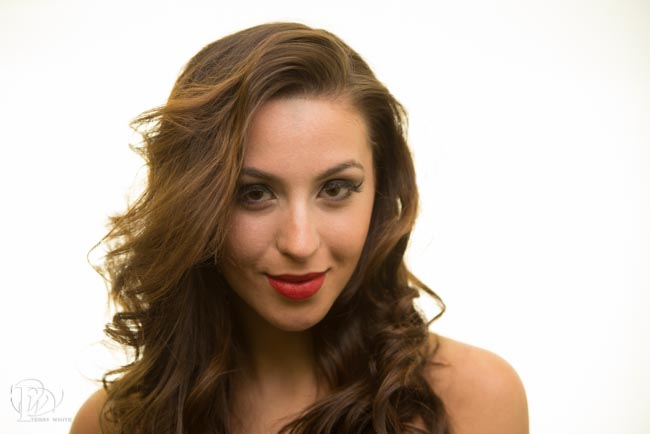
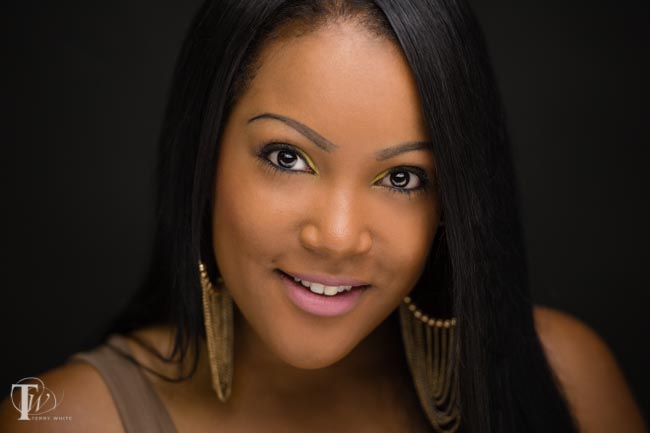
Now with the Fstoppers Flash Disc mounted directly on the speed light. The results are notably better than without it. If you look at the shoulders you see a software light pattern and her face is less blown out and not as flat. Again there are more things you can do to make the results even better, like bouncing the light and perhaps a different position/distance, but again the point here is to see simply what difference it would make by adding the Flash Disc.

Adding in the Westcott Omega

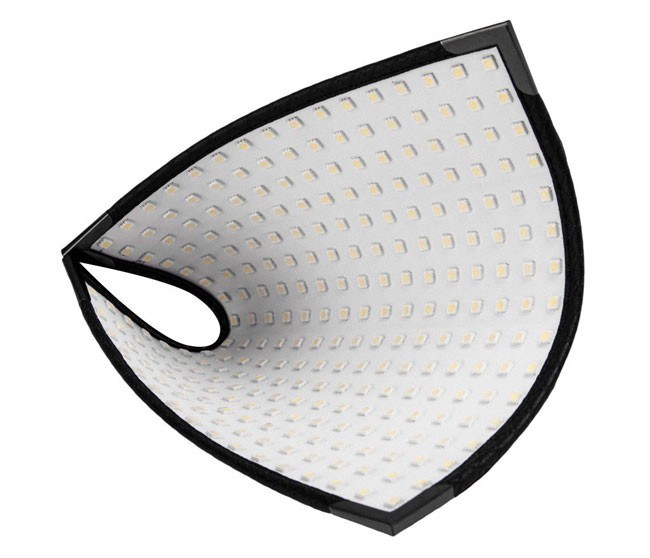
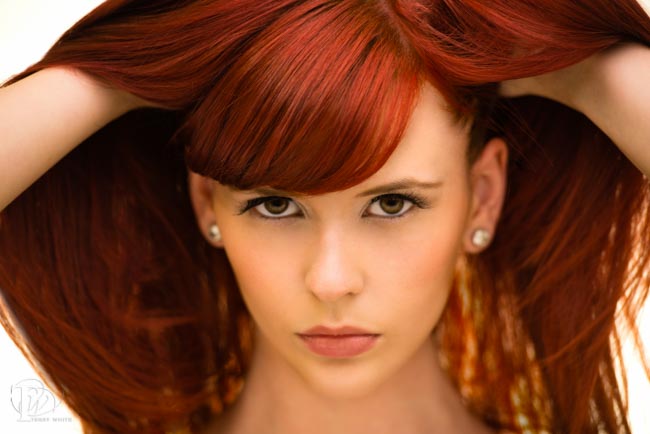
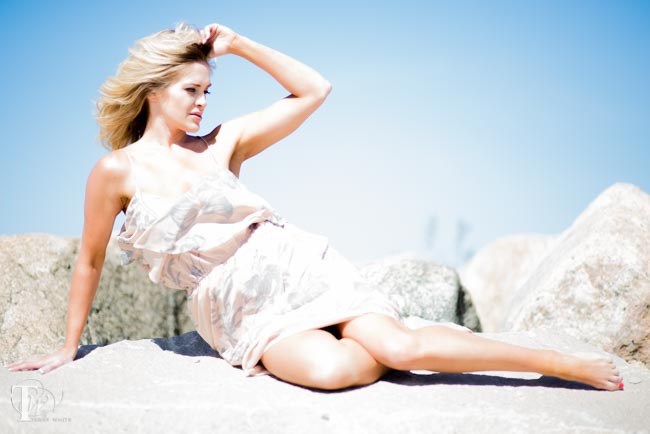
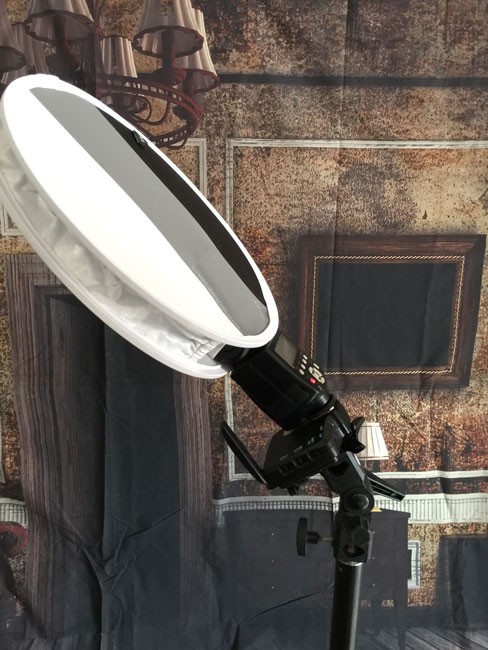
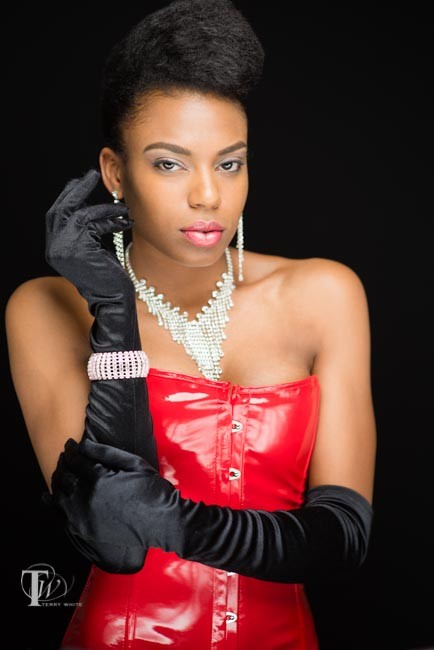
The next modifier I was going to look at was the NEW Westcott Omega 10-in-1 Reflector Kit. The material directly connected to the frame is a one stop diffusion panel. So before getting to my Omega setup I simply added the diffusor to my existing Flash Disc set up to get this result.

wpid14323-Christa-0009_sm.jpg

Same light. Same Flash Disc. However, the results are much much better simply by diffusing the light a little more. Add a reflector for under the eyes/chin and you’re golden.

fstopper-flash-disc-w-Omega

Since the Omega was effectively going to take the light down 1 stop, I increased the power setting on the speed light from 1/8 to 1/4 to compensate.

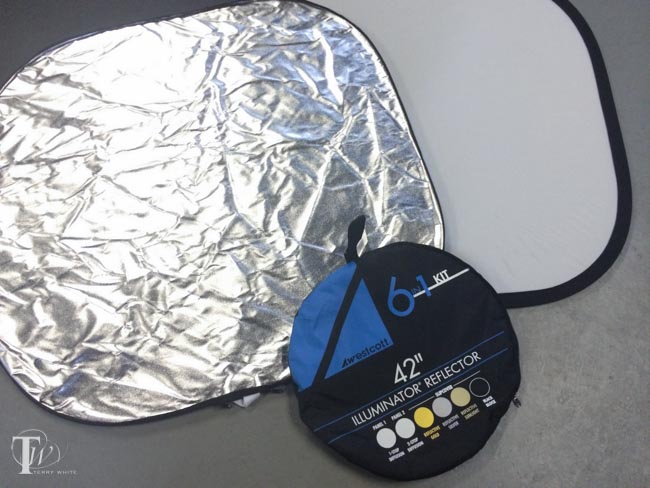
The Omega 10-in-1 Reflector Kit

westcott-omega

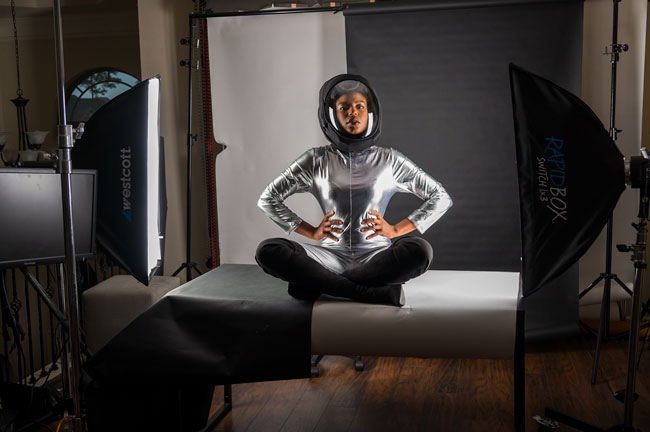
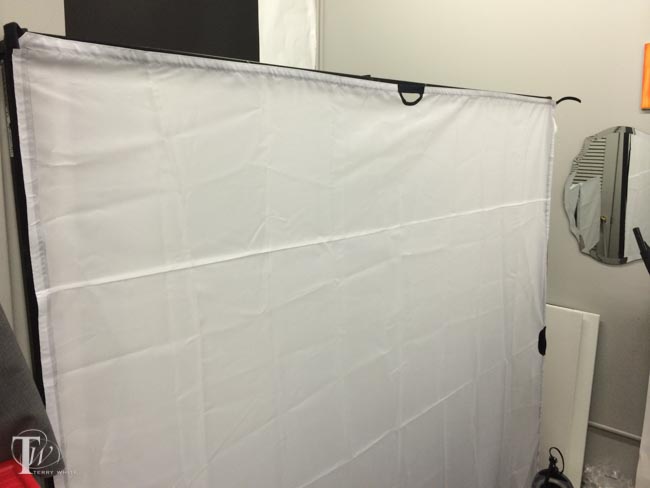
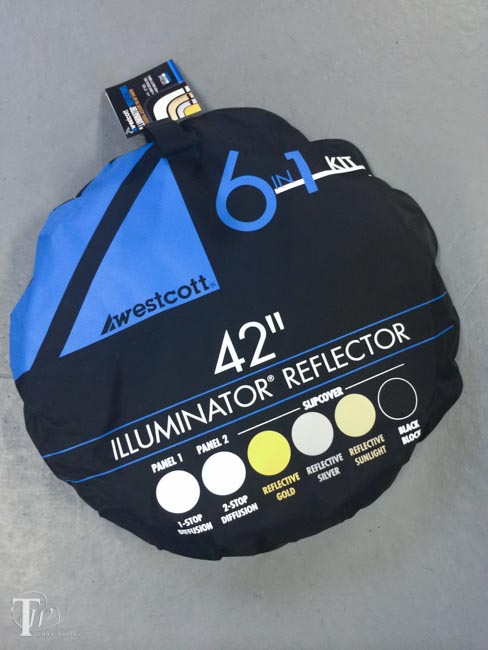
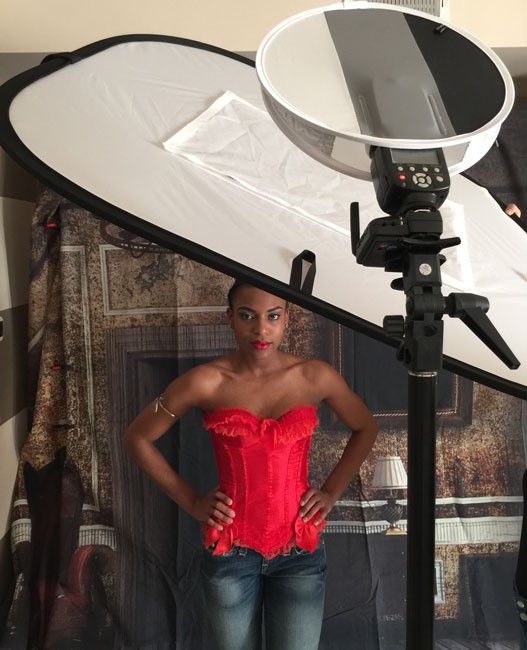
This reflector kit adds one element that I haven’t seen or had in any of my previous multi-use its and that is a “shoot through window”. First off you get a typical 5-in-1 kit right off the bat. You get Silver, Gold/Sunlight, White, Diffuser (built on to the frame) and Black. Now take all of those surfaces and remove the center piece for a 10-in-1 kit.

wpid14331-IMG_7838_sm.jpg

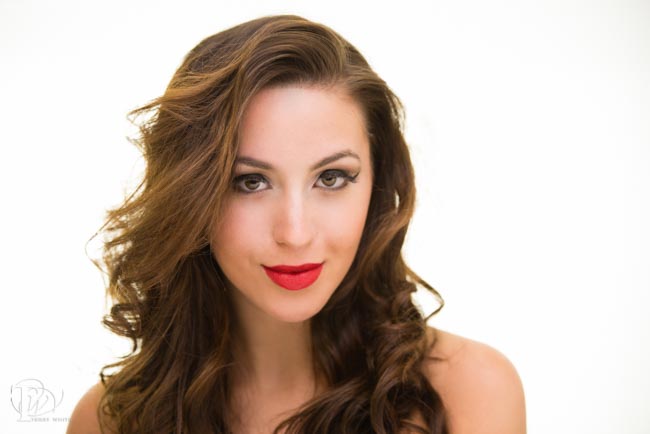
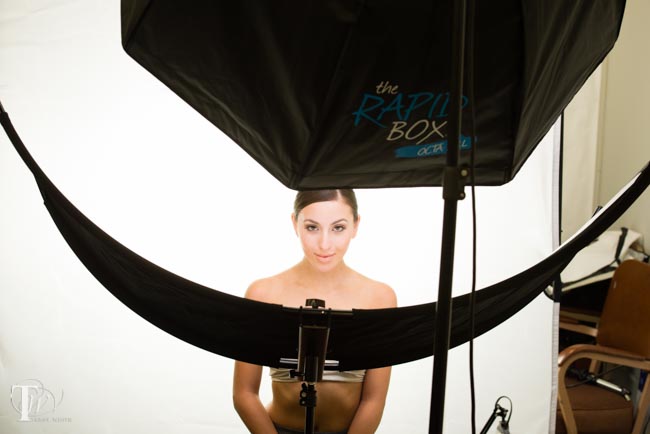
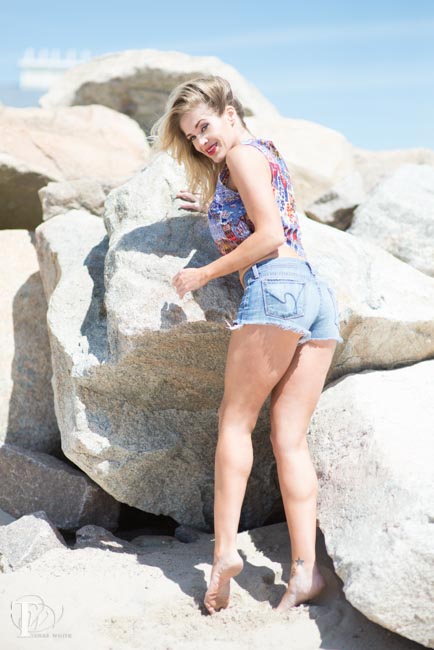
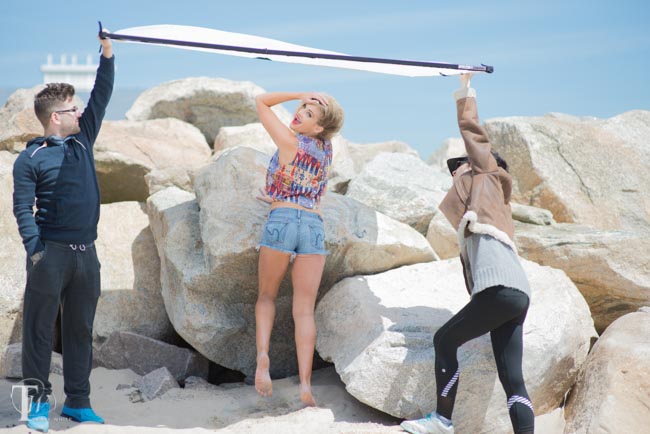
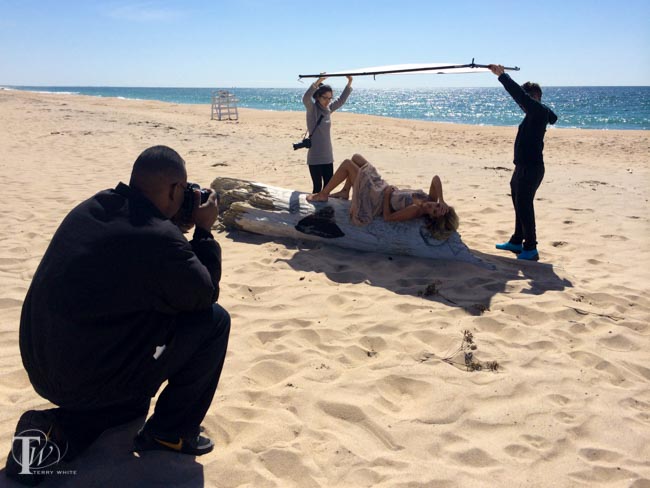
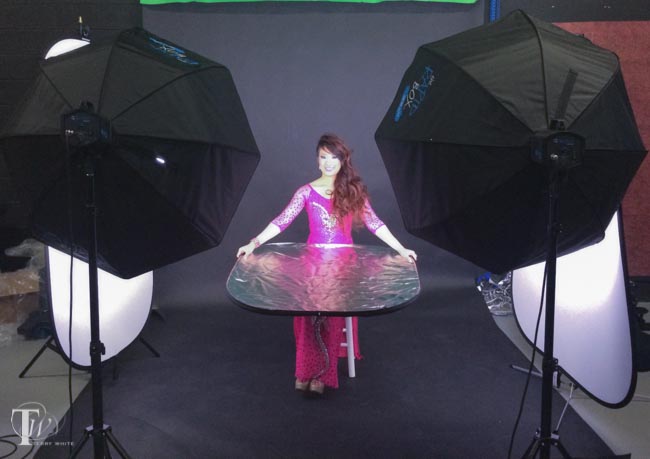
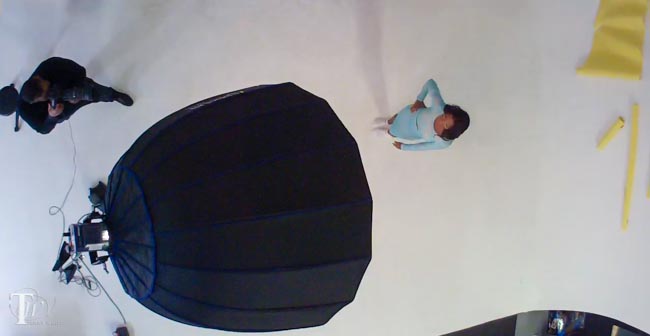
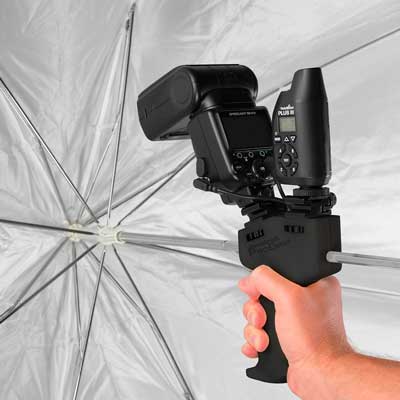
When doing a shoot through setup like this, you kinda have to think backwards as you’ll be using the reflective side facing the subject to light the subject. In the setup above I used two speed lights. The one in back (no modifier) was position up high to act more as a hair light and to add a little fill. The second speed light was mounted in a Rapid Box Strip to provide both a rim light and main light.

wpid14335-Elena-0066-Edit_sm.jpg

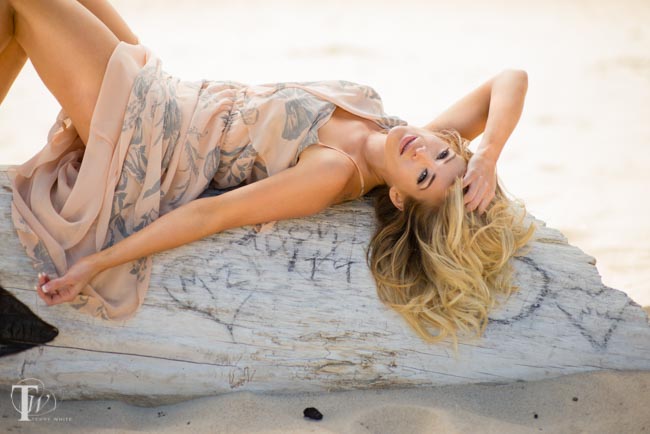
I like the results and the fact that this modifier made me think outside my box in ways of setting up lights that I probably wouldn’t have tried otherwise. It’s also ideal for putting up in front of a window either as a diffuser or shooting through the window from outside into the room without blocking the light.

The Westcott Omega 10-in-1 38″ x 45″ Reflector Kit is the one I’ll be traveling with from now on as it provides the basic reflecting, diffusing, flagging functions that I would need, plus the ability to shoot through.
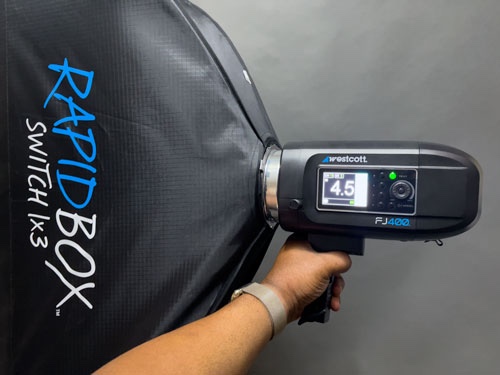
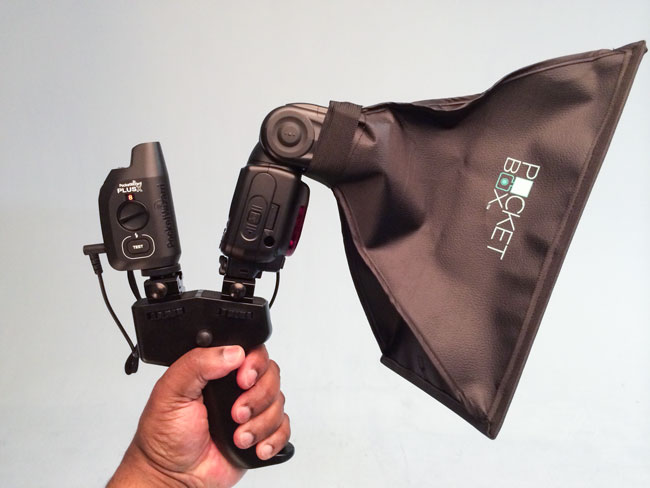
The Rapid Box Duo

I was already a fan of the Westcott 26″ Rapid Box, which is part of my “Westcott Terry White Travel Portrait Lighting Kit“. So when they announced the Rapid Box Duo, I was intrigued.

wpid14345-IMG_5721_sm.jpg

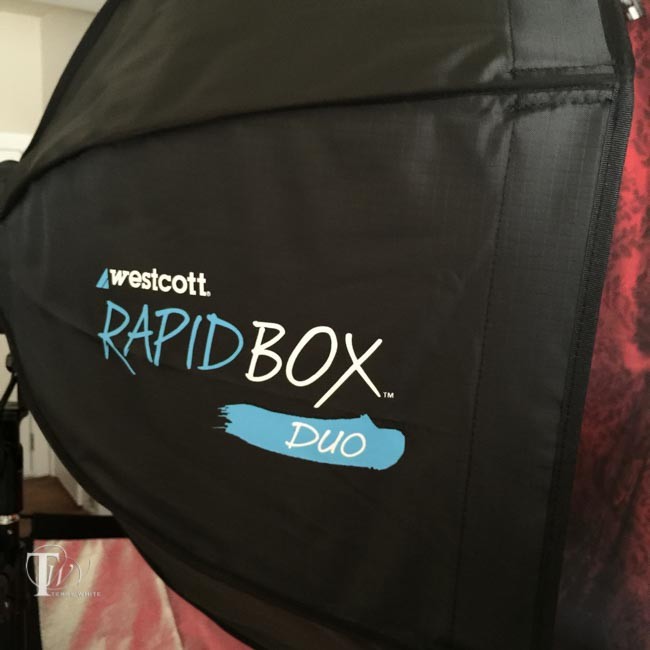
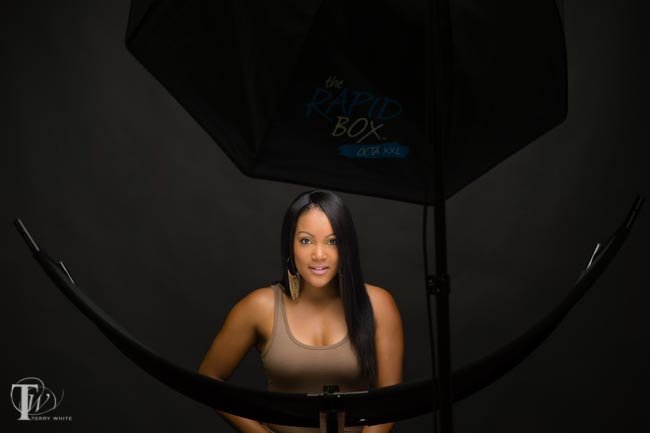
The big difference here is that this one allows you to mount one or two speed lights to give you more light. It’s also a slightly bigger size at 32″. It still collapses down for travel and comes with all the mounting hardware/angled bracket for mounting your speed lights outside for better triggering.

wpid14343-IMG_5720_sm.jpg


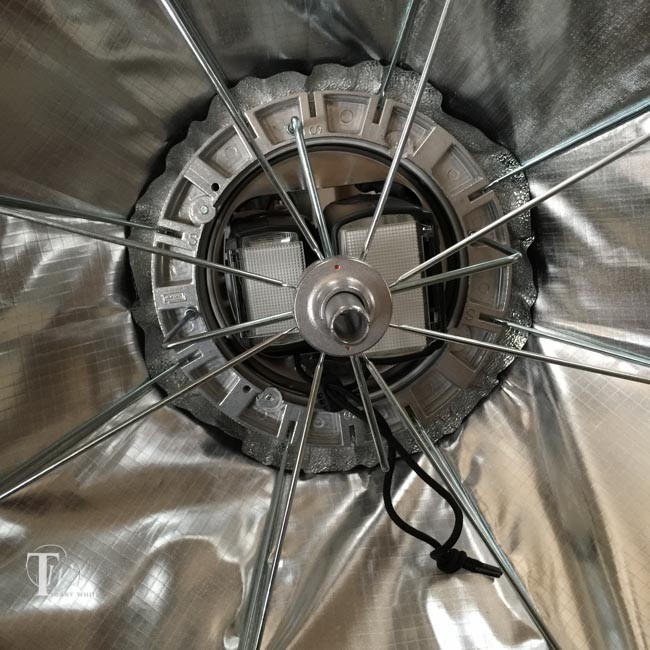
Here I have an Nikon SB 910 and SB 800 mounted.

wpid14337-IMG_7887_sm.jpg

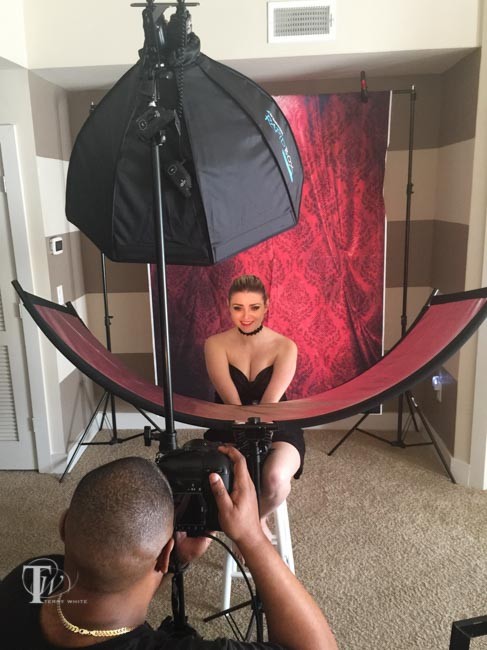
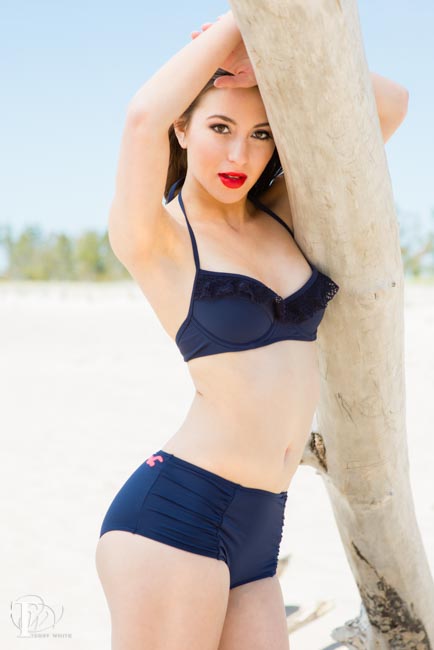
Adding in the Westscott Eyelighter, which is probably my favorite modifier of all time. I get the results on location that I would typically get with more expensive studio strobes.

wpid14341-Christa-0071-Edit_sm.jpg

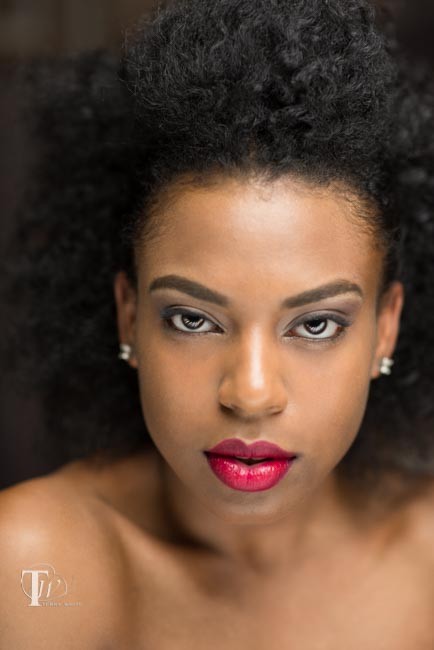
As I’ve said many times. You can have the most expensive camera in the world, but without great light your pictures are liable to suck.

wpid14339-Christa-0171-Edit_sm.jpg


However, if you have great light you can get good results with just about any camera.

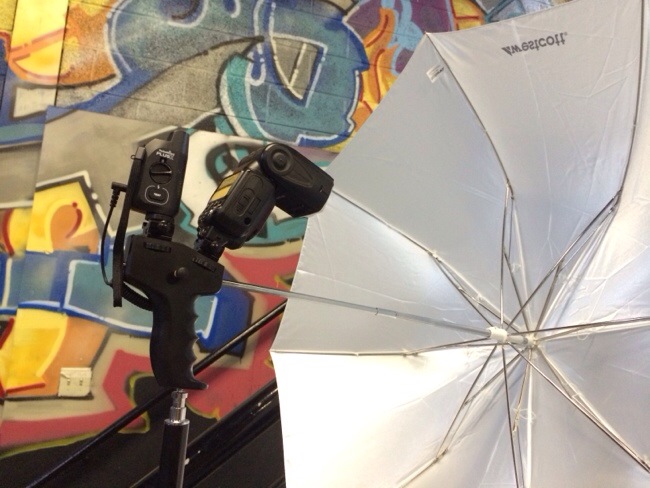
You can get the Fstoppers Flash Disc here. You’ll also want this “tilt mount” to be able to mount your speed light and tilt it down.

You can get the Westcott Omega 10-in-1 Reflector Kit here.

You can get the Westcott Rapid Box Duo here


Before and After the Westcott Eyelighter

wpid13605-Aylla2-0125-Edit_sm.jpg

When I initially gave a first look at the NEW Westcott Eyelighter a couple of weeks ago (here), one thing I failed to do was to show a before and after comparison

wpid13599-Thais2-0204-Edit_sm.jpg

So I took some time away from my vacation last week and setup a beauty shoot with a few models to really give you an idea of what the Eyelighter really does beyond providing interesting catchlights in the eyes. In the two shots above you can see the affect of the Eyelighter not only in the eyes of my subjects but also under the chin.

wpid13601-Thais2-0205-Edit_sm.jpg

What a difference an Eyelighter makes. The shot above is the same model under the same Westcott Skylux and XXL RapidBox 48″ octa softbox, but without the Eyelighter.

wpid13593-Thais2-0064-Edit_sm.jpg

The shot above is a production shot showing the Eyelighter setup just in front of the subject with the Skylux LED light above subject.

wpid13595-Thais2-0074-Edit_sm.jpg

The results are AWESOME and pretty much night and day.

wpid13597-Thais2-0075-Edit_sm.jpg

Again here’s another look without the Eyelighter using the exact same main light, subject and camera settings.

But what about the background?

wpid13608-IMG_2362_sm.jpg

The background was lit using two lights shining through the Westcott Scrim Jim. This gave me the High Key look that I wanted by providing a nice big soft light source directly behind the subject that wrapped around the subject with beautiful rim lighting.


The Bottom Line

wpid13611-Thais2-0084-Edit_sm.jpg

I’ve always been a fan of this clamshell beauty look and the Westcott Eyelighter makes it much much easier to do now with one light. Adding another light or two behind with the Scrim Jim makes this accessory useful for in studio work as well as on location work. All of the images above were shot with my Nikon D600 and 70-200mm f/2.8 VRII lens.


Beautiful Catchlights with the NEW Westcott Eyelighter

wpid13556-KandiceLynn34-0036-Edit_sm.jpg

Anyone that knows me knows that I love beautiful light when it comes to photography. Therefore I use quite a few light modifiers. When it comes to interesting catchlights I had been using a Triflector. While the Triflector does create an interesting light pattern as well as providing good reflection backup up to a subject’s chin, neck and chest, it’s a broken pattern. This is due to the fact that it uses 3 reflectors, hence the name Triflector. Westcott has started shipping the long awaited Eyelighter. As you can see from the photo above the Eyelighter is one big continuous reflector that has a nice crescent shape. This creates not only a nice reflection of light under the chin, but it also creates great crescent shaped catchlights under the eyes.

wpid13554-KandiceLynn34-0172-Edit_sm.jpg

This is why Westcott called it the “Eyelighter” and I LOVE IT. When I first saw it in person at Photoshop World it didn’t seem that large. Even when I received the box the box appeared to be pretty compact. However, once I got it setup I was quite pleased by the size. It provides a very nice soft reflection under the subject. In the photo above I used the one light, a Westcott Skylux continuous LED light with a large Rapidbox Octa XXL softbox.


The Bottom Line

No single light modifier works for every situation. However, since I do a lot of portraits and beauty work, I’ll be using the Eyelighter more than most of my other modifiers. The results exceeded my expectations. You can order the Eyelighter here.


Shooting in bad light doesn’t have to suck!

wpid13463-ChristineJennax-0005_sm.jpg
No matter how good your subject is, bad light can be distracting.

Any good landscape photographer will tell you that you’ll get the best results if you’re up, out, and ready to shoot as the sun is coming up or as the sun is going down. Middle of the day is probably the absolute worst time to be outside shooting. However, if you’re shooting a wedding or other gig you may not have the luxury of having everyone on set before the sun comes up. Sometimes you’re going to be out in bad light. I hate it, you hate it, and we try to avoid it at all costs, but it may happen some day. Luckily if you’ve got the right gear, it doesn’t have to suck.

wpid13461-ChristineJennax-0266-Edit_sm.jpg
As you can see from the harsh mid-morning sun we have hard shadows and unflattering light.

I recently did a beach shoot and I purposely waited until after 9AM to arrive on location. Yep, that’s right I purposely sabotaged my own shoot. I wanted to see if I could still get good results if I used a Scrim Jim Kit. The sun was up and the light was HARSH!

wpid13459-ChristineJennax-0263-Edit_sm.jpg

Any other time I would have turned around and headed back home. Even though it wasn’t noon, it looked like it was. Not only was the light harsh on the subjects, but it was a clear sunny day with no clouds and that meant a lot of squinting on the part of my models. It was just bad all the way around.


wpid13465-IMG_1679_sm.jpg

I set up the Westscott Scrim Jim Large Reflector Kit and I had two people to hold it for me over my subject to block the sun. Now instead of the sun being my enemy, the sun turned the Scrim Jim into a giant softbox with nice even light. The only problem was the wind. It was a windy cool morning and it was a challenge for my assistants to keep the large Scrim Jim in place. It was like holding a sail at times. However, they did a masterful job with it and I was able to shoot with sun being my ally instead of an enemy.

wpid13455-ChristineJennax-0075-Edit_sm.jpg
Shot with the Nikon D600, 85mm f/1.4 lens, ISO 200, f/1.8, 1/4000 sec.


The Bottom Line

wpid13457-ChristineJennax-0247-Edit_sm.jpg
Now with the Westcott Scrim Jim Large Reflector Kit in place the light is much much better.

I still highly recommend that you shoot in good beautiful natural light. However, if the situation is out of your control and you need to be out in harsh lighting conditions, then I definitely recommend the Westcott Scrim Jim Large Reflector Kit.

wpid13453-ThaisVieira-0221-Edit_sm.jpg

Even when you’re not out in bad light you can use it as a reflector. It comes with both a 3/4 stop white diffusion fabric sheet and white/silver reflector fabric sheet and you can quickly attach either one as needed with the built-in Velcro. The frame is quick to assemble and disassemble and it comes in a nice carrying case. If the wind isn’t bad you can also get a stand to hold it for those times when you don’t have an assistant.

wpid13451-ThaisVieira-0102-Edit_sm.jpg

Shooting in bad light doesn’t have to suck! You can get the Westcott Scrim Jim Large Reflector Kit here.


The Westcott Illuminator Reflector 6-in-1 Kit

wpid13335-IMG_1253_sm.jpg

Photographers use reflectors to add light and defusers to soften light all the time. I was in need of a new reflector kit that I could take on the road. There are lots of reflector kits out there that come with reversible covers. Usually you’ll get white, silver, gold and perhaps black. The one thing that intrigued me the most about the Westcott Illuminator Reflector 6-in-1 Kit is that unlike most kits, they actually include TWO collapsible diffusers. One is a full-stop of diffusion and the other one is a two-stop diffuser. They include a reversible cover that has silver, gold, sunlight and black.

wpid13339-IMG_1259_sm.jpg

With this one kit you can either have two separate diffusers or one diffuser and one reflector or one diffuser and one black/flag. That pretty much gives you everything you could want in the field.

wpid13337-IMG_1254_sm.jpg

The nice big 42″ size is also a bonus because it can either diffuse a large area or bounce a larger amount of light therefore make it softer.

wpid13361-Liz_Group_Shoot-0471-Edit_sm.jpg


You can get the Westcott Illuminator Reflector 6-in-1 Kit 42″ size here.

If you want one with an arm and stand, check out this kit.


A Big Beautiful Light for Photographers – Westcott Zeppelin Para-59″

wpid13210-Delvis-Zeppelin-1-Edit_sm.jpg

The bigger the light and the closer to your subject, the softer it will be. I’ve always been a fan of BIG softboxes. So when I saw that Westcott had just introduced three new Zeppelin deep parabolic softboxes and the largest one being 59″ I was delighted to take it for a spin. First off, I already had an Elinchrom deep octa softbox, but as you can see below the Westcott Zeppelin dwarfs it!

zeppelin-next-to-elinchrom

This is a beast and that means big beautiful quality light wrapping around my subject. I do mostly beauty, portrait and fashion work and the nice thing about deep softboxes is that you get a nice fall off of the light.  Having the new larger 59″ size means that I can light more of my subject easily as well as multiple subjects more easily. I took it for a spin and really liked the results:

wpid13208-Delvis-Zeppelin-0053-Edit_sm.jpg

It’s really hard to argue with the results. While you can get these in two smaller sizes, I immediately opted for the largest one because I already have smaller sized modifiers.


wpid13206-Delvis-Zeppelin-0318-Edit_sm.jpg

It’s almost a little intimidating when you take this thing out of the box. Luckily the design of the mount/speed ring was well thought out. Since this thing is so big it could easily be a strain on your strobe. So the bracket/mount is designed to hold your strobe instead of the other way around.

wpid13204-Delvis-Zeppelin-0298-Edit_sm.jpg

This design also helps balance it better on your light stand. Once I got it all set up it was quite easy to mount my Elinchrom strobe to it and put the whole thing on my stand, which I weighted down with sandbags. There is an optional deflector plate that you can get for it and although I had it, I actually forgot to install it. The purpose of it is to deflect the light away from the center point creating a more even lighting pattern and therefore reducing potential hotspots. I’ll be using it from now on for sure. Westcott liked my results so much they requested the use of my images for one of their new ads.

wpid13214-Westcott-Zeppelin-PDN-May2014-Trim-Proof_sm.jpg

The Bottom Line

These new Zeppelins are sure to be a hit! They are well constructed and the light is gorgeous. Having the mount bear all the weight of the Zeppelin AND the strobe makes me feel a lot better about using it as I know there will be no additional stress on my strobes themselves. This will undoubtedly be my new go-to softbox for the majority of my studio work.

You can get the Westcott Zeppelin Deep Parabolic Softboxes here:

Westcott Zeppelin Para-59″

Westcott Zeppelin Para-47″

Westcott Zeppelin Para-35″

Westcott Zeppelin Deflector Plate

You will also need a speed ring & bracket adapter for your brand of strobe. Here are the ones they make:

Adapter/Speed ring for Bowens

Adapter/Speed ring for Elinchrom

Adapter/Speed ring for Profoto

Adapter/Speed ring for Balcar


Review: Westcott Speedlite ProGrip

westcott-progrip

Just about any photographer will tell you that you’ll get better results from getting your speedlight up and off your camera. There are all kinds of ways to do it including full blown solutions like my “Westcott Terry White Travel Portrait Kit.” It seems that Westscott has done it again with a handheld solution that can also be mounted on a stand. The Westcott Speedlite ProGrip shows that someone was thinking about this problem and came up with a way to not just accommodate your speedlight, but also a modifier such as a softbox or umbrella and even a second shoe for your trigger. It’s also nicely angled downward to give you better results if you simply hold it straight up.  In the picture above I have the Westcott Speedlite ProGrip PocketBox Kit. I have a Nikon SB 910 Speedlight on it as well as a PocketWizard Plus X trigger. Of course the speedlight and pocketwizard are not included. I’ll be the first to tell you that while I think this is a great solution that I’m not accustomed to holding up a speedlight for my shoots. If I use a speedlight I’ll more than likely mount it on a stand or some other mount. The other thing you probably wont see me do very often is use such a small modifier because I typically like the much softer light achieved by using larger softboxes. However, I wanted to give this solution a shot since it’s so portable and even smaller and easier to travel with than my RapidBox. I was already doing a portrait shoot in studio over the weekend with my full sized regular strobes, but I decided to take a couple of shots with the ProGrip and supplied PocketBox. I handheld the ProGrip in my left hand while shooting the Nikon D4 with my right hand. Here are my results:

wpid13038-Kimberly_Brown-0248-Edit_sm.jpg
f/5.6, 125th sec, 28-70mm f/2.8 lens, ISO 200 and Nikon D4


I took a few shots to get the power just right. I ended up at 1/8th power on the SB 910 and probably could have taken it down a bit more to control the hotspots a little better.

wpid13036-Kimberly_Brown-0235-Edit_sm.jpg
f/5.6, 125th sec, 28-70mm f/2.8 lens, ISO 200 and Nikon D4

The Bottom Line

The Westcott Speedlite ProGrip has a great feel to it and solves a real problem by letting you either easily handhold a speedlight, modifier, and trigger or by letting you mount it all on a stand. It’s very lightweight and small enough to put in just about any bag. The sell these in three flavors. You can get just the Speedlite ProGrip Handle without any modifiers or you can get the Westcott Speedlite ProGrip PocketBox Kit or Westcott ProGrip Umbrella Kit.

progrip-umbrella


20140127-132513.jpg