Are you willing to give up unlimited data for a Personal Hotspot?

Although I know it's iPad 2 day (more on that to come), let's not forget that Apple released iOS 4.3 this week for iPhone, iPad and iPod touch. One of the most compelling features for iPhone users is the Personal Hotspot feature (finally!). However, use of this feature on AT&T comes at high price. I'm not talking about the monthly charge as much as I am the fact that original iPhone users have to make a choice if they are thinking about using it. Prior to the iPhone 4 iPhone users on AT&T have enjoyed unlimited 3G data for a single monthly charge. AT&T grandfathered this plan for people upgrading to the iPhone 4. In June 2010 AT&T discontinued the unlimited data plans for NEW iPhone/Smartphone customers. While the new plans offer a lower monthly charge for less data, the highest plan is capped at 2GBs/month. If you go over, you pay!


Unlimited Data or Personal Hotspot?

In order to take advantage of the new Personal Hotspot feature that allows you to connect your Laptop, WiFi iPad or other WiFi devices to your iPhone wirelessly to share your iPhone's 3G data connection, you have to switch to the newer Data Pro plan ($25/month for 2GB of data) AND you have to ADD a tethering plan ($20/month) for a total of $45/month. What sucks the most about this is that the extra $20/month doesn't get you any more data! It's a "just because we can" charge. CORRECTION: The New DataPro tethering plan gives your 4GB total per month. Of course if you use the Personal Hotspot feature you'll likely hit that 4GBs faster and then have to start paying for additional data. On the plus side you can choose to turn this feature on or off on your account as needed. If you know you're going on a trip and want to use it, you can turn it on and then turn it off for the following month. Either way, you still have to give up your Unlimited Data Plan to use it.


Choices

Your choice of course is to not switch. Besides that option, you can weigh the cost of a data card or the MiFi if you're going to be a heavy user. Lastly since Jailbreaking your iPhone is legal, you could use a Jailbroken App that allows you to turn your iPhone into a personal hotspot without switching plans (you may be violating AT&T's rules by doing this and I'm not telling you to do so. You would be doing this AT YOUR OWN RISK and risk to your Apple Warranty). Verizon is already rumored to be dropping their iPhone unlimited plans soon too!

For now and as long as it's allowed I'll be sticking with my Unlimited Plan! 


AT&T and Verizon you really need to rethink "data".

Continue reading “Are you willing to give up unlimited data for a Personal Hotspot?”

How Much Faster is an SSD Drive?


SSD (Solid State Drives) are expensive! So the question that people usually have is “how much faster are they and will I see a difference?” In a nutshell the answer I have is FAST and YES! See my speed test above.


The SSD configuration is Apple’s CTO (configure to order) 512GB Drive. It’s in a 2011 MacBook Pro with 8GB of RAM and the 2.3GHz Quad Core i7 processor.

The 2010 MacBook that it’s being compared to has a 500GB 7200 RPM SATA drive. It also has 8GB of RAM and a 2.66GHz Dual Core i7 processor.

You don’t have to buy a new computer to get an SSD speed boost. OWC has several options for your existing computer.

5 Things You May Not Know About Photoshop CS5

httpv://www.youtube.com/watch?v=2qq_20ruKA0


In this episode I'll show you 5 features that you may not know about in Photoshop CS5. These are just 5 of the many JDI (Just Do It) features that the Photoshop Team worked into Photoshop CS5 to make life easier for Photoshop users each and every time they use the application.


See more of my Adobe Creative Suite Videos on my Adobe Creative Suite Podcast and get the App here. It features EXCLUSIVE CONTENT that no one else gets to see. This episode has a BONUS CLIP that is available only in the App:

Learn Adobe Creative Suite with Terry White - Wizzard Media


My New Watch is an iPod nano

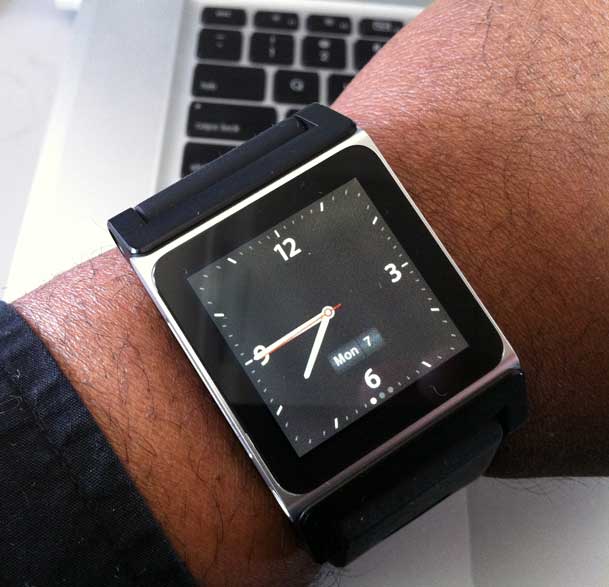
Although I love gadgets, when it comes to my watch I've always gone with something pretty simple. It's not even digital. I've worn an analog watch for years and have been happy. I remember when the 6th generation iPod nano was released and Steve made the joke about it being warn as a watch I smiled and really didn't give it a second thought. Actually I had no plans of ever buying the new nano simply because I didn't need one. My personal iPod is my iPhone 4. If I want to watch a movie on the go I usually do that on my iPad. I just don't need to carry around another iPod. The only other iPod I use is an iPod touch in my studio during photo shoots. I do own some of the older nanos and there is one dedicated to the glove compartment in my car. The only reason I would ever upgrade that one is if I needed more space or if Apple ever saw fit to provide WiFi syncing of media (that one I'd buy in a heartbeat). Nope, the new nano just never appealed to me.


I got a gift!

My buddy Bruce bought me the New nano as a belated Christmas present. The only reason the gift was delayed because he didn't just want to give me a nano (that I didn't need) he wanted to give me a cool tech watch! In order for that to happen he had to wait for the shipping of arguably the best wristband solution for the new iPod nano. It's called the TikTok. This was actually a Kickstarter seed project that got off the ground by individual donations/investments to the project and Bruce invested in them. The interest in this product was staggering!  They originally only wanted to raise $15,000 to do the project and to date they've raised $941,718! While the concept of wearing an iPod is certainly not new, it appears that there are lots of people that want to wear one as a watch.


Using the nano as a watch

First off while the band totally rocks! There are a couple of pros and cons to wearing an iPod nano as a watch though. The first one is that while the nano is a small iPod, it's a fairly large watch. I have large wrists so I can pull it off 🙂 The iPod nano has a multi-touch screen. This is cool because you have instant access to your music, pictures, FM radio, and other features like a pedometer, stopwatch and of course a clock. Speaking of the clock that's built-in to the nano you would think that the options to customize it would be endless. However, there are only a couple of choices. You can choose a black or white face. You can, umm….that's about it. There's no choice for a digital display or any other visual features. I'm fine with an analog display because that's what I was using anyway but it would be nice to have more options. The nano also offers an option to display the time upon touching the button no matter what App you are running. Again, this is an iPod that has a clock, not an Apple watch. It's clear that Apple didn't spend a lot of time trying to make this the ultimate "watch." The only real downside is having to press the button to see the time. Like all Apple multi-touch devices you can't just tap the display to wake it. You have to press the hardware button. I'd love to see a "shake" to display the time feature or a low power OLED continuous display. Although the nano doesn't run iOS, it's begging for Apps. I could see developers going nuts making "mini" or nano Apps for the wrist. Lastly even as an iPod the one other feature that is painfully missing is Bluetooth. I would LOVE to be able to use wireless headphones with this "watch". That would be killer!

All-in-all I'm happy with my gift! Thanks Bruce! It's my main watch now.


You can get the iPod nano here on sale starting at $134.

You can get the TikTok band here starting at $34.95.

Continue reading “My New Watch is an iPod nano”

Review: Drobo FS


I've been a happy Drobo user since October 2008. My main Drobo 4 Bay Firewire 800 unit is being used as the main storage on my Mac OS X Server in my home office. My second Drobo 4 Bay Firewire 800 unit is being used on my dedicated media server (an iMac running iTunes) and it houses all of our music, movies, TV shows etc. I love Drobos because you can easily increase the storage capacity by swapping one or more drives for larger ones without having to start over and reformat. I also love the fact that the drives don't have to be the same capacity. While my Drobos have been relatively trouble free from a hardware standpoint, I did suffer from a directory corruption problem once back in February 2009. Luckily I knew better and had my data backed up. While Drobo is GREAT at protecting you against drive failures there's is no magical protection against accidental file deletions, viruses, or directory corruption. In my current setup I have each Drobo being backed up on a nightly bases to external large capacity drives via SuperDuper! This all works great, but it does still leave me exposed to one problem. 


An Oops Moment

We all have those oops moments. Those moments where we do something that we wished we hadn't. It could be deleting a file that you thought you no longer needed or doing a Save when you meant to do a Save As, etc. If that happens to me and I catch it right away, no problem I can restore from yesterday's backup. However, if that happens and I don't realize it right away then I could lose the file completely after the new file gets backed up during the next evening's backup. In this case Time Machine really shines. As a Mac user I have Time Machine right in the OS. I use it on my MacBook Pro and other computers around the house. So no worries if this problem happens on one of those computers because i can just go back in time and grab and older version. However, if the file is on my Sever then I don't have that protection. Same goes for my iTunes collection. If I delete something there without realizing it, it will be gone for good after the next backup. 


Drobo FS to the rescue
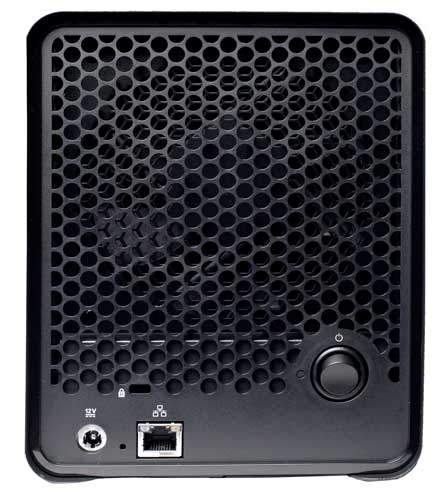
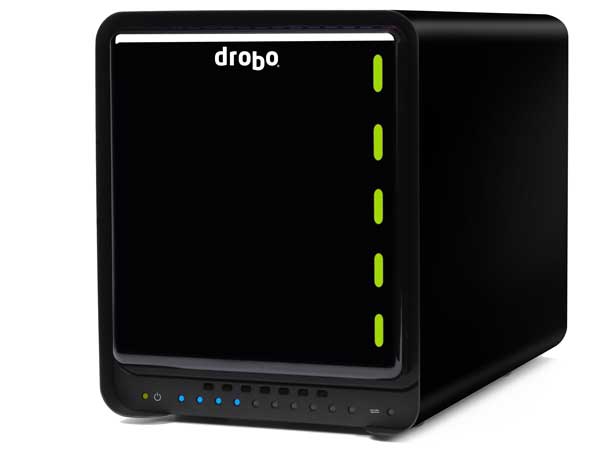
While I can pretty easily clone my Drobos to nice big 2TB and 3TB drives, it becomes more challenging using Time Machine for that much data on a single backup drive. The drives would fill up quickly and I would be no more protected than I was with a clone. In this case I wanted to use Time Machine but I would need something as large as the capacity of my Drobos and actually significantly larger if I want to go back further in time. The solution was clear – another Drobo. With another Drobo I could put large drives in it and it would not only have the storage I needed to backup one Drobo, but both Drobos. Since the two computers are not in the same room, I needed a network solution. This lead me to the Drobo FS. While I could have put another Drobo on my Mac mini server it would mean having to daisy chain it via Firewire and I also have limited space in that area of my office. The Drobo FS is a 5 bay unit that connects directly to your network via Ethernet. This means that it can be anywhere in my house including a closet or storage room. The 5bay FS doesn't cost that much more than a directly connected Drobo model.


Setting up the FS
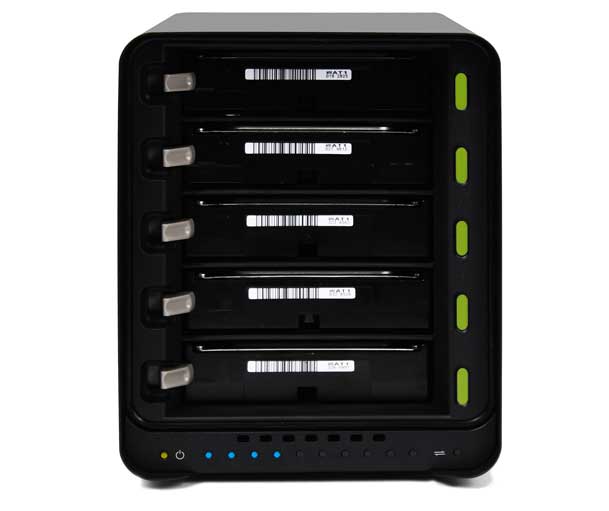
I love it when all the instructions that you'll need to setup a new device fit on a single card. The Drobo FS is that easy to setup. install the software. Insert one or more hard drives (2 or more is best for protection) and they don't even have to be the same capacity. Plug in your Ethernet cable (gigabit ethernet if you want performance) and turn it on!

The Drobo automatically formats itself and in a few moments shows up in the Drobo dashboard of all your networked computers. At that point you change the administrator username/password and create the "Shares" you want to be seen on the network. Add your users/passwords and you're done. 


Using it for Time Machine
Since I already have a Fileserver that I'm happy with I didn't really need to setup any shared folders beyond the one for my network Time Machine backups. You create a share and then just enable the Checkbox so that this new Share can be used and seen by Macs as a Time Machine volume.
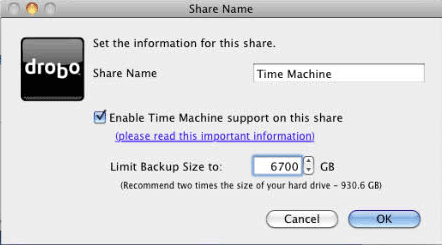
Unfortunately you do need to install the Drobo Dashboard on each of the Macs that you want to backup to it via Time Machine. It's not the end of the world, I just dont' like installing any more software than I absolutely have to. Once the Drobo Dashboard is installed on a Mac that you wish to backup, you mount the Share and then choose it in the Time Machine System Preferences. For now I've decided to use it for all of my Desktop Macs including both servers and another iMac and Mac Pro. I've completed the backup on a couple of these Macs as of the writing of this review. The big ones are going to take a day or two to complete because if you've ever tried to backup 1.5-2TBs of data you know that it can take a while.


The Bottom Line
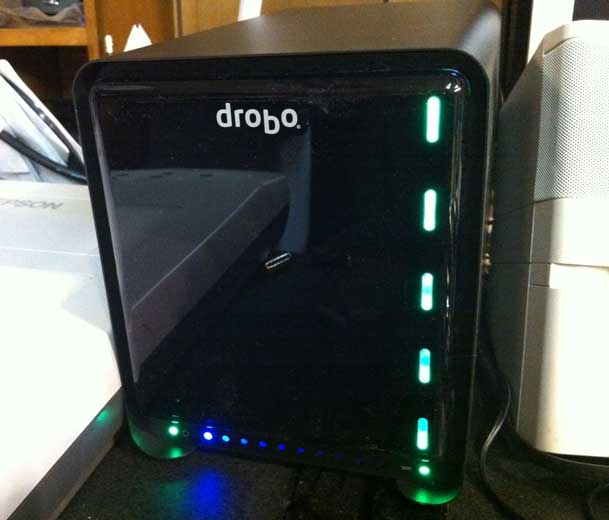
The Drobo FS is a great solution for any home or small business looking to setup a File Server/NAS or Network backup that is painless and has built-in redundancy for protection against drive failure. If you are going to use one in a File Server capacity keep in mind that while Drobo protects against drive failure, you should still back it up too! That goes for any drive solution. Also if you are going to use it as a File Server you can enable the Drobo Apps so that you get File Server type features such as web serving, ftp, etc. I didn't enable these as again, this isn't my main server.

The fact that the Drobo FS connects directly to my network instead of requiring a host computer is huge for me! I would hate it if the day comes that I restore an entire Drobo from a backup because it would take a while. I would hate it even more if the day came that I needed to restore a large amount of data and I didn't have a backup at all.

You can get the Drobo FS enclosure for less than $615 from B&H Photo and Video

You can get 2TB SATA Hard Drives here for $75. The price of storage has never been cheaper!

You can use the Drobo Storage Calculator here to figure out how much storage you would have based on the drives that you put in it.
Do We Need All the LED Status Lights?


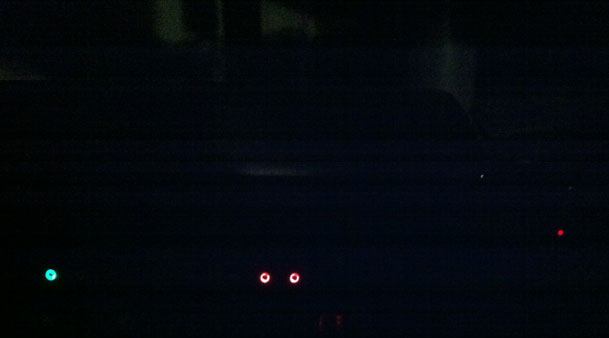
The other night I was walking through my house and the lights were off, but I was amazed by the number of things that have LED lights that are on all the time. I like to sleep in a TOTALLY DARK ROOM. I've gone as far as putting black tape over some of the most annoying LED lights in my bedroom. In most cases these LEDs are used to tell you the current status of the device. For example, on the TiVO Premiere a red LED comes on when it's recording something. A blue one comes on when it's transferring a show from from another TiVo. However, there's a green LED that's on all the time that simply means the device is on and has power. Since you never turn a TiVo OFF I question do we really need to see this green LED 24/7. I guess you'd want to know if it had become unplugged or lost power, but as I far as I can tell no one is climbing behind my TV and unplugging things. It gets worse.

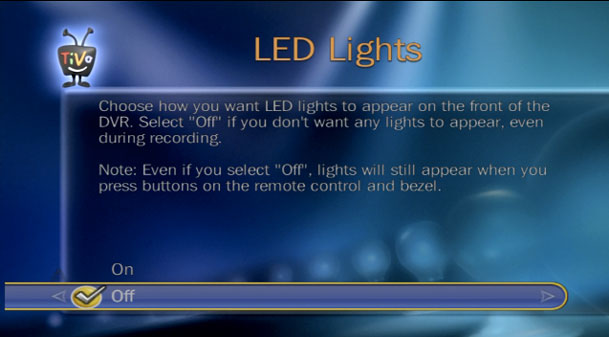
Update: TiVo does give you the option to turn them off (thanks Martha). It would be nice if MORE vendors offered this!

My bedroom TV has a red LED that is on when the TV is OFF. Again this simply means the device is plugged in and getting power. When you turn the TV on the LED goes off. I'm guessing that if there's no picture for more than a few minutes that the TV is not on. I'm also guessing that if I press the button to turn it on and it doesn't come on for some reason that there may be a power problem. In other words I don't need a continuous reminder that tells me that it's plugged in, has power and is OFF. 

Most of these devices have internal clocks. At a minimum it would be nice to be able to disable the LED at night automatically as a preference or simply turn it off altogether for those that don't need to see it. I was happy that Apple chose not to put the annoying pulsing bright white sleep light from the MacBook Air. Sadly it's still on the MacBook Pro, but clearly it's not essential as it was not deemed necessary on the Air.

If you are an interface design engineer and reading this post, please kill the unnecessary power wasting LED displays wherever possible. We'll all sleep better 🙂

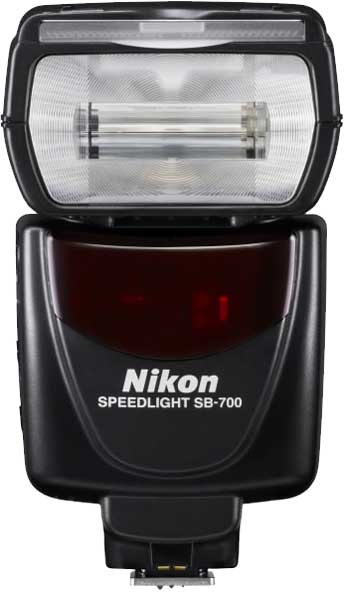
Nikon SB-700: Guest Review by Jason Lykins


I love the Nikon CLS flash system. For me, it is THE reason to choose Nikon over any other brand. Their R&D, fit and finish, and performance are second to none in the small flash arena. For a few years the SB-800 was the go to flash for me, offering the control, and power needed for a working professional. Recently Nikon updated it’s flash line; first with the flagship SB-900 replacing the SB-800, and more recently the SB-700 replacing the SB-600. I am currently using SB-900’s as my go to main flash units, but when my last SB-800 died I decided to take a look at the new SB-700 as an alternative. After reading David Hobby’s (aka the Strobist) initial review of the flash I decided to give it a go. After a couple of weeks with it, I’m not only impressed, but sold on this unit. I’ll be buying more.
 

What it had to have

There were a few things that this flash had to have to make it useful for me. The first and most important thing that I need is power. I often double, and triple diffusing my flashes to increase the quality of light. This requires a lot power to shoot through all of these layers of diffusion and still have enough “oomph” to light the subject. The SB-700 has power to spare. After shooting it side by side with a SB-800 I’m pretty sure that the power output is on par with that unit. Of course I didn’t do a scientific comparison to measure this, but just the light output, the coverage, and the recycle times make me think that this flash is right there with the 800. Nikon claims not, but I have to think that the low power rating by Nikon is to drive pros to the SB-900 over the 700. Suffice to say that this flash meets my power and output needs without a problem.


The next thing on my list of must have’s is control. I need to be able to control wireless flash systems just as I would with the SB-800 if I’m going to be using these flashes as replacements. The SB-700 gets part of the way there. Let me explain. Nikon did a great job by putting a lot of the controls on the outside of the flash similar to the SB-900. They placed a rotating switch similar to the 900 for TTL, remote, and Master selection for the wireless CLS system. While we’re on this subject, the 700 can act as a Master flash for the CLS system, but only offers two groups. For me this isn’t a big deal because I use them with the Pocket Wizard Flex units, which allow me to add that control externally anyway. The 700 also adds a physical switch to the back of the unit to select your mode. With the option of TTL, Manual, and guide number, it has every option that I would want. Another Physical switch added to the back of the flash is the light output type (standard, even, and center weighted). The FEC (flash exposure compensation) for your main unit, and the remote units when in master mode is controlled just like the SB-900 with a quick button push and a spin of the wheel. If you’re already accustomed to the SB-900 controls, you will feel right at home.

The reason that I said Nikon only get’s part of the way there on the control has to do with the way it handles it’s wireless flash units. With the 700 in master mode, the remote flash units are set to the same flash exposure mode as the 700. This means that if you are using TTL for the main on camera flash, you can’t set the remote units to anything else. For most this probably won’t cause a problem. For me I want to make my remote flashes different exposure control than my master sometimes. Sometimes my subject is being lit with TTL, but in the background I want to add a small amount of kicker light with a gel. The SB-900 allows for this independent control of the wireless flashes, but for whatever reason they excluded it from the SB-700. To work around this, I use the SU-4 mode to trigger the background lights instead. Speaking of SU-4 mode, it works remarkably well on the 700. Nikon flush mounted the light sensor for triggering making this thing super sensitive. When I say sensitive, I mean SENSITIVE. It picks up any little glint of flash and triggers it.
Continue reading “Nikon SB-700: Guest Review by Jason Lykins”

How To Get Started With Adobe Photoshop Lightroom 3

httpv://www.youtube.com/watch?v=-5SA-uluPns


In this episode I show you how to get started with Adobe Photoshop Lightroom 3. Sure there are tons of videos and sites dedicated to Lightroom and showing tips and tricks, but this time I'm specifically aiming at Lightroom beginners. Learn how to get started the right way with Lightroom 3 no matter where you're coming from in terms of image management.


See more of my Adobe Creative Suite Videos on my Adobe Creative Suite Podcast and get the App here. It features EXCLUSIVE CONTENT that no one else gets to see. This episode has a BONUS CLIP that is available on in the App!:

Learn Adobe Creative Suite with Terry White - Wizzard Media


5 Ways To Take Advantage of Dropbox

I started out using Dropbox.com because someone shared a file with me using that service. I really didn't think much about it at the time and treated it like all the rest of the File Sharing over the Internet services out ther. However, the more I used it the more I got hooked on it. I'll also state for the record that I have no affiliation with Dropbox.com, don't know them, never have met them and get nothing from them other than great service. Now that I have that out of the way let me explain briefly what sets Dropbox.com apart from the rest of the services I've tried.


How does Dropbox.com work?

First off you head over to Dropbox.com and setup your FREE account. You get 2GBs for free and while that doesn't sound like a lot (it's really not, but…), it's free and will cover most people's needs for sharing documents. You can also earn an additional 250MB's of space (up to 10GB total), per each friend you refer that signs up for a free account.

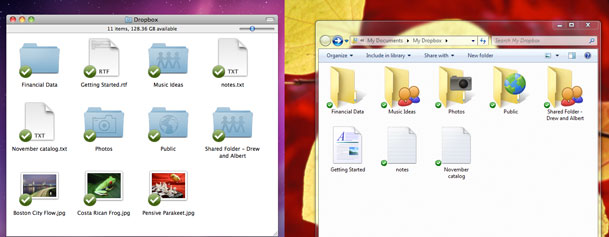
At this point you haven't done anything special that you couldn't have done on a dozen file sharing sites out there. However, what you also get is the ability to download the Dropbox.com application for your Mac or PC (as well as mobile devices such as iPad, iPhone, Android, Blackberry, etc.). With the Dropbox App installed it sets up a "Dropbox" folder wherever you want it be on your drive. You can treat this folder like any other folder. You can create subfolders in it as well. The difference is that anything you put in this folder will AUTOMATICALLY and securely sync up to the "Dropbox" cloud. The files will still be on your local drive, but they will also be available online via the Dropbox website as well as accessible from any of your mobile devices and sync'd to any other computers you have Dropbox installed on. This is what really sets it appart from most similar services out there. The latest version even offers the ability to keep this folder sync'd with your other computers on your LAN, which is a lot faster. Now that we know how it works (if not, watch the video at the end of this post), here are 5 ways to take advantage of it:


Have the same files on your Laptop and Desktop computer

Because Dropbox will sync the contents of your Dropbox folder across ALL of your computers (Mac, Windows, Linux), it makes it really easy to have the same files on a work/office/studio computer and a home computer or a Desktop Computer and a Laptop. Every operating system out there gives each user account a "Documents" folder. Instead of putting your documents in the default "Documents" folder, put them in a Documents folder located inside your Dropbox folder. Now you can work as you always do and when you get home those same documents will be there waiting for you on your home computer or on your laptop. This same concept would work for photos, music and movies as well.  Syncing happens in the background once the document is saved and closed. 


Share a folder with your colleagues

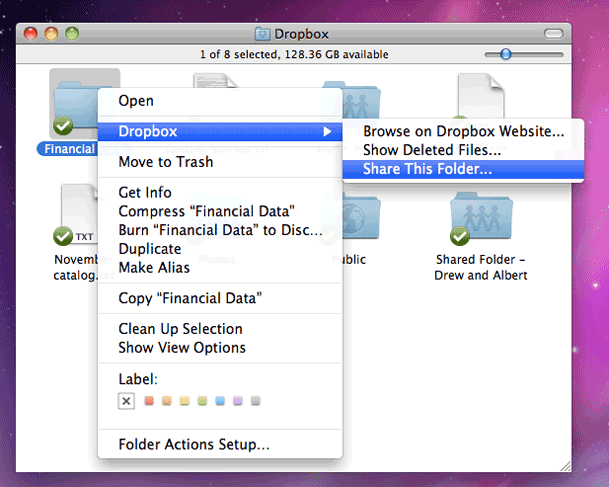
The shared folder concept is how I got started with Dropbox in the first place. Someone shared a folder with me and the other people working on the project. When any of us would add things or make changes to the stuff in that folder, it would automatically sync those things to each of our computers. No more emailing files back and forth or using thumb drives. This is also useful for sharing photos with a group of if multiple people take photos at an event, they can all copy them to a shared Dropbox folder for everyone to have a set.


Create instant online, sharable photo galleries

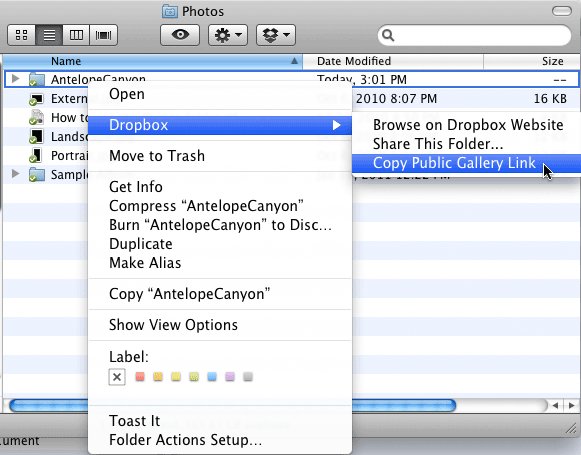
I hadn't really discovered this feature until recently. If you stick a folder of JPGs in the default "Photos" folder, Drobbox will automatically turn it into a gallery and let you share a link to that specific folder for anyone to see even if they don't have a Dropbox account. Here's an example gallery that I created.

Continue reading “5 Ways To Take Advantage of Dropbox”

The New MacBook Pros are Here!


As rumored, Apple introduced their NEW MacBook Pro lineup today and while they didn't introduce the MacBook PrAir that I'd hoped for, these new machines are noteworthy in terms of performance features. The most notable enhancement is the new "Thunderbolt" (aka Light Peak) multipurpose port offering up to 10Gbps data throughput. This makes it the fastest I/O port that Apple has ever used on a notebook offering speeds that are 12 times faster than Firewire 800. The next notable update is the move to the Intel Quad Core "Sandy Bridge" processors. Lastly in the notable update area is the upgraded "FaceTime HD" camera offering a much higher resolution image over the previous iSight camera. Apple also moved to AMD graphics cards. I had hoped for faster Nvidia cards with 1GB of RAM or more for Mercury (effects) Playback in Premiere Pro CS5, but the good news is that Premiere Pro rocks with real-time GPU playback on AMD too.

Get all the specs here.


So what will I do?

Although I had hoped for a New MacBook Pro that was closer to the MacBook Air in terms of weight, I can't argue the potential of these new notebooks for making my work and demos go even faster. I look forward to a NEW 15" "work" MacBook Pro (is the store back up yet? 🙂 ) However, I had a backup plan in case these weren't the new lighter weight models that I dreamed of and that plan is to buy a 13" MacBook Air to be my "personal" notebook. Granted I do personal stuff on my work notebook and I'd probably do work on my personal notebook, but having the choice of either one depending on my needs for a particular trip would be great. This way if I'm NOT traveling to do a demo/teach a class where I need all the horse power I can get, then I'd bring the Air. I'd probably also use the Air around the house along with the iPad. With services like Dropbox.com keeping files in sync between multiple computers is not a problem these days. So that's my plan.


UPDATE – To answer the questions I'm getting regarding Premiere Pro playback on the new AMD graphics cards

Here's a video by my buddy Dave

httpv://www.youtube.com/watch?v=dUyxSJUVQb0