
Happy Memorial Day 2105
As you enjoy this day with your family and friends let’s not forget that this is the home of the free because of the brave.


Welcome to my technology blog!
Happy Memorial Day 2105
As you enjoy this day with your family and friends let’s not forget that this is the home of the free because of the brave.
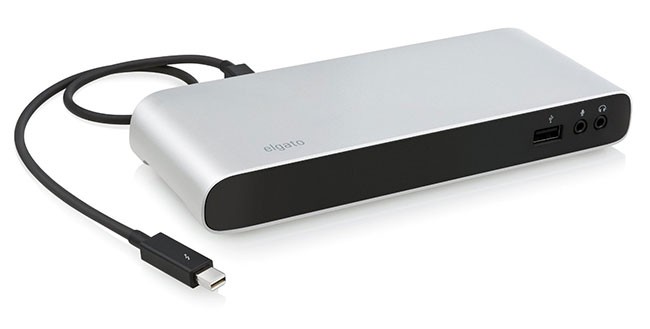
For years now my MacBook Pro has been my primary computer. Now my only desktop computer is my Mac OS X Server. Having a MacBook Pro doesn’t mean that I don’t have a ton of peripherals that I need to connect. The last thing I want to do when I leave or return from a trip is connect a bunch of cables. That’s where a Thunderbolt 2 dock comes in. Although I’ve used a Belkin one for years now, people are always asking for a lower priced alternative. Elgato has created one the fits the bill nicely. For a hundred dollars less than the competition you still get 2 Thunderbolt 2 ports, 3 USB 3.0 ports, 1 HDMI port, 1 Gigabit Ethernet port, and an audio in and audio out port. Really the only thing missing is more USB 3.0 ports and a legacy port like Firewire 800 or eSATA. Since I connect more than 5 USB devices anyway I would still need a USB 3.0 hub. Also most people at this point have probably replaced their older Firewire 800/eSATA devices with newer tech. If you fall into that category then I would save save the hundred bucks and use part of it to buy a USB 3.0 hub.
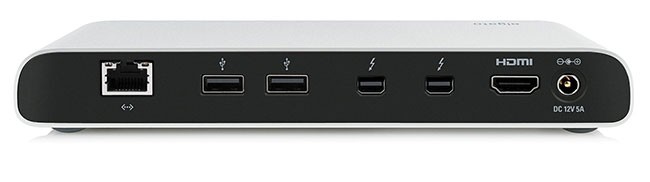
The design is nice and compact and it’s great having the audio ports on the front as well as the 3rd USB 3.0 port capable of charging your mobile device.
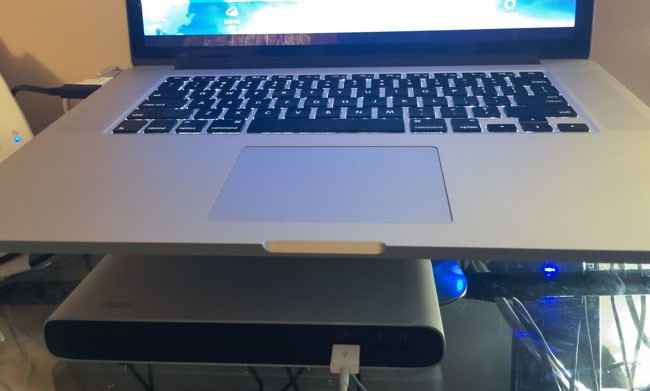
If you have a MacBook Pro then having a Thunderbolt 2 dock is a big plus. You’ll enjoy the single Thunderbolt connection and the additional ports. The one thing I wish that these devices offered are more Thunderbolt ports. You really don’t gain any because you have to connect the dock to one of your existing ports taking up a Thunderbolt port on the dock and one on your computer. That leaves you with the same number of Thunderbolt ports that you started with. I would like to see a model with 3 or 4 Thunderbolt ports for true Thunderbolt expansion.
You can get the Elgato Thunderbolt 2 Dock here on sale.
For a few bucks more you can get this one by OWC that has 5 USB 3.o ports and a Firewire 800 port.


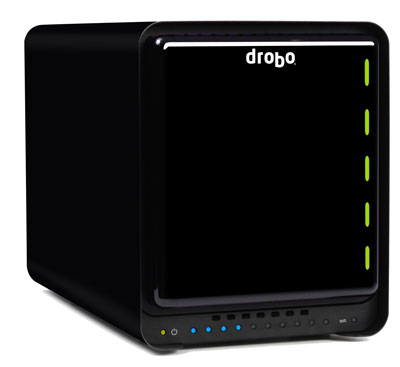
Like you, my data is very important to me. I have several backups and offsite cloud backups too. In my home office I use a Drobo 5D connected to my Mac OS X Server as well as a second Drobo 5N to backup the Drobo 5D. The whole reason to have a Drobo is so that if one of your hard drives fail your data will be protected and you can just keep working. You’ll probably replace the failed drive with a larger one since larger drives come out every year. The one thing we don’t really think about is what happens if two drives fail at the same time? Normally this means you’re screwed and it would be time to restore from a backup (after replacing the two failed drives). The last time I had a Seagate 3TB drive die in my Drobo 5N, I not only replaced it with a WD 4TB NAS drive, but I also enabled Drobo’s dual redundancy feature in the settings.
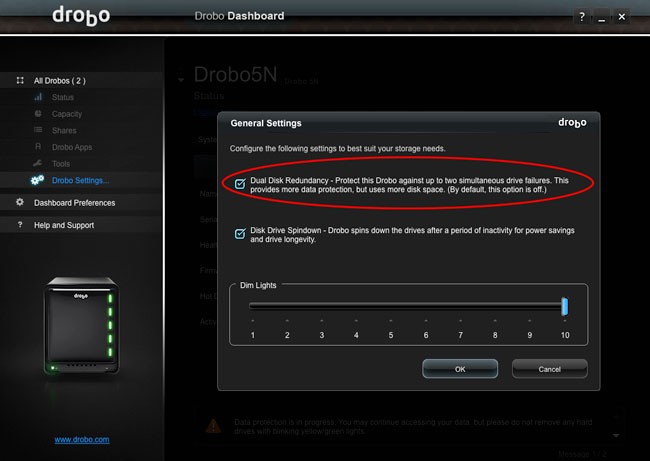
With this feature enabled now two drives could fail at the same time and I’d still be protected.
I hear ya! However, before I tell you what happened on my other Drobo (5N), think about it. When you setup your Drobo (RAID), chances are you bought multiple drives at the same time. So if one fails (especially as they get older), then it’s likely that another one bought around the same time could fail shortly thereafter. As a matter of fact I now know this can happen. Although I had turned on Dual Redundancy on my Drobo 5D, I had not yet turned it on my Drobo 5N. While traveling on business I received an email alert that one of my drives had failed (an older 2TB Seagate). No big deal as my data was protected. However, by the time I got home several days later a second 2TB Seagate drive had failed. That’s it. Game over. It wasn’t a huge deal since this Drobo served as a backup to my main Drobo. I didn’t lose anything other than Time Machine history.
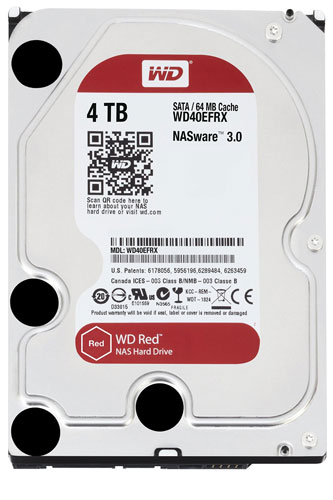
I replaced both drives with new 4TB WD NAS drives and during the setup process I enabled Dual Redundancy. My Drobo 5N still has two of the 2TB Seagates and a 3TB Seagate (which have been failing on my pretty regularly and it’s why I’m kinda done with Seagate) in it. Now I’m a little less worried if two of the older drives bite the dust at the same time. Keep in mind that I just put two 4TB drives in my Drobo 5N at the same time. Chances are if they die in a few years (no premature failures) under normal wear and tear, they’ll probably die around the same time.
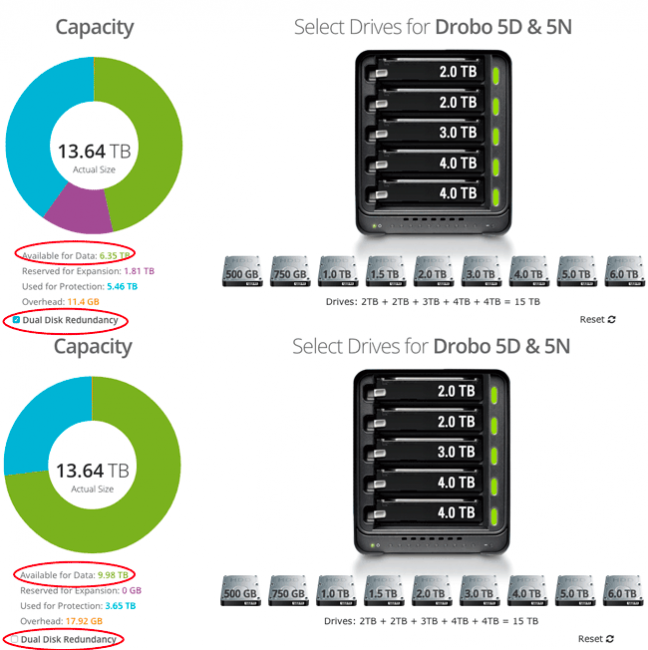
There is a downside otherwise this option would be on by default. By enabling Dual Redundancy your Drobo will have less usable space. You can figure out how much storage space you’ll have by using the Drobo Capacity Calculator on their website.
Yes two drives can fail at the same time or back to back. While enabling Dual Redundancy does give you less storage space, drives are relatively cheap and it’s better safe than sorry.

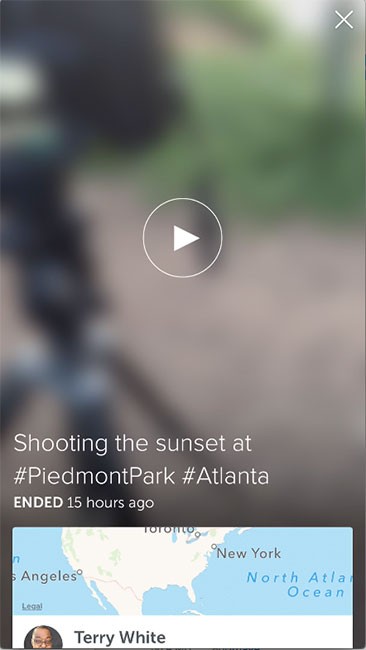
It’s always fun to get out and shoot on my free time. Now with the Periscope App it’s easier than ever to invite people to watch live. This past weekend I did a live broadcast from my sunset shoot at Piedmont Park in Atlanta Georgia. I had over 100 people watching my short broadcast. With Periscope the broadcasts can be uploaded for replay for a 24 hour period. After that they are pretty much history. Sure Periscope allows you to save the video to your camera roll, but that video doesn’t include any of the comments or interactions (hearts) you received during your broadcast. Not to mention the fact that it’s in vertical orientation which really tends to tick people off on YouTube. I figured out a way to keep the video, comments, hearts and reshare it in a landscape view:
1. Within 24 hours of your broadcast you can plug your iPhone into your Mac running Yosemite (Mac OS X 10.10.x) and launch the QuickTime Player. From there you can choose your iPhone as the camera and audio source (see the details how to do this here). Now just press the record button in QuickTime and playback your Periscope broadcast from the Periscope App. This will effectively screen record your iPhone so that you’ll have a movie of all your Periscope interactions.
2. This still doesn’t solve the portrait vs. landscape issue. As of this writing the developers of Periscope are working on “landscape mode” but it’s not here yet. Therefore embrace it, don’t fight it. With Adobe Premiere Pro CC I was able to import my Periscope screen recording and then add other elements to fill up the space. Elements like still photos that I captured during the shoot and other videos such as drone footage.
Here are my results:
While it will be absolutely phenomenal when Periscope offers landscape mode, you can make due in the meantime.
Follow me on Periscope/Twitter @TerryLWhite


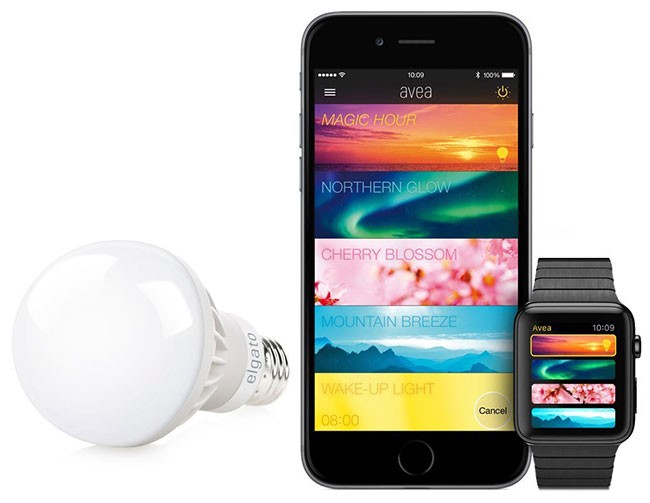
I love home automation products. My first X10 remote controlled lights date back to the early 1980’s. Long before smartphones and bluetooth wireless. I always thought it was cool to be able to remote control several lights, appliances, etc. all from one control pad or timer module. I haven’t looked that the advancements that closely over the years, but when the Elgato Avea came across my review desk I was excited. The Avea Dynamic Mood Light is a 7W bluetooth controlled LED lightbulb. Unlike other products on the market this one doesn’t require a network connection or any other hardware to drive it other than your iPhone or iPad. Once you take it out of the box you merely screw it in to any standard light socket and set it up with the App on your iPhone. Rather than go into more detail via text, check out this video of how it works:
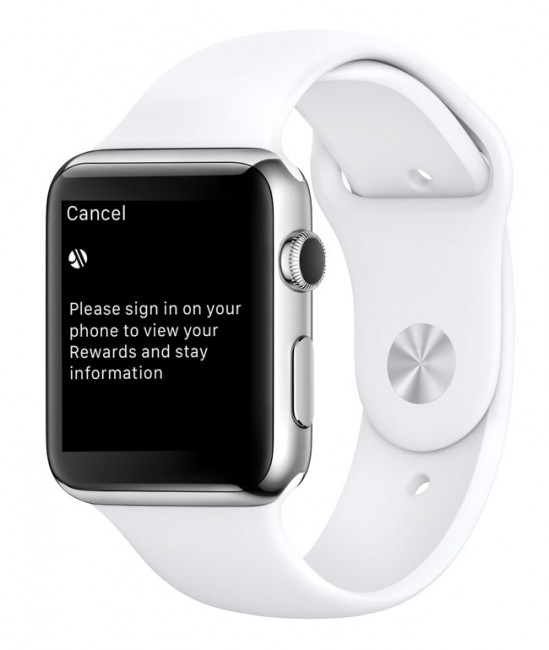
I was so happy with the review unit that I immediately ordered another one for another room. I was also pleasantly surprised to see and use the Apple Watch support. Being able to turn lights on and off as you walk around from your wrist adds another level of convenience and cool factor. I was also pleased to see that the lights can be controlled from either device at any time. When it comes to the iPhone vs. iPad vs. other iPhone, whoever opens the App first has control. This eliminates the pain of having to constantly unpair and pair differing mobile devices. My only two complaints are that I wish they offered a higher watt (brighter) version and that they made the app easier to control different lights than it is now. While the bulbs are plenty bright when using the “white” color setting, they colored settings/moods can be a bit dim. The App does allow you to turn on a mood for one or more lights at the same time, it seems like that control is buried another level deeper in the mood presets. I would like to see this setting moved up in the UI. My gripes are very minor. I’m very pleased with this product and will probably order more of them.
You can get the Elgato Avea on sale here.
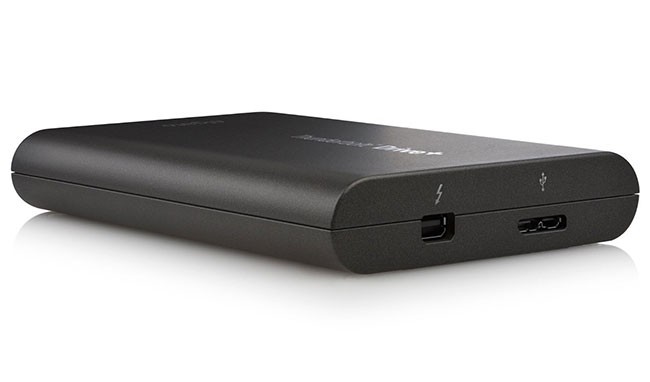
You can never have too much storage and fast external storage is even better. A few years back I bought the first Elgato External SSD and my only complaint with it was the fact that it only had a single Thunderbolt port. That pretty much killed the use that I thought I would have for it which was to boot from it during certain presentations. Since the MacBook Pros back then only had one Thunderbolt port I couldn’t connect the drive and an external display/projector at the same time. Fast forward to today and the NEW Elgato Thunderbolt Drive + and while we still get a single Thunderbolt port, we get the addition of a USB 3 port as well as great performance in an external portable hard drive.
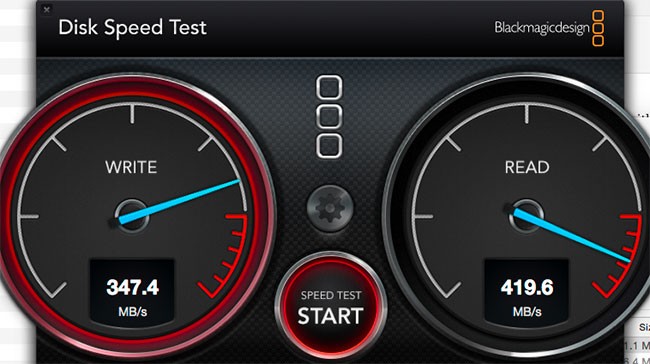
I ran the above speed test on the 512GB model connected and the results were respectable!
You can choose between the 512GB model or the 256GB model. Both come with a USB 3 cable and Thunderbolt cable. The metal enclosure is very solid and sleek unlike many of the plastic USB 3 cases.
While it’s great having a FAST portable SSD that can be connected via USB 3 or Thunderbolt, the only issue with this drive is the cost. If you want quality vs. cheap, then this is the one for you.
You can get the 256GB model here or the 512GB model here.
Many of my followers told me that when they saw that I was getting an Apple Watch that they “can’t wait to read your review.” Well here it is… At 3:00 AM ET on April 10th my alarm went off so that I could roll over and place my order for my Apple Watch. I was able to get into the site by 3:05 AM and I placed my order for a 42mm Silver Sport Watch. The Silver Sport only comes bundled with a White Band, Blue Band, Pink Band or Green Band. I’m really not fond of any of those colors, but wanted the Silver watch. Therefore I ordered an extra Black sport band (it’s still on backorder). By 3:10 AM I had rolled over and went back to sleep. Because I got my order in fast enough I was lucky to be in one the first shipments. I got my Apple Watch via UPS at about 2:45pm on April 24th. I had already done some research, read other reviews and watched the videos on Apple’s site. Therefore I knew a lot about the Apple Watch before I broke the seal on the box. I knew that the setup process included a fairly long sync process to sync the Apple Watch Apps from my iPhone. The process took about 10 minutes from start to finish. Of course your mileage will vary based on the number of Apple Watch compatible Apps that you have on your iPhone. Right after I got it setup I recorded this video to give a quick video overview of some of the features:
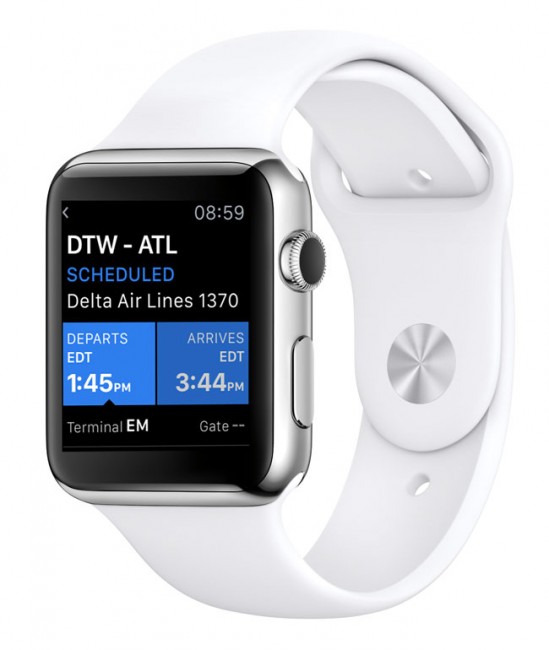
The video above was only after having just setup the Apple Watch. It just so happened that I was traveling on a business trip Friday evening. I got the watch setup in time to head out to the airport and make my flight. The first real world use I got (besides simply seeing the time at a glance – yes it is a watch) was to use the Uber App to summon a car to pick me up and take me to the airport. The next real world use was using the Delta boarding pass that I had received the day before on my iPhone in Passbook. Any of your Passbook passes automatically appear on your Apple Watch. I used it both at the TSA checkpoint and to board the plane at the gate. No problems. I landed and got a notification from the Hertz iPhone app to let me know what stall my rental car was in. I drove to my hotel, checked in and crashed for the night.
Battery Life… The next day (Saturday) I woke up and after showering I put my Apple Watch on. While you’re supposed to be able to shower in the Apple Watch I’m just not ready to take any chances at this point. I’ve seen the video where someone submerged an Apple Watch under water for 15 minutes and it still worked. Apple says it’s not water proof and I’m not ready to push it. I put the watch on at about 9:45am and went on about my day. When I got to my seminar I used the timer app on the Apple Watch to remind me 10 minutes before my end time. The great thing about the Apple Watch timer is that it will give you a taptic response when it goes off. This way I can feel it even if I don’t hear it. I used the Apple Watch as much as I wanted throughout the day and at 9:42pm (about 12 hours later) my battery indicator showed that I had 47% battery left. This was good. I would only be up for a few more hours at the most and this meant that I can easily use the Apple Watch with a single charge each day. As a matter of fact as I write this post on Sunday night and having started earlier today at around 8:30 AM I still have 36% battery life at 12:22AM (Monday morning).
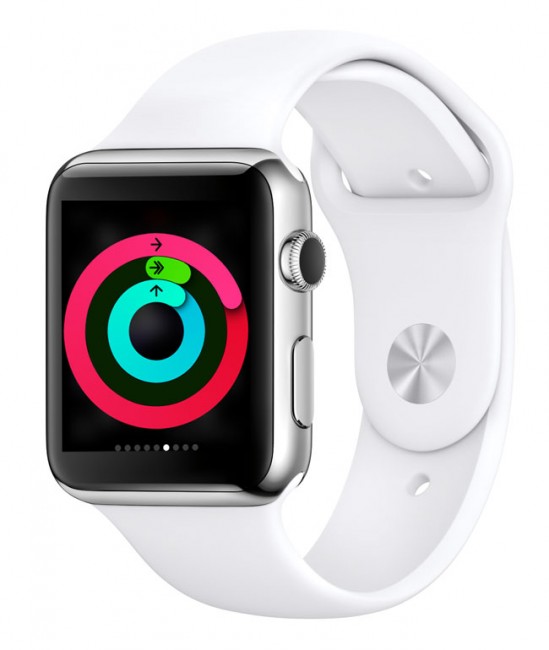
On Sunday I got up a bit earlier and went on a morning walk along the river. I like the Activity monitor and I was looking forward to the Apple Watch replacing my Nike+ Fuelband and it does so nicely. The Apple Watch allows you to track your overall activity/calorie burn, standing for at least one minute every hour for 12 hours throughout the day and getting at least 30 minutes of exercise throughout the day.
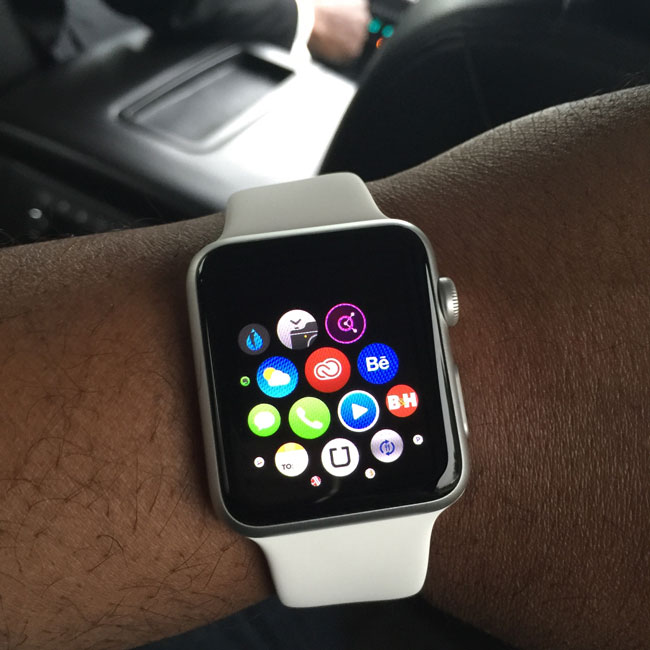
Reportedly there were at least 3,000 apps available on April 24th for Apple Watch. I know that I was seeing updates on a daily basis. I have 71 Apple Watch Apps myself.

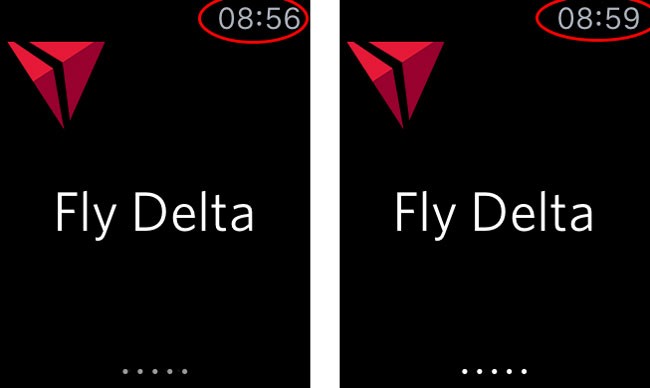
NOTE: I noticed today that once I opened the Delta app on my iPhone the Apple Watch app opened right away. Like the Marriott app, that defeats the purpose of the Watch app. This needs to be fixed.
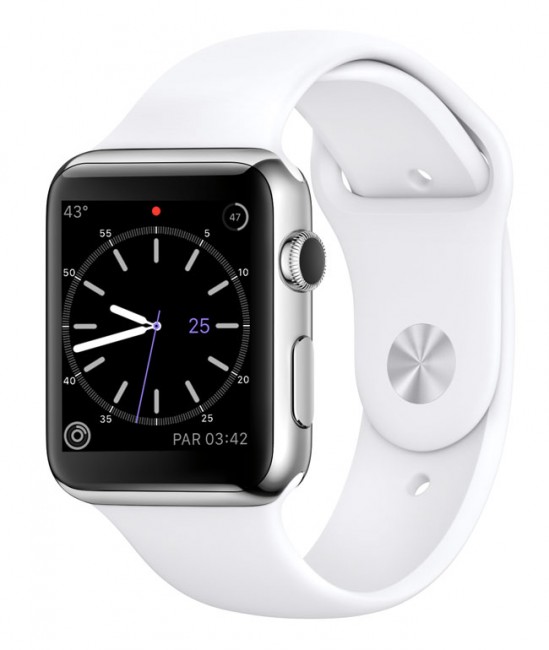
As you might expect the built-in apps are generally better, more stable than the 3rd party Apps. I’m sure Apple’s engineers had complete access to the hardware to play. I really like the Messages App, Passbook, Weather, the Phone app, and the Timer (I used the timer as a presentation timer on Saturday and really appreciated the tap on my wrist letting me know I only had 10 more minutes left).
I’m finding that while you can have up to 20 Apps with “Glances” that fewer “Glances” are better. By the time you have to swipe left or right 10 times to find the Glance you want you could have just as easily found and opened the App itself. Today I removed all but the few glances that I will use the most. By the way a “glance” is when you swipe up from the bottom to get to things like battery life, current stock price of your favorite stock, current weather etc. When you swipe up you see the last glance you used. To switch to a different glance you either swipe left or right to navigate them. Having too many will defeat the convenience of glances.
One of the things I was looking forward to with Apple Watch is actually Apple Pay. The idea of not only not having to take out my wallet at the register, but not having to take out my iPhone 6 Plus is very appealing. I’m happy to report that Apple Pay rocks on Apple Watch and is definitely the fastest way to pay for things. See it in action in this short video I made:
Every time I mention Apple Watch I always have at least one person questioning why anyone would need it? Apple Watch is an extension of your iPhone on your wrist. There isn’t anything that you can do on Apple Watch that you couldn’t do on your iPhone. I remember the same arguments that surfaced when the iPad was released. There was nothing that you could do on iPad that you couldn’t do on your laptop. If you’re in that mindset then you’re right Apple Watch is probably not for you. For me it’s about seeing information at a “glance” and not having to always pull out my iPhone 6 Plus. The same way the iPhone allowed me to do things without always having to pull out my MacBook Pro. If the Apple Watch did nothing but displayed the time, weather, date, another time zone of my choosing, gave me my Passbook passes and Apple Pay it would have already been all that I wanted. However, the Apple Watch offers so much more. For a 1.0 product the hardware seems solid. I would like to see more watch faces as it seems like the iPod nano had more watch faces than the Apple Watch, but I’m sure that will happen in time with software updates. Once the 3rd party apps are refined a bit, Apple will have another healthy new product line on their hands. I’m happy with my purchase and look forward to continued updates, apps and other 3rd party accessories.
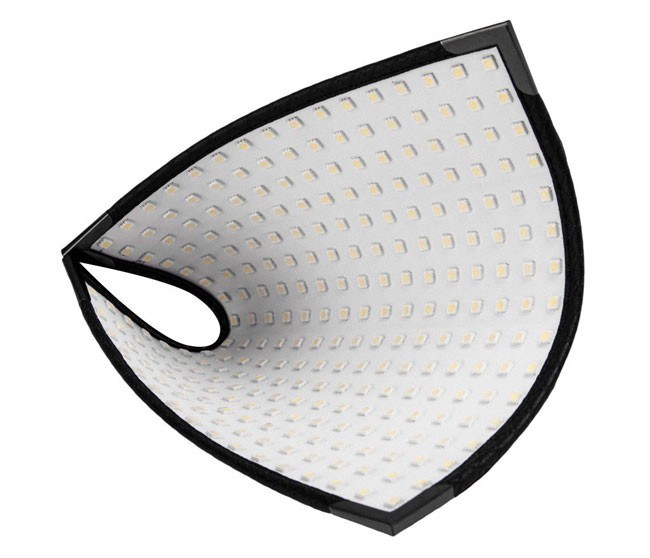
I remember when I first saw the above photo on Westscott’s website, I immediately and without hesitation said “WOW!” I love continuous lighting and the thought of having an LED light panel that would be easy to travel with was intriguing. I recently put the 10×10″ model to the test. Here’s a short video of my setup:
The Flex LED is 5,600 daylight balanced. The Flex™ 1-Panel Daylight kit includes a mounting bracket and a 1/4 stop diffusion panel. The dimmer goes from 5% to 100%. The panel is water resistant and the kit also includes a 16′ extension cable.
Here’s a production shot from my test shoot:

The mounting bracket includes a “clip” style mount instead of a traditional light stand mount. That’s both a plus and a minus. However, since the panel is so light you should be able to attach it to any light stand or any other suitable stand. I also clipped it to a chair back at one point to light the background. In the picture above I simply clipped it to the light stand holding my Westcott Skylux LED and Rapid Box Octa XXL softbox which was powered off at the time.

The above shot was captured with my Nikon D810, 70-200mm VRII f/2.8 lens at ISO 200, 190 mm, f/3.5 1/80 sec. Although I prefer bigger, softer main lights for portrait work I was impressed with this light for its size and incredible amount of output. It was soft enough with the diffusion panel on front.

The Westcott Flex LED is another great tool in my lighting arsenal and it’s probably the first LED light that I feel very comfortable in traveling with and knowing that it won’t take hardly any room in my carry-on luggage. The “clip” means that I can probably get away without having to carry or find a light stand too. While the price may seem relatively high, it’s actually on par with high end name brand speed lights from the top camera manufacturers. However, the fact that it’s continuous lighting means that I can also use it for video recording too making it more flexible than a speed light.
You can get the details/order the kit here.


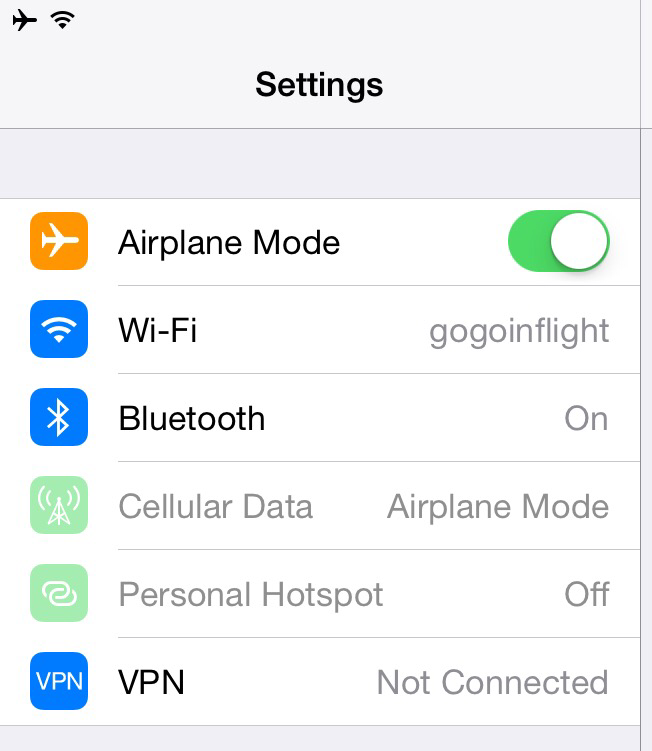
I’m headed back to Atlanta from Amsterdam today. The flight time is just over 9 hours. I did my usual downloads from my TiVo DVR the night before so that I would have some shows to watch and of course I have my MacBook Pro so that I can get some writing done. The last thing I expected on this Delta flight was to have WiFi internet all the way home! Sure I get my hopes up each time I board an international flight by looking for the familiar WiFi stickers found on 99% of all Delta domestic flights and like always there were no stickers present on this flight. However, once we got up to 10,000 feet I noticed that my phone was asking me to login to my corporate IPASS account (a roaming partner of Gogo). I just figured someone on the plane was faking a Gogo hotspot. However, it worked! I was blown away because I figured I wouldn’t see this until at least 2016. I asked the flight attendant just to make sure and she confirmed that “some” planes have it now and that we were “lucky” today. Lucky indeed!

So what does it cost to enjoy this international benefit? Since I have a corporate plan from work that covers Gogo InFlight WiFi I didn’t even think that about a cost difference at first, but as I started writing this I figured my readers would want to know. I went back to the regular logon page and the prices are high indeed. $19.95 for one hour and $39.95 for the whole flight. While I appreciate this being a work perk, I gotta say that I would gladly pay $39.95 for WiFi on this 9 hour flight. The amount of stuff that I can get done (including this blog post) is worth it to me. The next question is how fast is it? Gogo inlfight wifi in the states uses a celluar system (plane to ground) and from I can see it’s based on 3G technology. When it first came out the speeds were decent, but lately they have been slow to almost unusable. Still slow is better than nothing, so I use it all the time.

Since connecting to the ground over the ocean is not feasible, any plane offering international service requires satellite connections instead. One of the first thing I did was run 4 consecutive speed tests to get an average speed and while it’s not screaming fast, it’s faster than the domestic service. I’ll take it!

I remember wishing for WiFi on long haul flights for years. It almost brings a tear to my eyes to see it finally making its way into my life and I commend Delta for making these investments to make air travel a little less painful.

Looking forward to seeing many of you at Professional Imaging in the Netherlands this weekend. Should be a lot of fun and a lot of great information passed on from the very talented list of instructors. I’ll be teaching my photography workflow using Lightroom and Photoshop CC. If you attend the show be sure to stop by and say hello. Also if you have any “must shoot” location recommendations be sure to leave a comment below.
You can register here or simply find out more.