A really cool idea for the 3g iPhone

While I can’t take credit for the idea (wish I had thought of it), I have never heard anyone mention it before as it relates to the iPhone. I was reading a post on engadget.com about a new phone (I don’t even remember which one it was), but it had a feature that would be KILLER on the 3g version of the iPhone.

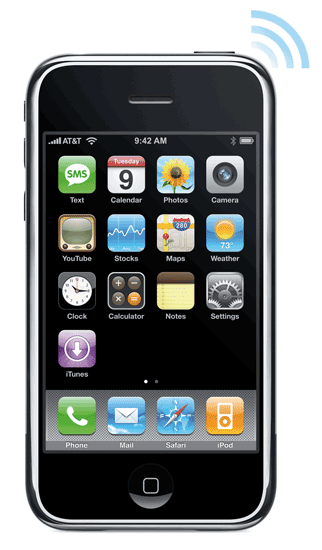
Here goes: Most of us that travel with iPhones also travel with laptops. One feature that we hope for on the 3g iPhone is to be able to use it as a wireless modem (tethering/DUN) via Bluetooth. However, what would even be sweeter is having the iPhone itself become a Wi-Fi access point. Having a 3g iPhone means that we’ll have the potential for significantly faster data access than what we now see over EDGE. Since the iPhone already has Wi-Fi built-in, why not just tap a button, set a password and have it broadcast a Wi-Fi access signal that you could tap into with your laptop and surf?

Of course there’s the whole battery life thing and I have no idea if the Wi-Fi radio uses more power than the Bluetooth radio, but it would be pretty sweet nonetheless. It would also allow multiple devices to share the 3g internet connection simultaneously whereas Bluetooth would not.

Either way, the next version of the iPhone should definitely have either Bluetooth or Wi-Fi internet sharing for your laptop! Steve would probably argue that the iPhone is so good that you shouldn’t need to connect to the internet from your laptop and maybe with all the new corporate support (MS Exchange support, VPN access, etc.) that’s coming in iPhone 2.0 he’s right. I can’t wait til June to find out!

You may remember that I have a running list of features that I would like to see come to the iPhone (some of which have either been addressed in recent updates or have been announced for the 2.0 software update due in June) and all of which could be implemented via software updates or 3rd parties. So while were on the subject of the 3g iPhone, here are my:


Top 10 iPhone 2.0.1 Feature Requests

  • Flash Player! – We can’t keep pretending that we don’t need this! With a faster iPhone, there’s no excuse
  • Video Recording – No reason not to have this either
  • MMS Messaging – Can we send some picts and video directly to our buddies without using email?
  • Cut/Copy/Paste – Duh!
  • Contact Search – I’m sure I’m not the only one with hundreds of contacts
  • Note Syncing – No reason not to have this
  • Audio Recording – Taking notes/Voice recorder would be a very popular feature
  • Email Anything – The ability to email anything that’s on the device, ie: contacts, voicemail messages, maps, etc.
  • Voice Dialing – Lesser phones have this basic feature
  • Consolidated Email Box (option) – I have 5 email accounts on my iPhone – my screen is starting to wear out in the spot that I have to keep hitting the Back button on.

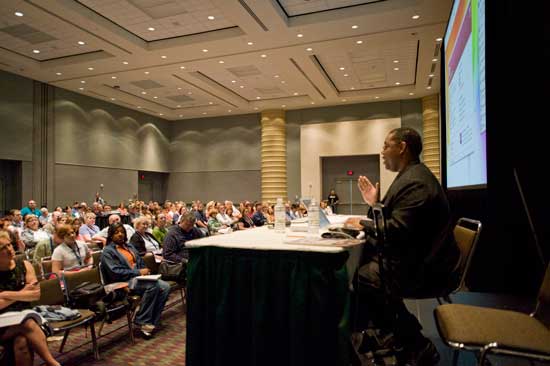
Great turnout here at Photoshop World Orlando

Teaching Intro to InDesign CS3 at Photoshop World in Orlando – Photo by R.C.


I gotta say that I’m having some really good classes here in Orlando at Photoshop World. Yesterday, I had standing room only in the Adobe Theater on the show floor as I was showing the NEW Adobe Photoshop Lightroom 2.0 Public Beta and today I had about 300 people in my InDesign CS3 class.

There are about 2,700 people in attendance at this year’s east coast show. Everyone I have talked to is jazzed about the show and all the things that they are learning. I want to thank all of you who took the time to come up to me and let me know that you enjoy this blog and my Creative Suite Podcast.

Well back to work! I have one more class today and Midnight Madness tonight 🙂

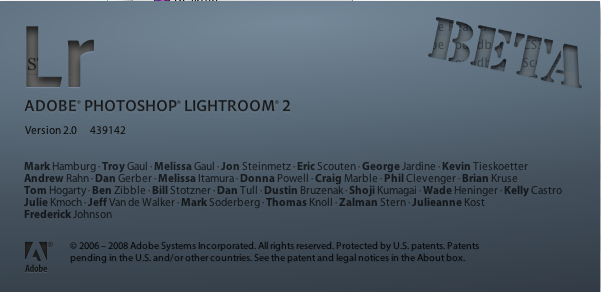
Adobe Photoshop Lightroom 2.0 Public Beta

After a wildly successful Lightroom 1.0 public beta and launch, Adobe is back with another one! Adobe Photoshop Lightroom 2.0 is now available in Public Beta (download it here)! That’s right, once again Adobe is looking for feedback from the Photographer community to build the next version of its digital photography workflow tool.

Now keep in mind that this is a BETA! That means that it’s not done yet, nor is it feature complete. You can install the public beta of LR 2 without interfering with your LR 1.x install. The idea is that you’ll keep working in the current version of LR and test 2.0 along side your current version without disruption to your workflow. As a matter of fact the LR 2.0 public beta will NOT open your LR 1.x catalogs. So there’s no chance of your accidentally upgrading your existing catalogs only for them not to work in the current version anymore. Download it, import some images into it, play with it, give us feedback and at the end of the day get back to work with LR 1.x.


New Features

In addition to being a 64bit app here are some of the new features to look forward to:

Library
-Streamlined Library Layout
-Smart Collections
-Powerful Filter Bar to search and refine images
-Suggested Keywords for simplified keywording
10k pixel size limit raised to 30k pixels

Multiple Monitors:
-Four flexible modes for an alternate window: Grid, Loupe, Compare, Survey
(Check out the Live Loupe mode!)

Photoshop CS3 Integration:
-Open files in Photoshop as a Smart Object
-Select multiple images to merge as a Panorama
-Merge multiple exposures into a single Photoshop HDR image
-Load multiple files or virtual copies into Photoshop as separate layers in a single document.

Export Functionality:
-Auto-add exported images to the Lightroom catalog
-Auto Output Sharpening for images on export

Develop Module
-Non-Destructive Localized Correction for dodging and burning specific areas of an image
-Post Crop Vignette
-Basic Panel Keyboard Shortcuts
-Improved Auto Adjustment:  

Print Module
-Picture Package for multi-page layouts
-Print Module output directly to JPEG
-16 bit printing under Mac OS X 10.5 Leopard
-Enhanced Print Sharpening based on PhotoKit Sharpener algorithms


See it in action!

I recorded a special episode of my Adobe Creative Suite Podcast where I show many of the new features of LR 2.0. Also the good folks over at NAPP have put up a LR2 Learning Center with videos. Also check out what Adobe’s Photoshop Product Manager, John Nack has to say.

Also if you’re at Photoshop World this week, I’ll be demoing it after the keynote in the Adobe booth. Come check it out and say hello!

Adobe and Apple have announced that they are merging

It’s the news you’ve been waiting for and speculating about for years now! That’s right Steve Jobs and Adobe’s CEO Shantanu Narayen have announced that they are merging the companies. Although they haven’t settled on a name for the combined company yet, the new acronnym for the combined company will simply be "A.A."

The question on everyone’s mind is what will the new product line up look like? In the press release today, they gave a list of their top products to be sold and there are a few surprises:

  • Acrobat MacBook Pro iCS3 Connect Pro Hosted Edition Public Beta
  • iPhone 2.5 Flash iCS3 Developer’s mini
  • iPhotoshop Express for .Mac take 3 – includes 11GB of space for $101/yr or Free with a new aMac
  • Big Mac mini Master Collection iCS3
  • iPod hi-fi take 2 with iPremiere Pro enabled visualizer
  • Final Cut Studio now with iPageMaker 7.5.6.take2 for laying out your Blu-ray DVD covers
  • MacPro now with Blu-ray support, however this will only play movies burned with A.A. Encore CS3

These products are available and shipping today! Also now no matter what you purchase, you will receive a FREE iPhone case.

It is uncertain as to the fate of the Windows versions of the existing products, however both CEO’s said that they remain customer focused and that Windows customers shouldn’t be concerned. Steve went on to say that the Mac is a great platform and that he would give the Windows versions serious consideration, "no, really I will". They also announced that since they’ve now created the world’s largest software/hardware monopoly outside of Microsoft that prices will be raised immediately across the board by 25%. Shantanu went on to say that "the decision to raise prices across the board was not taken lightly. However, it was necessary to cover the cost of all the new package designs and trademarks of the new company and to hire a top legal team to continue to fight the mounting lawsuits that both companies would now be facing."

All in all I’m happy that this merger has finally happened and I can’t wait to see what the combined company does in the future.


Steve jobs pictured with Adobe co-founders Chuck Geschke and John Warnock. Steve was quoted back then in saying "I think you will see our companies do more than ever together in 2008!" What a visionary. He was right!

Photoshop Layers Book

With each new version of Adobe Photoshop there are usually lots of new features. However, there is usually one feature that really stands out. Yes, believe it or not there was a time that Photoshop didn’t have Layers. I actually go back that far. I first started using Photoshop (and teaching it) at version 2.5. Photoshop life was pretty tough back then (think about your parents telling you how they had to walk up hill to school for 5 miles – both ways). That’s right, it wasn’t until Photoshop 3.0 was released that we got Layers. It wasn’t until Photoshop 4.0 until we got Adjustment Layers and yes, it wasn’t until Photoshop 5.0 that we got editable text. Photoshop has come a long way! We take Layers for granted now in our Adobe apps. Layers is one of the most powerful features and because we take them for granted, we may not be getting all that we can out them.

Matt Kloskowski’s New Book: Layers: The Complete Guide To Photoshop’s Most Powerful Feature promises to help you get the most out your use of Layers in Photoshop. I know what you’re thinking and yes I was thinking the same thing, "I already know how to use Layers. I use them all the time." I’ve actually had Matt’s book for a couple of weeks now and it wasn’t until this past weekend that I decided to take a look at it. After getting past the basics of Layers that I already knew, I found some really helpful tips and techniques that I hadn’t considered before. Actually that’s what makes Photoshop so dynamic. It’s not so much about learning the tools and the menu commands as much as it is the infinite possibilities and combinations of using the tools together. Matt gets into some clever tips and techniques on how to use Layers in ways you may not have thought about before.

If you’re a Photoshop user, whether you’re a newbie or a pro, you should give this 248 page book a read. It’s beautifully laid out in color with two steps per page with corresponding screen shots. Matt does a really good job of explaining his techniques in detail without going overboard (and getting all boring on ya).

Amazon has it for $26.39.

Adobe SHARE Public Beta

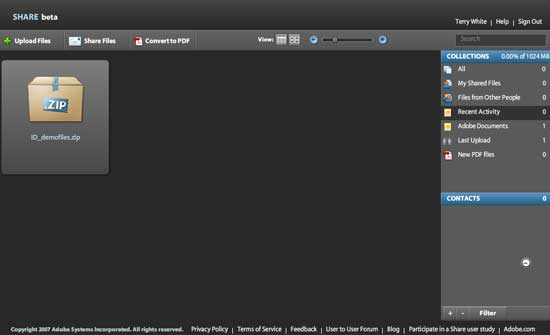
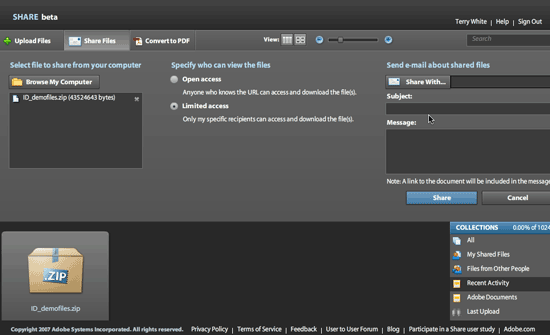
My 43MB Zip file that’s too big to email as an attachment is easily shared with SHARE.


Adobe is on a roll lately with this whole public beta/FREE thing. Here’s one that almost slipped through the cracks until I read about it on John Nack’s blog. While Adobe Photoshop Express got all the buzz recently (that’s so yesterday’s news), Adobe SHARE promises to make it easy for you share large files with friends, colleagues and family – for FREE!


With Share you can:

  • Send documents without email attachments.
  • Access your documents from anywhere.
  • View all the documents you have shared or received in one place.
  • Post a link to your document on a wiki or blog.
  • Embed a Flash® preview of your document on any website.
  • Limit access to a document to a list of recipients.

You get one gigabyte of space and you even get 5 FREE PDF conversions from your Office documents. SHARE is free so there are restrictions. For example, the Share preview is currently limited to documents, and the contents of your files may be restricted by the Share Beta Agreement. You cannot upload and share any music or video files at this time, e.g. mp3, aac, wmv, mov etc.


So if you’ve been looking for a slick, FREE web based service to share your larger files, head over to Adobe Labs and set up your account.

Photoshop Online? Photoshop Express Beta – Now Online!

You’ve heard of Photoshop right? C’mon, it’s now a verb! "I Photoshoped that picture." As popular as Adobe Photoshop is, believe it or not there are people out there (from what I hear) that have never used it and probably never will – gasp, I know! However, it’s true. There could be a lot of reasons for this, such as people that just don’t buy editing tools. Teens for example, usually don’t have an extra $600-$900 lying around to pop for Photoshop CS3 or Photoshop CS3 Extended. Sure there are cheaper versions such as the industry leading Adobe Photoshop Elements, but hey – these guys won’t even pay $90 for software. How do they get their MySpace images edited? Well they either Don’t edit them at all (I’ve seen more than enough photos with red-eye out there to know this to be true) or they rely on FREE tools. "Free" you say?


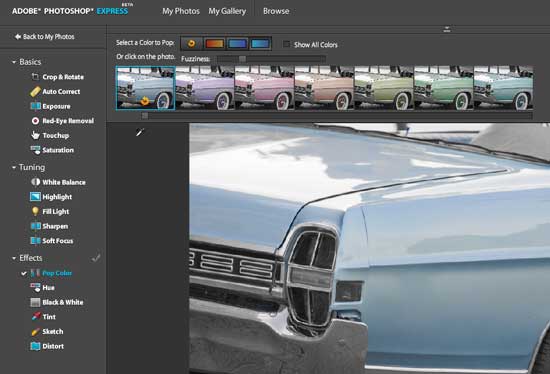
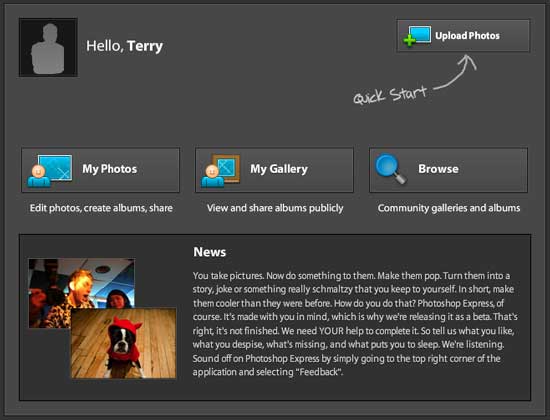
That’s exactly where Adobe Photoshop Express is aimed! It’s a FREE service that allows you to polish, sort, store and show off your picts. It’s also completely web based! You might remember last week when I turned you on to another FREE Adobe Service code named BRIO. So this is not really the first time that Adobe has given users a FREE way to do things. That’s right, think of some most frequently used features of Adobe Photoshop available for use on the web anytime for FREE. Completely platform independent because it works in your web browser as long as you have the Flash 9 Player, which is also FREE. Now before my Pros get all up in a tissy, don’t worry. This is not going to replace the Photoshop you’ve come to know and love. As a matter of fact if you’re making your living doing that Photoshop thang, then you can just keep right on working the way you always did. There are no Layers here, No CMYK, No pro level filters and the list goes on. However, if you’re that guy or gal that just wants to up your online cred (formally street cred) and get your MySpace and FaceBook images poppin’ then you’ll want to check out this free public beta!


What do I get for FREE?

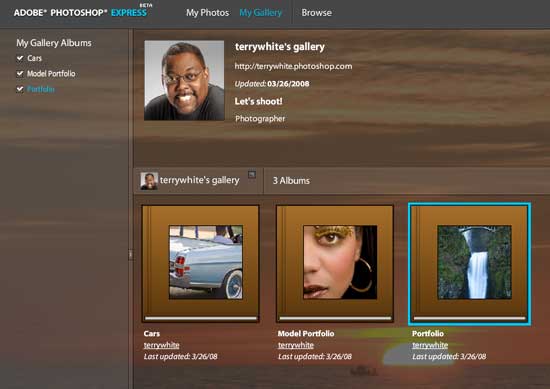
Well for starters you get 2GB of storage space for your images. Once you set up your account, you’ll get your URL like mine: http://terrywhite.photoshop.com (pretty cool huh?). You’ll be able to access your images from any computer on the net that has a browser and Flash Player 9. You’ll be able to upload, tweak/enhance your photos, put together your own Flash based web galleries and share them with your friends. You can also access your Facebook, Photobucket, and Picasa accounts directly. Once you’ve edited your photo you can either share it with someone or download it back to your computer for printing.


OK, I want to give it a spin. How do I get started?

Simply head over to the Photoshop Express page and sign up.


Also check out the FREE Photoshop Express Learning Center put together by our buddy Matt Kloskowski from KelbyTraining.com.

Epson PowerLite Home Cinema 1080 UB HD Projector Review

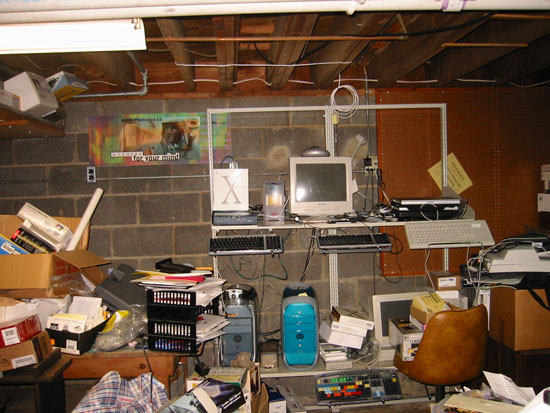
In October of 2004 I decided to convert a storage/server room in my home into a home theater. This room used to be the catch all for empty boxes, discarded computer equipment, my web and file servers as well as the place that old papers and software seemed to go to die. At one point it was almost impossible to walk from one end of the room to the other, because of the amount of crap that was in the way.


So I decided it was time to turn this:

into this:


At the time I spec’d out the latest and greatest sound and video gear. I settled on the Sony Cineza VPL-HS20 1080i HD Projector. My friends were telling me this one was the one to get and the good folks over at projectorcentral.com had this GREAT REVIEW. So it was a done deal and I’ve enjoyed that projector for the past 3+ years. However, my cravings for "higher Def" lead me to want to experience Blu-ray at its best which meant that it was time to upgrade from 1080i (interlace) to a true 1080p (progressive) projector. I started asking around and my colleagues at Adobe (Kevan O’Brien and Dave Helmly) were both quite impressed with the Epson PowerLite Home Cinema 1080 UB projector. I’ve always been a fan of Epson projectors for data/business presentations, so it didn’t take much convincing to look into Epson to replace my Sony.

I also turned to ProjectorCentral.com once again to see what they had to say. They had not only reviewed the pro version of this projector, but they gave it their highest honor of Editor’s Choice! That’s all I needed to hear. My mind was made up! I figured I’d get it in the next few weeks when my schedule settled down a bit. However, I noticed that B&H Photo and Video had it and also alerted me to the current $200 rebate that is in effect until 3/31/08. So that pushed me to order it now instead of waiting. After all, $200 is $200 right?

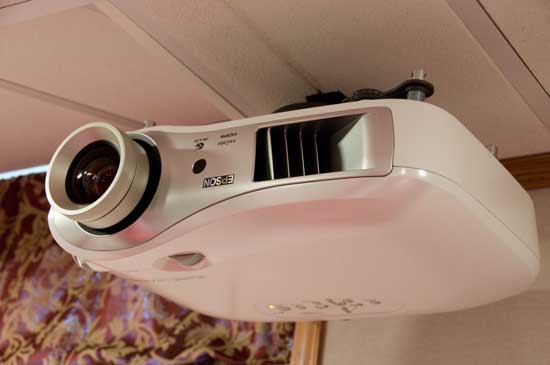
I ordered it so that it would arrive in time for the weekend. That way I’d have time to set it up and enjoy it before going back to work and back on the road. Setup was quite easy. I used the same universal mounting bracket that I had used with my Sony projector and I ran a new HDMI cable to replace the DVI and Component cables I was using with the Sony. Although they (Epson) offer a ton of different configurations for getting just the right color and picture, the defaults produced STUNNING image! Yes, I might go back and play with the settings to compare, but out of the box I was blown away by the picture quality. It wasn’t like I looked at it and said, "well it’s a little too green or it’s a little to contrasty." It was dead on right out of the box. I can’t imagine it being better!


Comparing the old to the new

The Sony VPL-HS20 has a power zoom and focus. The Epson relies on a manual focus and zoom ring. So I sat right under it and just reached up and adjusted it until I was happy. There is also a "Pattern" button on the remote that allows you to throw up a pattern on the screen to make sure you have it aligned properly. The lens will shift up/down and left/right so that even if your mounting location is not dead on, you have some wiggle room (which worked out great for me!) This way I didn’t have to move the mounting bracket since the Sony’s lens is centered and the Epson lens is off to one side. It would have been a major pain in the butt if I would have had to relocate the mounting hardware in the ceiling. Luckily I didn’t have to.

The Epson is better in just about every way over my almost 4 year old Sony. It powers on and starts to display your image almost instantly. It powers off quickly too. There are a few little things I like about it: for example, there is a separate on and off button on the remote instead of just one power button. This makes it nice for programming universal remotes and macro sequences. In other words with a single power button, if the projector were already on and someone accidentally hit the power on macro, it would power the old projector OFF! Then we’d have to wait for it power all the way down before being able to bring it back up again. Although I’m only using a single HDMI cable to it, I like the fact that the Epson remote has buttons for each source. With the Sony I had to cycle through several sources to get to the one I wanted. Epson also allows you to diable the projector’s control panel so that kids or other people don’t mess with your settings. There is even a "Child Lock" that prevents small children from accidently turning the projector on.

I will have to hand the overall styling to Sony though! The Epson projector doesn’t win any awards in my book for design of their cases. The Home version is white and the Pro version is black. The latest Sony projectors look like something right out of War of the Worlds. Their home theater projector designs set themselves apart from standard business projectors. Epson could learn a thing or too here.

A scene from War of the Worlds where the alien probe has a look around. This bears a striking resemblance to the Sony Bravia VPL-VW40.


Back to the Epson…

Epson also does the right thing by standing behind their products if something does go wrong. Rather than making you take it into a service center, they will advance ship you a replacement! You just send the defective one back when the new one arrives. However, in my over 10 years of using Epson projectors, I’ve yet to have one break down!

I did find it funny that in the literature when they were bragging about their service, that they used the example of if your projector goes down before the "big game", they’d send you a replacement. I had a simple question and I thought I’d give them a call only to find out the service is open Monday through Friday only. So if the big game is on the weekend, you might be hosed 🙂


What about Blu-ray playback?

Now it was time to try out the one thing that I upgraded for. I wanted to see a Blu-ray movie in true 1080p high def. So I fired up the Playstation 3 and loaded up a movie. Believe it or not, Rocky Balboa was the closest so that’s what went in. I’m glad that it was, because that particular Blu-ray disc starts off with an opening ad for Blu-ray movies with clips and scenes from several blockbuster movies. I had seen this ad before, so it was a great comparison. My mouth hit the floor. I had never seen that ad with such clarity and depth. I was stunned by how much better the quality was. I also set my Apple TV to 1080p output and the photo slideshows are even more spectacular!


The Bottom Line

If you’re looking for a true 1080p Projector Experience, you can’t go wrong with the Epson PowerLite Home Cinema 1080 UB. If you’re not technically inclined and want someone to set it up for you and calibrate it, then you’d want to go with the Pro Cinema 1080 UB version which is only sold through Home Theater companies. Now I know what you’re thinking: "what are you going to do with your Sony VPL-HS20 HD projector?" Well, if you hurry, you can get a great deal on it here 🙂


Time Capsule Review

As the saying goes, "there are two kinds of computer users: those who have lost data and those who are about to!" Unfortunately, I’ve lost data in the past. Therefore, I’m a firm believer in having a good backup strategy. When it comes to hard drives, it’s not a matter of if they will fail, it’s a matter of WHEN? I was always puzzled as to why Apple never had a backup utility built-in to the OS. However, I couldn’t wait for this to happen so I’ve used various backup utilities over the years and my absolute favorite is SuperDuper! SuperDuper makes a clone "bootable" backup of your drive to another drive. It has a schedule feature so that it can run unattended and it is the way that my server gets backed up every night. However, for my other Macs I wasn’t backing them up nightly. It was more like weekly (or sometimes bi-weekly) when I would think to plug in the external drive and do it. This was especially the case for my laptops which move around and don’t always have an external drive plugged in.

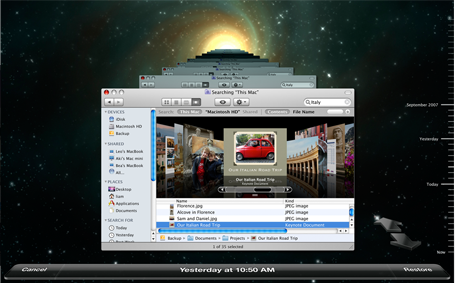
So needless to say I was quite intrigued by Mac OS X 10.5 Leopard’s Time Machine feature. You could call this "backup for idiots." In typical Apple fashion it’s just drop dead simple. You plug in an external drive, Time Machine asks if this is the drive you want to use for backups, you say "yes" and that’s it. There’s nothing to think about from that point on. It manages the backups from that point on automatically and hourly. When the drive fills up with all the incremental backups, Time Machine manages the task of deleting the oldest backups for you. It doesn’t stop there! The Time Machine interface for retrieving data from your backup is equally as slick, showing you cascading folders and allow you to scroll back in time to find the files that you want to bring back. You can even do a Spotlight search for them or bring back the whole drive if need be. Yes, Apple hit a home run with finally making backup so easy that you’d be a fool not to do it now.
This is all good except for one thing, those darn laptops. I have a young teenager that’s now on a MacBook instead of an iMac. Although I have an external drive setup on her desk, she doesn’t always remember to plug it in and of course if the drive is not plugged in, her MacBook is not being backed up.


This is where Time Capsule comes in

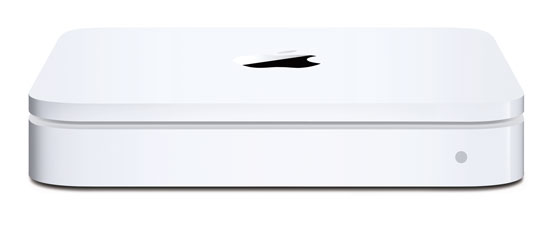
Although my desktop Macs are fine, each with their own external drives for Time Machine backups, I wanted an easier more seamless way to backup notebooks. Time Capsule is simply an 802.11n AirPort Base Station (wireless router) with a 500 GB or 1 TB hard drive built-in. I opted for the 1 TB model and used it to replace one of my existing AirPort Extreme Base Stations. It has 1 Gigabit WAN port and 3 Gigabit Ethernet ports for wired devices. So I have my iTunes Server plugged in as well as my Slingbox Pro. I had already set up a separate 802.11n network with my existing AirPort Extreme Base Stations so that I could have a really fast network that wouldn’t drop down in speed when 802.11b/g devices connected to it. They are still on my older wireless network. It all works great! When I plugged in the Time Capsule and installed the updated AirPort Utility that comes with it, setup was a snap. Took less than 5 minutes to put in all the settings I wanted. Although you can hang printers and hard drives off it to share, I don’t have a need for those features. Once I had the Time Capsule set up, I took the first MacBook and plugged it in to my network from my office via Ethernet. It saw the Time Capsule right away and I was able to pick it as my Time Machine drive. I had already figured and heard that the initial Time Machine backup over ethernet would take a long time, so I did this over night and just let it run. When I woke up the next day it was done backing up. I then unplugged it from Ethernet and put it back on Wi-Fi.

In addition to the Ethernet ports Time Capsule is expandable via the USB port which allows you to add external USB hard drives which could also be used for Time Machine backups. It’s also nice having the power supply built-in.


One of the biggest questions on my mind…

was how would it handle subsequent hourly backups. In other words, I knew that my family would NOT remember to mount the Time Capsule drive. If you’ve ever had a kid lose an important term paper or book report due to a drive hiccup, it’s not pretty! Although I had read other Time Capsule reviews, I didn’t find one that mentioned whether or not the Time Capsule drive would automount each hour. I was hoping that Time Machine would do the right thing and mount the drive as needed. I was happy that it does just that. There is no further interaction required on the users’s part. Time Machine automatically mounts the Time Capsule drive each hour (wirelessly), does the incremental backup and then unmounts the drive. Again, this is the solution I’ve waited for for years.


The next Mac to be added to the Time Capsule backup plan was my iTunes server which I had just upgraded to a 1 TB hard drive as well. This Mac is always connected to Gigabit Ethernet. When I switched to Time Machine drives to the Time Capsule I didn’t realize that Time Machine automatically backs up other attached hard drives. So my initial backup was 200 GBs bigger than it needed to be (400 GB in all). Even over Gigabit Ethernet, this took freakin’ forever! I’m not kidding, this took close to 18 hours. So let’s cut that in half and say 9 hours for 200GB. That’s a long time for the initial backup and I can’t even imagine how long that would have taken over Wi-Fi. The next day when I realized that I had backed up the second drive unnecessarily, I added it to the "do not" backup section of Time Machine. However, it didn’t automatically delete the data from Time Capsule. I assume that once the drive fills up that  that will be the first data set to go, but I would think that there would be a way to kill the extra 200GB manually. I tried and got all kinds of permission warnings and just aborted my attempts.

Now that the initial backups are done, Time Machine takes only a few minute to do the hourly backups and of course it does it in the background.


The Bottom Line

I’m happy with Time Capsule so far and have had no problems. It doesn’t get any easier than this and Time Capsule is the BEST/EASIEST way to backup your multiple Macs running Leopard. Although you could also use Time Capsule as a network drive to put data on and share it amongst your users, I don’t recommend this. The reason is, if you get in the habit of using it as a server to store your daily work files, then how will they be getting backed up? If your Time Capsule dies, you’d still have your Mac hard drives. However, if Time Capsule dies and you were using it as a network server, then that data that was on it would be lost.

Time Capsule is bigger than the AirPort Extreme Base Station and while it is quiet, it’s not silent. Like Apple’s other white boxes (AirPort, Apple TV, etc.) it does run warm.

The initial backup takes way too long. So the best way to do it is to plug in and let it run overnight or over the weekend. Don’t forget to exclude things that you don’t want backed up or things that are already backed up in another location and don’t change regularly. This will save on disk space. All in all Time Machine was worth the investment for me. Time Capsule/Time Machine only works with Macs running Leopard. It will not back up PC’s or Boot Camp partitions. For a complete list of specs, go here.

500 GB Time Capsule $299, 1 TB Time Capsule $499
Web conference with BRIO for Free

More and more people are wanting to share ideas and and concepts without having to physically drive or fly to where their clients, colleagues or friends are. Typically web conferencing systems are reserved for business use and well, out of the reach of smaller shops, consultants and individuals. Adobe hopes to change all that with a new FREE service code named BRIO. One of Adobe’s best kept secrets is Adobe Acrobat Connect Pro which is a full fledged conferencing and eLearning system for business and education. BRIO is based upon the same technologies (Flash) and aimed at getting people to experience web conferencing first hand without the up front costs and infrastructure.


How could I use this?

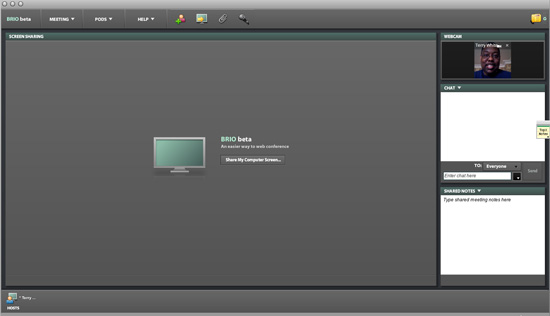
As we all know it’s sometimes (most times) easier to show someone something rather than trying to explain it over the phone or via email. Once you set up your BRIO account you get a static URL to your meeting room. You login to your room and invite up to two other people. Once all 3 of you (or 2 of you) are in the room, you can then share your screen and the other folks see exactly what you’re doing in real-time. Although you’re limited to 3 paricipants in your room at once, that doesn’t mean that those participants have to be alone in their physical rooms. This could be 3 conference rooms full of people all watching on a big screen.

This would be a great way to show your client the work you’re doing without actually having to give them the files just yet. You can show the actually apps you’re working in, slides or whatever you want. Not only can you share your screen, but you can upload files for them to download (we all know how hard it can be to send email attachments through corporate firewalls right?). It gets better, your BRIO account comes with the ability to use your webcam to broadcast your live video. You also get VoIP AND a teleconference number to boot. Although the teleconference number is not toll-free (ie. it’s a long distance call), it is free to use. So if you don’t have the bandwidth or microphone setup to do VoIP, just have your folks dial in to the conference on their phones. In addition to screen sharing, webcam video, and VoIP, there’s also whiteboarding and even the ability to request control of a meeting participant’s computer so that you can not only show them how to do something, but you can do it yourself while they watch.


Yes, it really is FREE

Although your BRIO account is in fact FREE, there are some limits compared to the full Connect Pro product. In the full Connect Pro product you’re not limited to just 3 participants. You can also setup multiple meeting rooms, you get multiple room layouts to choose from, the ability to upload video content that plays back through Connect Pro, record meetings and host of other features. However, for just starting out and for smaller meetings, you just can’t go wrong with BRIO. Also keep in mind that BRIO is cross platform and doesn’t require your participants to download or install anything. They likely already have what they need to watch the meeting in their browser, the Adobe Flash Player!


OK, nothing’s free, what’s the catch

Yep, you caught me! You’re right, there is some angle. There must be! Well, it’s true. OK, here goes. It’s FREE! I know, I know, but it is. The only catch is that Adobe hopes that by trying this FREE version out, you’ll get so hooked that you’ll want more and you’ll want to step up to the full version of Connect Pro for your business or organization to get rid of the limits. However, you’re not obligated to do so. So you have nothing to lose. Account setup is painless and if you already have an Adobe ID, it takes about 1 minute to set up your BRIO account.


Um, so what are you waiting for? Go create your FREE BRIO account and meeting room today and give it a shot. Show off that cool work you’ve been doing. You’ll look so good to your clients this way.