Review: IPEVO Tubular Wireless Speakers


I've been watching the Bluetooth Wireless Speaker revolution from the sidelines now for several months. I've reviewed a few different sets of travel speakers in the past but they were all wired. While I have wanted to try out some of the new bluetooth wireless options such as the Jawbone Jambox, I couldn't get past the asking price of $199 retail ($179 street) for a speaker that would spend the bulk of its time in my suitcase. Don't get me wrong, I'm sure the Jambox is fantastic, sounds great and is worth the money if you plan to use it regularly. I also certainly don't have a problem spending money on something of good quality. It's just that my need for a travel speaker is for those occasions when I'm traveling and want to hear my music, videos, etc. on something better than the speakers in my laptop or iPad. 


IPEVO Tubular Doesn't Break The Bank
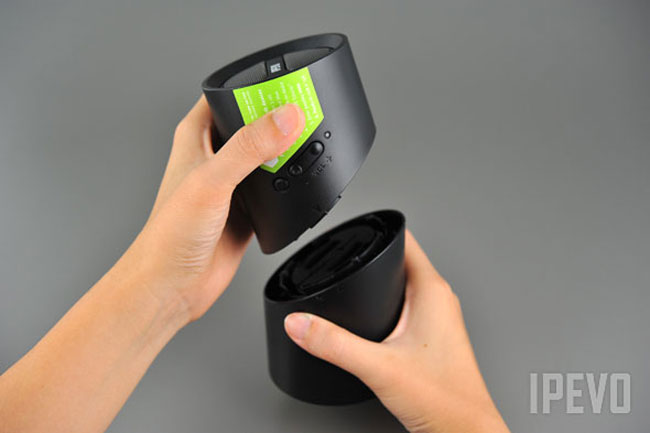
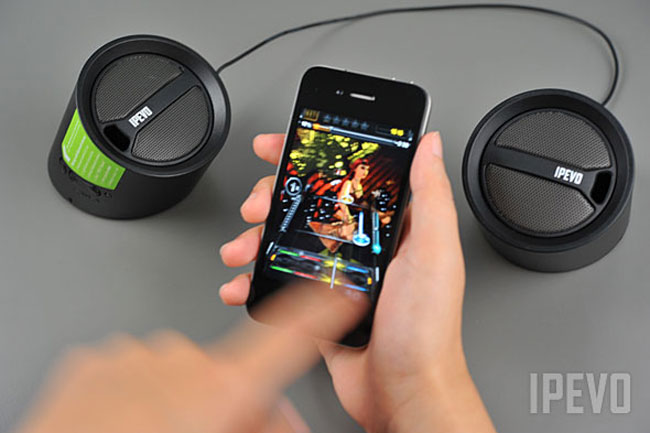
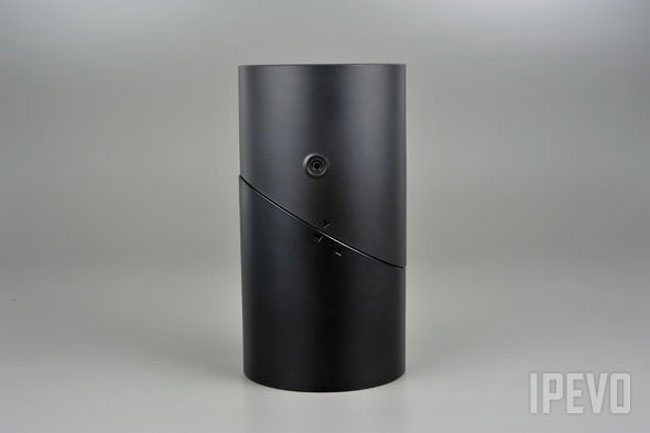
This is actually my second IPEVO product. You might remember my review of the IPEVO P2V webcam for doing mobile device demos. Again, it's a product that solves a specific need that I have at a reasonable price. The IPEVO Tubular Speakers are exactly what I was looking for. They are small enough to stick in a suitcase or laptop bag, yet the sound good enough to compete with most "small shelf" speakers. They are designed for travel. The two speakers connect together in a "tube" fashion when not in use. When you're ready to use them you untwist the tube to separate them out. They connect to each other via a single built-in cable. That's the only "wire" you have to deal with during normal operation. You can play your music to them via Bluetooth. iOS 4.x supports stereo bluetooth music playback. So your iPod touch, iPhone or iPad can stream music to these speakers wirelessly. I also had no problem pairing them to my MacBook Pro. They showed up immediately after pairing as a an Sound Output Device. 

There is a power button and volume control right on the speaker itself. Not to mention a small LED status indicator to let you know that they are on or in pairing mode.


How are they powered?

This is both a plus and a minus. The speakers have their own built-in rechargeable battery. There's a USB connector on the bottom of the main speaker that you can plug into any USB power source. It takes 2 hours to charge for 6 to 8 hours of playback. While it's great having a built-in battery, it also means that if you forget to charge them you can't simply pop in a set of AA's. 
 

Room for improvement

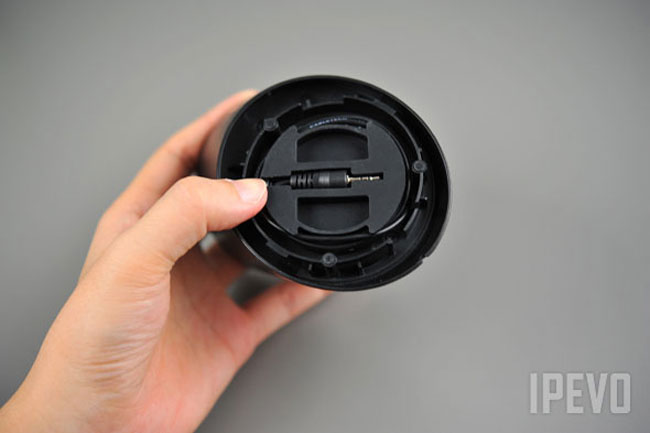
The speakers work and sound great. I've had zero problems with connectivity or playback. My only issue is that the cable under the speaker for connecting to the second speaker simply wraps around a circular section in the base of the speaker. I would have preferred this to be a retractable cable as it sometimes takes 2-3 tries to get it wrapped around just right so that the end of the cable fits in the holder for storage. Otherwise I have no complaints.
 

The Bottom Line

These speakers are a great alternative to the more expensive options out there. While they perform well, the best part is the price. The IPEVO Tubular Wireless Speakers go for a mere $59.95 (list price $79.99). That's less than half the price of other speakers in the category and they sound as good if not better than any other travel speakers I've tried.

Triple Your MiFi Battery Life

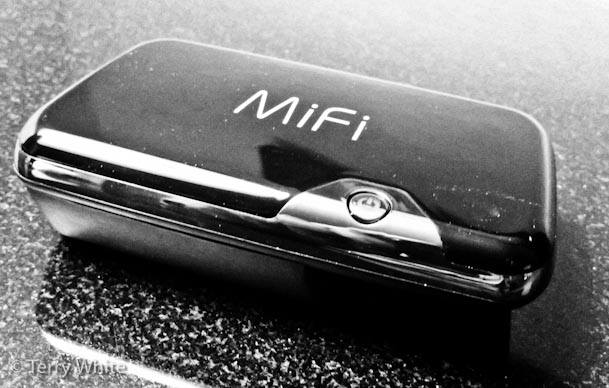
I love my MiFi 3G hotspot! I use it all the time. The only thing that can be a bit of a drag is when it runs out of battery power. If I’m near an outlet I can just plug in the supplied USB adapter and run it all day. However, if I’m in a seminar or other setting where I don’t have immediate access to an outlet the battery can only last about 4 hours tops. That all changed when I “super sized” my MiFi Battery.

A 3300 mAh Extended Battery Lasts me all Day!

As long as I have a good 3G signal, my MiFi will now last me all day with this battery. It’s designed to replace the stock battery and battery cover. This way it charges internally and as far as your MiFi is concerned it doesn’t see any difference. The good folks over at The 3G Store sell both Verizon MiFi 2200 and Novatel GSM MiFi 2352/2372 Extended Batteries for $90.

Yes it makes the MiFi about twice as thick, but it’s worth it if you need to be mobile and connected for several hours throughout the day.

By the way, you can get an unlocked MiFi GSM 2372 Mobile Hotspot here On Sale for $226.

Eye-Fi to Send Photos Direct to iOS and Android Devices without a WiFi Hotspot

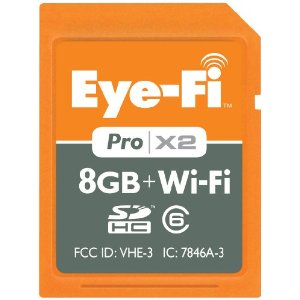
In case you haven't been following me on this story you can start with my "Shoot Tethered (wirelessly) to an iPad" from a couple of weeks ago here. Back then I decided to try out the Eye-Fi Pro X2 Card in my D7000 shooting wirelessly to an iPad 2 via my MiFi mobile hotspot and I was pleased with the overall workflow. Today Eye-Fi just announced a new card (yeah that happens in technology, deal with it!), the Eye-Fi Mobile X2 which is a cheaper card that offers Direct to iOS (iPhone, iPad, iPod touch) and Android mobile device shooting WITHOUT the need for a WiFi hotspot. Removing the WiFi hotspot requirement and going direct in an AdHoc fashion makes this solution even better. However, don't fret if you bought the Pro X2 card like I did. They are going to release a firmware update to the existing cards next week. Keep in mind that the Pro X2 card does handle RAW and Geotagging. The new card does not.

This should open up a whole new world for people that want to shoot with a decent camera and share those images even with some minor retouching/adjustments, from a tablet device directly. I'll be shooting RAW to my regular SD card in slot 1 and BASIC JPG to my Eye-Fi card in Slot 2 on my D7000. Life just got a little more fun.

If you don't have an Eye-Fi card yet, you can get the NEW Mobile X2 8GB card with the Direct Mode love built-in here.

Sorry, still not Compact Flash joy.

As soon as I have the yet to be released iOS App and an updated card you expect a review here.

Promo Video:

httpv://www.youtube.com/watch?v=zN8ZRzXLG_I

Review: Bowers & Wilkins Zeppelin Air with Built-In AirPlay Support

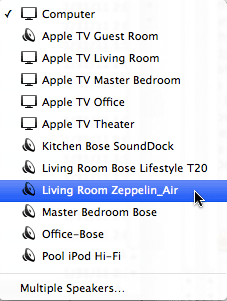
I've been a long time user of Apple's AirTunes (now called AirPlay) technology. As a matter of fact I bought the AirPort Express the day it was introduced, to be my travel WiFi hotspot, but then I quickly saw the benefits of wireless music streaming and set them up throughout my home. Each AirPort Express I have is either plugged into a powered speaker system like the Bose SoundDock or a surround sound system. Life has been good with this setup and it continues to get better now that Apple is putting AirPlay technology into more things. I also like steaming to audio to multiple rooms. I was really curious though what it would be like to have an AirPlay device that had this support built-in as opposed to having to tack on an AirPort Express to each speaker system. While the AirPort Express provides audio AirPlay support to any device with an audio-in jack, it is an extra expense and requires a cable to the audio device. 


Bowers & Wilkins shipped one of the 1st Speaker Systems with built-in AirPlay support

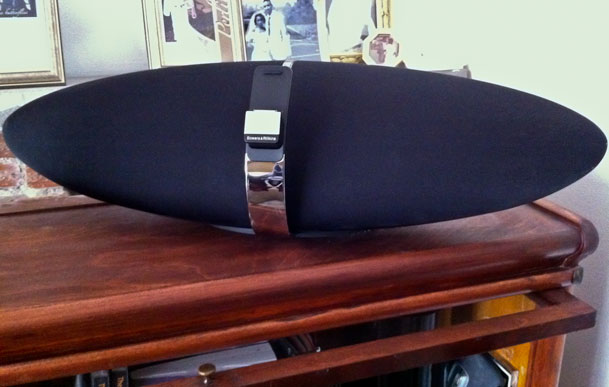
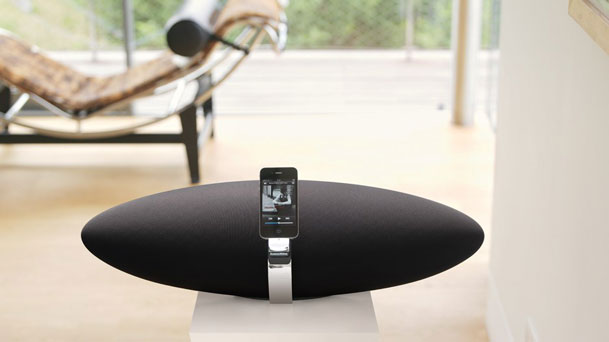
During last weekend's iPad 2 madness I noticed that my local Apple Store had the Zeppelin Air in stock. These speakers are sold out just about everywhere and even the Apple online store quotes a 3-5 week wait. It's not everyday that I plunk down $600 for a new sound system, but I was willing to give this one a shot. AirPlay is a great feature, but it has to sound amazing too. Bowers & Wilkins has a long standing history of making great sounding audio gear. I wasn't really worried about it not sounding great.


Setup could have been easier

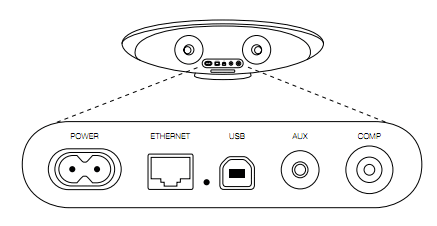
The Zeppelin Air is beautifully packaged and unboxing it only takes a few moments. They supply a wireless remote, power cable and ethernet cable. The ethernet cable is really only needed for the initial configuration and this is what could be improved. In order to set it up (following the directions) you plug the ethernet cable into the speaker and into your Mac or PC. Then you fire up a browser and go to 169.254.1.1. However, you would have to know that the only way this will work is if you have disabled your Mac/PC's WiFi connection and the only connection you then have is via the Ethernet cable. Luckily I knew this going in. Also it takes a few moments for your computer to realize that this is the only connection you have before it brings up the page. This may cause some users to think that it's not working.

Once the built-in web page comes up you use it to select your WiFi network and enter the password for it. You can also use this opportunity to name the Zeppelin Air whatever you like. This name will show up whenever you go to choose it in iTunes or other AirPlay compatible Apps. While this seems straight forward you get a big warning message that unless you read it slowly, it will sound like the setting you just made didn't work. What the message is really warning you about is that "if" you entered the wrong information on the "previous" screen, it may not connect to your network. Duh! This warning should be on the screen where you're actually keying in the info. I did it 3 times before realizing that the message wasn't saying that it didn't work, it was saying that it may not work if I keyed it in wrong. After you click OK, you disconnect the ethernet cable. The flashing LED will turn a solid dark red if it worked and connected to your network. It also takes a few moments for it to connect, causing a bit of anxiety.

I also took this opportunity to download the latest firmware update from the B&W site and install it. This is when I knew that the process above could have gone better. The firmware update installs via a USB cable. Yep, there is also a USB port on the back of the speaker too. They don't supply the cable, but it made me think how much easier this whole setup could have been had they allowed it to happen over USB instead of Ethernet. There would have been no need to screw with your Mac/PC's network connection at all.  Oh well, it's up and running now!


The Zeppelin Air is Live on my Network

Once I got through the setup and Firmware update the next thing I obviously wanted to do was hear my new investment. While I could have simply docked an iPod or iPhone on the built-in dock, I wanted to hear it via AirPlay. So I fired up iTunes 10 and started streaming music to it over the air As I expected/hoped the sound was AWESOME. Nice bass response and just and overall great sound. I've often professed NOT to be an audiophile. I'm not one! However, I can definitely tell the difference between this speaker and other lesser speakers that I have around my home. It easily fills the room I have it and then some. No hiccups or other delays in streaming.


AirPlay from Devices

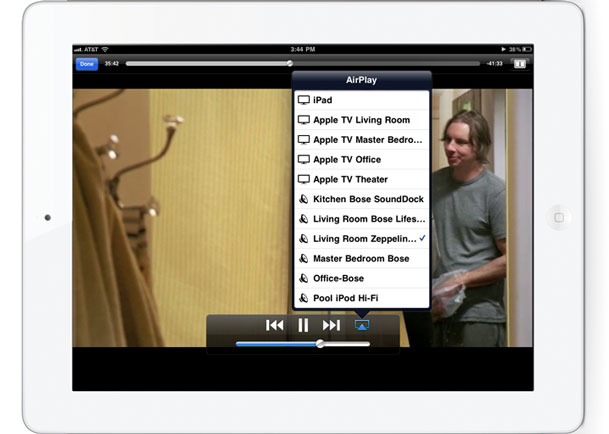
Since AirPlay is built-in to iOS 4 I can pickup  any of my iOS devices (iPad, iPhone 4 or iPod touch) and start streaming audio directly to this speaker. Besides having the ability to stream iPod content I can stream audio from Apps like Mobile Safari, Pandora Radio, YouTube, SlingPlayer Mobile for iPhone, etc. See more AirPlay Enabled Apps Here.


The Bottom Line

There really isn't anything "special" about this speaker system. It has AirPlay built-in! However, and I stress this again that the same exact thing can be accomplished with an AirPort Express Base Station and ANY speaker system, including other Bowers & Wilkins Speakers via a line out of the AirPort Express and into the speaker's audio-in jack. If you are starting from scratch and looking for an all in one solution that only has a single power cable once it's setup and sounds great, this is it! Audio streaming has been flawless so far.

I expect a flood of these kind of devices in 2011. I'm also hoping to see some video displays with AirPlay built-in for wireless streaming of video and audio. This is just the beginning.

You can get the Bowers & Wilins Zeppelin Air here for $600 or less.

Are you willing to give up unlimited data for a Personal Hotspot?

Although I know it's iPad 2 day (more on that to come), let's not forget that Apple released iOS 4.3 this week for iPhone, iPad and iPod touch. One of the most compelling features for iPhone users is the Personal Hotspot feature (finally!). However, use of this feature on AT&T comes at high price. I'm not talking about the monthly charge as much as I am the fact that original iPhone users have to make a choice if they are thinking about using it. Prior to the iPhone 4 iPhone users on AT&T have enjoyed unlimited 3G data for a single monthly charge. AT&T grandfathered this plan for people upgrading to the iPhone 4. In June 2010 AT&T discontinued the unlimited data plans for NEW iPhone/Smartphone customers. While the new plans offer a lower monthly charge for less data, the highest plan is capped at 2GBs/month. If you go over, you pay!


Unlimited Data or Personal Hotspot?

In order to take advantage of the new Personal Hotspot feature that allows you to connect your Laptop, WiFi iPad or other WiFi devices to your iPhone wirelessly to share your iPhone's 3G data connection, you have to switch to the newer Data Pro plan ($25/month for 2GB of data) AND you have to ADD a tethering plan ($20/month) for a total of $45/month. What sucks the most about this is that the extra $20/month doesn't get you any more data! It's a "just because we can" charge. CORRECTION: The New DataPro tethering plan gives your 4GB total per month. Of course if you use the Personal Hotspot feature you'll likely hit that 4GBs faster and then have to start paying for additional data. On the plus side you can choose to turn this feature on or off on your account as needed. If you know you're going on a trip and want to use it, you can turn it on and then turn it off for the following month. Either way, you still have to give up your Unlimited Data Plan to use it.


Choices

Your choice of course is to not switch. Besides that option, you can weigh the cost of a data card or the MiFi if you're going to be a heavy user. Lastly since Jailbreaking your iPhone is legal, you could use a Jailbroken App that allows you to turn your iPhone into a personal hotspot without switching plans (you may be violating AT&T's rules by doing this and I'm not telling you to do so. You would be doing this AT YOUR OWN RISK and risk to your Apple Warranty). Verizon is already rumored to be dropping their iPhone unlimited plans soon too!

For now and as long as it's allowed I'll be sticking with my Unlimited Plan! 


AT&T and Verizon you really need to rethink "data".

Continue reading “Are you willing to give up unlimited data for a Personal Hotspot?”

Review: My New Jawbone Era Headset – It’s Jack’s Fault :)

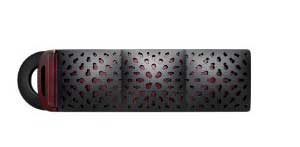
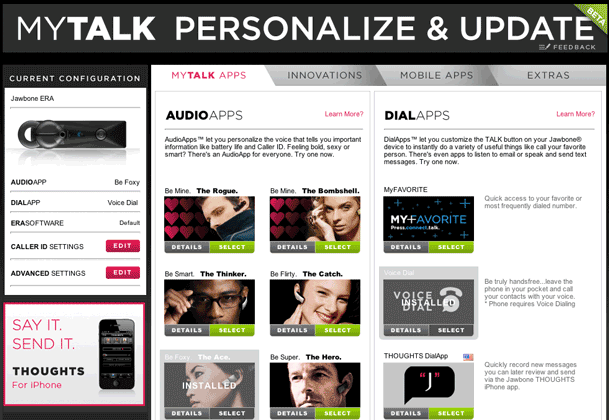
I've been totally happy with my Jawbone ICON headset (see my original review here). I did notice a new model called the Jawbone Era, but I didn't really get around to looking at it. Then my buddy Jack did his review of it and I read it. There was one thing in his review that caused me to place an order on the spot. Well actually it was two things. The first thing and probably the one that stood out the most was actually a little thing. When I receive a call on the Jawbone ICON it rings in the headset, but it also reads off the phone number from the caller-ID. While that's fine, in most cases I'm not going to know whose number it is because I don't commit phone numbers to memory. This means I either just take the call or look at the display on my phone first. The Jawbone Era has a feature that lets you enter up to 20 favorite numbers with names via the MyTalk website and it will actually read off the name aloud when that person calls. This makes an already great headset that much more "handsfree". The next thing was the Noise Cancellation. According to Jawbone, this headset has their "Military-grade NoiseAssassin 3.0" and while I never had a problem with people hearing me with the ICON, there have been times I've been in noisy environments and better noise reduction would have been nice. 


But wait, there's more

Those reasons might not be enough for the general population to upgrade. So Jawbone didn't stop there. This new version while it's slightly longer than the ICON is also slightly thinner. It appears that this configuration allowed them to use a bigger or better battery. So now instead of 4 hours of talk time I get 5 hours. This is also the first headset with a built-in accelermeter. That's right! You can shake to answer a call. I didn't say it wouldn't make you look strange, but the feature is there if you want to enable it and use it. I much prefer the new "doubletap" to answer feature. Like the Jawbone ICON, the Jawbone Era is software upgradable with firmware updates as well as software add-ons. My favorite voice is "The Ace". If you have an iPhone or Blackberry the headset's battery indicator will display right on your phone. I also commend Jawbone for including several different ear gels at different sizes. It also supports A2DP which allows you to use this headset for your music and App playback as well.

I can't think of a single feature that I would add to this headset. It does it all and is a great step up from the ICON.

You can get the Jawbone Era here for $129.99 or less.

Unleashed GPS Bluetooth Geotagging Solution for Nikon DSLRs

I've spent quite a bit of time reviewing GPS based Geotagging solutions for my Nikon DSLR cameras. You might remember my most recent review of the blueSLR solution, which involves attaching a bluetooth module to your Nikon DSLR and using your iOS device to run their App. The folks over at Foolography saw that review and asked if I would take a look at their solution. Since I have a passion (or geeky interest) in this area I jumped at the chance.


The Unleased Dx000 is the smallest one I've seen to date

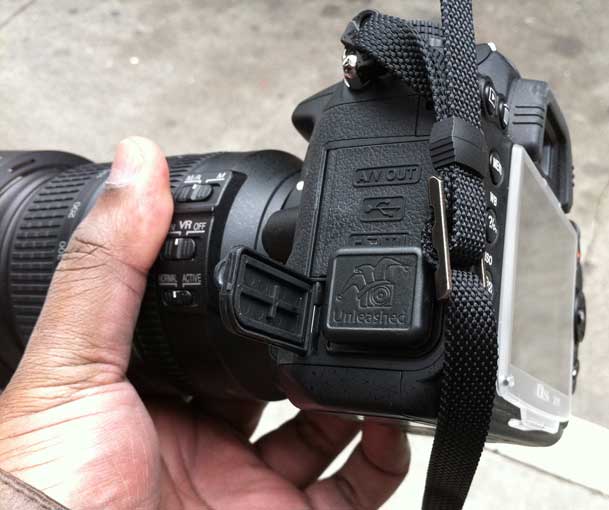
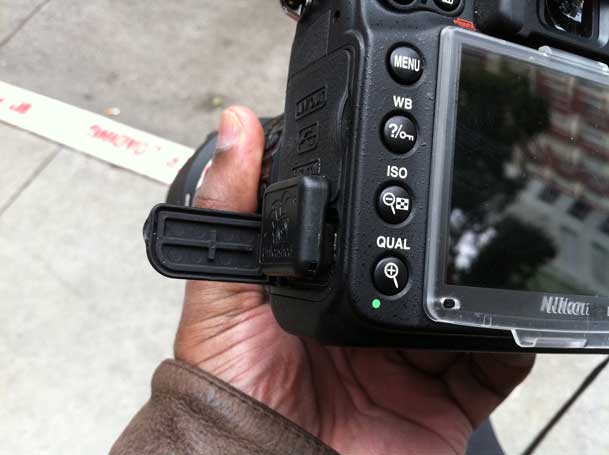
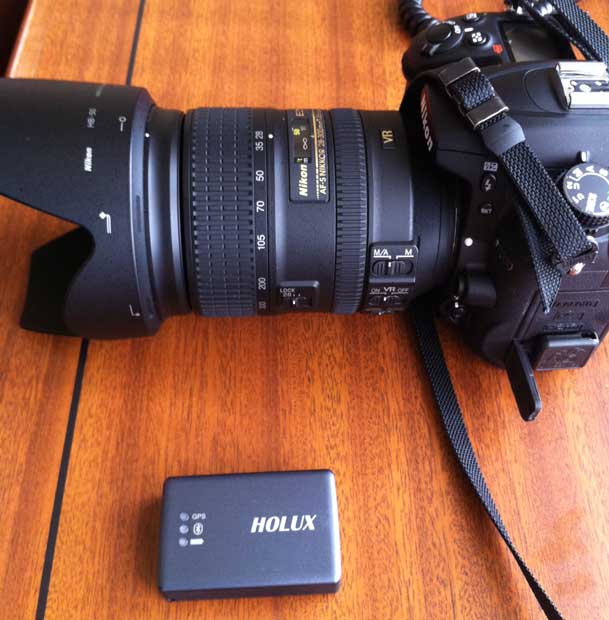
One of the issues with a GPS device on your Nikon DSLR is that it's not built-in. This means that you either have a module that attaches to the 10 pin terminal port (on the higher end DSLRs) or the GPS port on the side of the body (yes you can have one that doesn't attach and do it later in post, but I hate those solutions). These modules either attach via a cable, which means the module itself has to either sit on the hotshoe (not electronically, just for placement) or on the strap. The potential problem with these types is that as you walk around you're going to bump it and either knock it around or even possibly break the cable/port going into the module (I've done that). The Unleased Dx000 as you can see in the picture above fits very snuggly against the camera body. The only problem in the case of the D7000 is the port door hangs open.

When I first saw this product I almost jumped out of my chair until I realized that this was only one half of the solution….


The Unleashed Modules Require a Bluetooth GPS Receiver

While the module that plugs into your DSLR is in fact the smallest I've seen, there is another piece you need to actually Geotag your photos as you take them. You need a compatible Bluetooth GPS receiver.  Luckily there are quite a few to choose from. I received the Holux M-1000C for review. This (Holux M-1000C) module is the actual GPS receiver. It pairs with the Unleashed Dx000 wirelessly via Bluetooth. 


How does it work?

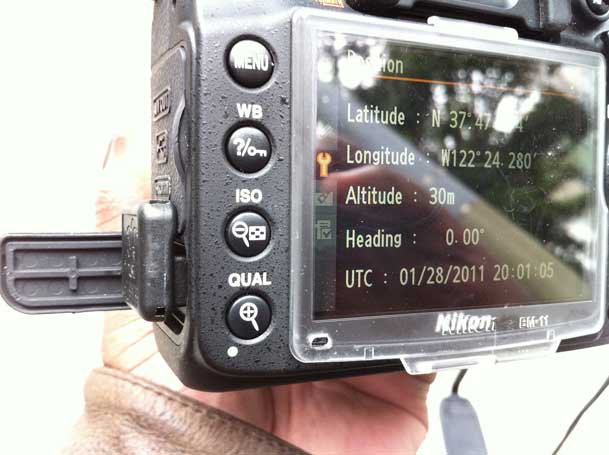
Once you pair the Unleashed Dx000 with your Bluetooth enabled GPS receiver, you then just turn on the GPS receiver and your camera. Mine came already paired and ready to go. I charged the Holux via USB and took it out to test it. Per the instructions I turned on the Holux and my D7000 with the Unleashed Dx000 attached. Once the Holux M-1000C locked on to a satellite the Nikon D7000 picked up the location from it wirelessly. At this point I put the Holux unit in my jacket pocket and started shooting. 


The Bottom Line

Click the above photo in Lightroom to see where this shot was taken/geotagged on Google Maps


This solution worked as advertised. The accuracy seemed a bit off but that may very well be to the placement of the Holux device in my pocket instead of out in the open. For example, when I took the shot above I was outside on the sidewalk across the street. However, when you click the shot above to see it on Google Maps you'll see that it places me (the green arrow) just inside the building. For this reason you're probably going to want the GPS module more out in the open. It would be nice if someone developed a GPS bluetooth hat 🙂

When I went inside the convention hall the module continued to transmit my last known location to the camera. However, this doesn't work indefinitely. After so long the GPS module will no longer transmit your location if it doesn't get an update. It's hard to say when it stopped, but my guess is about an hour inside. This is fine if you're ducking in and out of locations, monuments while shooting, but it's not suitable for prolonged indoor geotagging.

Battery life was great on both units. I kept the Holux on the entire day and the battery was still going strong until I turned it off for the evening. Also there was no significant drain on the D7000, which I did turn on and off as needed throughout the day.
Yes you can also attach a compatible shutter release for those long exposure shots.


Which one should you get?

There isn't a Nikon compatible GPS that I flat out don't recommend (although the Nikon branded GP-1 would be on the bottom of my list in terms of features). They all do what they say they do. It really boils down to the features you're looking for and form factors. I look at each solution as having a place depending on the kind of shooting you're going to be doing most. So here are my recommendations:

For the all day landscape shooter

If you're out and about all day then battery life will be a concern. While these newer bluetooth units offer better form factors they do pose a potential concern for the additional battery life you'll need in your iPhone/iDevice or your Bluetooth GPS receiver. So if you're out and about from sun up to sun down I would still recommend the Solmeta N2. It's my favorite all around unit that works with all of my Nikon bodies.

For the on location shooter

This is the person that will be shooting both inside and outside, but they will be shooting inside a lot! Monuments, museums, and other buildings where there isn't a clear view of the sky. For this shooter I would go with the blueSLR solution. Because it gets its GPS location data from your iPhone it stands the biggest chance of geotagging shots that the other solutions will miss! Also with the blueSLR solution you get the benefit of a wireless shutter release from your iPhone including time lapse photography.

For the photowalk photographer

If you are doing a lot of walking with your camera, say on a photowalk and you don't want to have to worry about constantly looking out for the GPS attached to your camera body, then hands down I would go with the Unleashed solution. I like the fact that you turn this on and forget about it. The flush mount design is awesome and again it's smallest on camera solution that I've seen. Prices start at 125 Euros for the Unleashed module and about 63 Euros for the Holux GPS receiver. 


The good news is that you can't go wrong with any of the solutions above. Pick the one that's right for you!

It’s Verizon iPhone Day :)

I've waited for this day for over 3 years now. It's the day that my "I'd get an iPhone if it were on Verizon" friends can finally shut up about it 🙂  Frankly I don't really care which phone you use or which network you use it on. Use whatever you like!

I've said it before and I'll say it again now. I have no plans of switching off AT&T, simply because my service has been decent and my GSM phone has worked worldwide. However, I realize for countless others out there your experience has NOT been as good and you can't wait to be on Verizon. Well today is your day. Verizon just announced the long awaited iPhone on their network. Although I have no plans of switching I am very much looking forward to the competition that this will give AT&T. I also hope that many of you on AT&T do switch (if you really are unhappy with AT&T) as it will free up some bandwidth for us who are staying. 

I raise a glass of champagne and I celebrate this long awaited day with you. Enjoy!


UPDATE!

Oh Snap! Mobile hotspot included for up to 5 devices. Um, AT&T? Helloooooo? What's your response? Hellloooo? 😉

$199 for the 16GB Model and $299 for the 32GB Model – iPhone 4 on Verizon.

Verizon's iPhone 4 FAQ is here.


UPDATE 2!

Looks like the Verizon iPhone 4 will share the same experience as other CDMA phones in that you can't do data and talk on the phone at the same time! While this isn't new to Verizon customers, it's something that AT&T iPhone users would be giving up in the switch.

Hey! There was an ad for that 🙂

httpv://www.youtube.com/watch?v=QWC8IzV9Pdo


And of course there's the Daily Show Reaction 🙂


The Daily Show With Jon Stewart Mon – Thurs 11p / 10c
Verizon iPhone Announcement
www.thedailyshow.com
Daily Show Full Episodes Political Humor & Satire Blog</a> The Daily Show on Facebook


Now that it's official

What will you do? Assuming that you are either at the end of your existing contract or you wait to the end of your contract:

24 Hours Without Using My Laptop

When I got my iPad back in April I questioned whether I could get by sometimes with just using my iPad instead of my MacBook Pro. Since that time a lot more Apps have come out and a lot more functionality is there. I don't see the iPad replacing my laptop any time in the near future, but I could certainly see using it solo on short (non business) trips where running my full range of Creative Suite desktop apps is not needed. Last week I took a pleasure trip to New York for a day. Before I left I thought about what I would be doing on this trip and figured that there was technically nothing that I would "need" my laptop for. I knew I would be checking email, social networking, responding to blog comments, browsing the web, reading my RSS feeds, etc. I couldn't think of a single thing that I would "need" to do that I couldn't do on the iPad. So I decided to force myself to use just the iPad the entire, albeit short trip. Just in case: I did bring my MacBook Pro too. However, my goal was to never take it out of the bag. 


I did it

I got through the entire trip without touching the MacBook Pro. I have the WiFi-3G version and I was able to be connected anywhere I went. However, AT&T service in the Times Square hotel I stayed in was horrible. For this reason I pulled out my AirPort Express and connected it to the room's ethernet cable. This gave me much better wireless internet in the room. The only time I was tempted to pull out my MacBook Pro was when I need to type large amounts of text in responding to an email. While I can use the onscreen iPad keyboard just fine, I don't enjoy using it for more than a few words at a time. I was thinking that I should have brought along my keyboard dock.


The next thing I bought

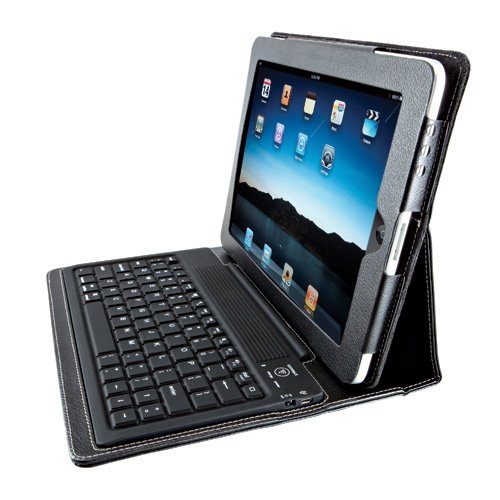
Although this little experiment was a complete success, I saw the immediate need for a keyboard. While I already own the Apple Keyboard Dock, it's not really designed for travel. Then I remembered a Bluetooth Keyboard/Case that a buddy (Mike) showed me and I thought, this is the one I would want to use on my next trip.

I bought it in the airport Brookstone (yes I paid too much) on the way home! They even offered to sell me one that was charged up. I declined as I wasn't going to use it right then and there, but that is a great thing that you do for your customers. Kudos!

I didn't test it until I got home and charged it up. It connected/paired as advertised. However, I hit an immediate snag on the very first thing I typed. I went to repsond to a Twitter comment with "Thank You" and I noticed right then and there that there is no Shift Key on the right side of the keyboard. I thought, "you've got to be kidding me?" Sure enough there are arrow keys, a return key and all the other keys you would expect, but no right side Shift Key. I happened to be on the phone with Scott Kelby (a popular writer/author) and I thought for sure he would share in my shock and frustration and he said "I never use the right Shift key." That floored me! I wondered was I the only one using both Shift Keys on a standard keyboard? Anyway, I can certainly train myself to use just the one on the left, but I thought it was an odd sacrifice for space. Otherwise the keyboard is comfortable and easy to type on. It rocks an impressive 90 hour battery life on a single charge! 

While this case/keyboard is GREAT, it does add a little extra weight onto the already slightly heavy iPad. This will not be my day-to-day case. It will definitely become my travel case!

Brookstone charges $99 for their version of this keyboard/case, but you can get it here for only $69.